Oh, the Hippeastrum calyptratum! It’s a plant that truly captures the imagination, isn’t it? Those magnificent, trumpet-shaped blooms, often with a delicate fragrance, are a sight for sore eyes. If you’ve ever admired one and wished you could have more of these floral wonders, you’re in for a treat. Propagating them yourself is incredibly rewarding. It’s a journey that connects you even more deeply with these beautiful plants. Now, is it a newbie-friendly task? Honestly, it can be a little finicky, but with a bit of patience and my guidance, you’ll be well on your way.
The Best Time to Start
For Hippeastrum calyptratum, the sweet spot for propagation is typically after the flowering season has completely finished. Think late spring or early summer. The plant has put on its show and is actively putting its energy into bulbil development. This is when it’s most willing to share its generosity. You’ll know it’s the right time when you see those little baby bulbs starting to form at the base of the parent bulb or along the stem.
Supplies You’ll Need
Before we dive in, let’s gather our tools. Having everything ready makes the process so much smoother:
- Sharp, clean pruning shears or a sharp knife: Essential for making clean cuts.
- Well-draining potting mix: A good mix for succulents or a blend of perlite, peat moss, and compost works wonderfully.
- Rooting hormone powder (optional but recommended): This can really give your cuttings a boost.
- Small pots or trays: For your new baby plants. Make sure they have drainage holes!
- Watering can or spray bottle: For gentle watering.
- Labels: Because let’s face it, we all forget what we planted where!
- Clear plastic bags or propagation domes: To create a humid environment if needed.
Propagation Methods
Hippeastrum calyptratum is best propagated through division or by propagating the bulbils that form. Stem cuttings aren’t really a viable method for this particular Hippeastrum.
Division (The Most Reliable Method)
This is where you’re essentially separating the offsets (baby bulbs) that grow from the mother bulb.
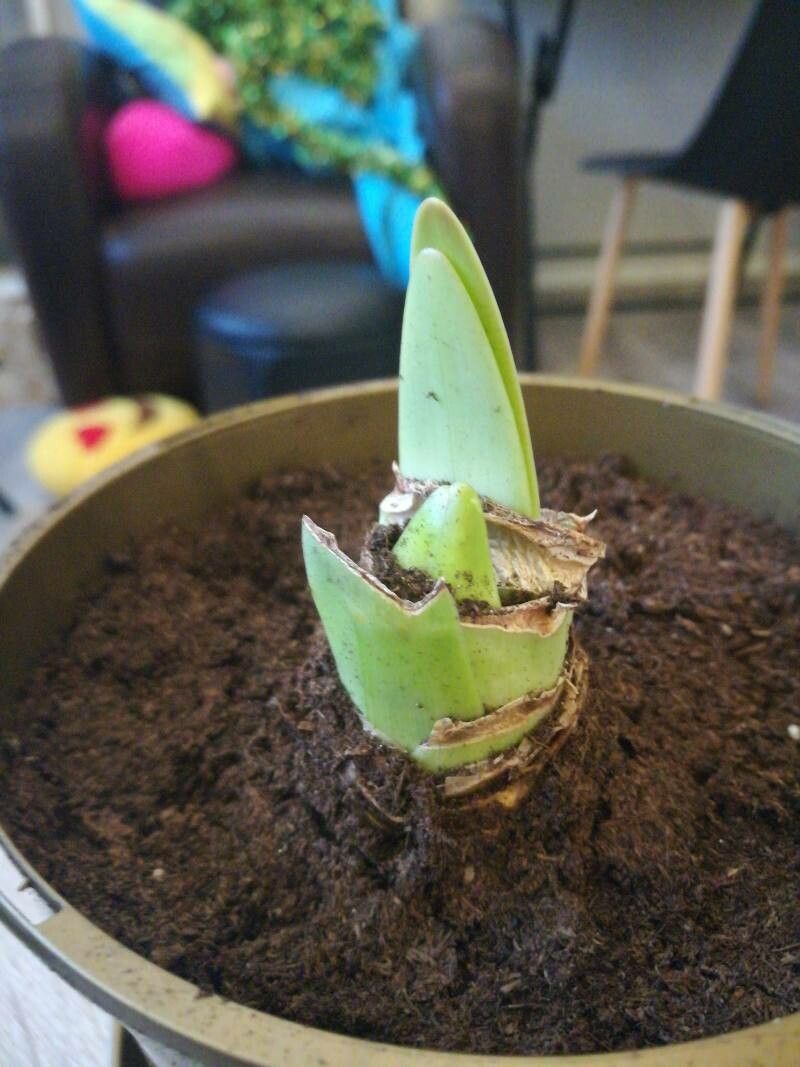
- Gently excavate: Carefully unpot your Hippeastrum. You want to disturb the roots as little as possible. Gently shake off excess soil to get a good look at the bulb.
- Identify the bulbils: You’ll usually see small bulbs clustered around the base of the main bulb. They might look like little onions attached by a thin piece of root or stem.
- Separate with care: Using your clean knife or pruning shears, carefully cut the bulbils away from the mother bulb. Ensure each bulbil has at least a few small roots attached. If roots are tangled, be patient; you might need to gently tease them apart. Don’t worry if you can’t get every single bit of the mother bulb off.
- Let them callous (optional but good practice): If you have time, let the cut surface of the bulbil and the mother bulb air dry for a day or two in a well-ventilated spot. This helps to form a protective callus, reducing the risk of rot.
- Potting up: Plant each bulbil into its own small pot filled with your well-draining potting mix. They should be planted just deep enough so the top of the bulbil is barely covered or at soil level.
- Water sparingly: Give them a very light watering. You don’t want them waterlogged.
Propagating Bulbils (When They Naturally Detach)
Sometimes, bulbils might naturally detach or be easier to remove if they are larger. The process is very similar to division.
- Check for detachment: If you notice bulbils that seem to be growing on their own runner, or if they easily separate with minimal effort, those are good candidates.
- Planting: Treat these detached bulbils just as you would those separated by division. Pot them in your well-draining mix and water lightly.
The “Secret Sauce” (Pro Tips)
Here are a few little tricks I’ve learned over the years:
- Don’t overwater early on: This is crucial. New propagations are incredibly susceptible to rot. Err on the side of too dry rather than too wet. A light misting or watering from the bottom can be helpful.
- Give them a warm hug: Young bulbils and divisions really appreciate a bit of warmth. Placing their pots on a heating mat (like those used for seed starting) can significantly speed up root development and overall success.
- Patience is your superpower: Hippeastrum calyptratum can take their sweet time. Don’t be discouraged if you don’t see immediate growth. It might take several weeks or even months for you to see signs of new leaves emerging from the bulbil.
Aftercare & Troubleshooting
Once your little bulbils are potted, keep them in a bright, indirect light location. Avoid direct, hot sun. Water only when the top inch or so of the soil feels dry. This is about establishing a consistent, albeit slightly drier, moisture level.
Signs of trouble to watch for:
- Mushy bulbils or rot: This is usually a sign of too much moisture. If you see this, unpot the affected bulbil immediately. You might be able to cut away the rotted parts with a clean knife and let the healthy portion callous over before repotting in fresh, dry soil.
- Wilting leaves on the parent bulb after division: This is normal for the mother plant as it recovers. Keep it in good conditions, and it should bounce back.
- No growth: Don’t panic! As I said, patience is key. If the bulbil itself looks firm and healthy but isn’t growing, it’s likely just taking its time to establish roots.
A Little Encouraging Closing
Propagating Hippeastrum calyptratum is a journey of observation and gentle care. It’s a chance to witness the miracle of a new plant emerging from a tiny bulbil. Be patient with yourself and with your new charges. Each success, no matter how small, is a reason to celebrate. Happy growing, and enjoy the process of bringing more of these stunning blooms into your life!
Resource: