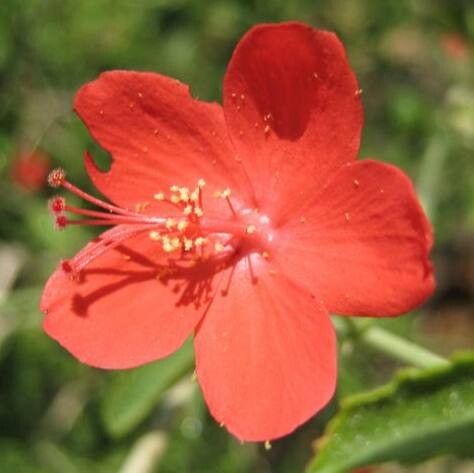
Hello there, fellow garden enthusiasts! Today, I want to chat about a gorgeous little gem that sometimes flies under the radar: Hibiscus micranthus. If you’re anything like me, you’ll fall in love with its delicate, dainty flowers and its cheerful disposition. It’s a plant that just seems to radiate happiness, and the best part? It’s surprisingly straightforward to share this joy with others by propagating it yourself! Honestly, for beginners looking to dip their toes into the world of plant propagation, Hibiscus micranthus is a fantastic, rewarding choice.
The Best Time to Start
For the most success when propagating Hibiscus micranthus, spring and early summer are your golden windows. This is when the plant is in its most vigorous growth phase. We’re looking for softwood or semi-hardwood cuttings. These are stems that are bending easily but aren’t completely floppy and tender. Think of it like growing fingernails – firm enough to be useful, but not yet rock hard.
Supplies You’ll Need
Before we get our hands dirty, let’s gather our trusty tools:
- Sharp Pruning Shears or a Craft Knife: Clean cuts are key for healthy healing. I always have a dedicated pair for plant work.
- Rooting Hormone: This isn’t strictly essential for Hibiscus micranthus, but it can give your cuttings a real boost and speed up the process. A powder or gel works beautifully.
- A Well-Draining Potting Mix: A good blend would be about 50% perlite and 50% peat moss or coconut coir. You can also buy specialized seedling or cutting mixes.
- Small Pots or a Propagation Tray: Cleanliness is next to godliness here! Small pots (like 3-4 inch) are perfect.
- Clear Plastic Bags or a Propagation Dome: We need a way to keep humidity high around our cuttings.
- Water: For watering and, if you choose, for water propagation.
- Labels and a Pen: Trust me, you will forget which cutting is which!
Propagation Methods
Let’s dive into how we can get more of these lovely plants!
1. Stem Cuttings (My Go-To!)
This is how I usually increase my Hibiscus micranthus collection.
- Take Your Cuttings: On a bright morning, select healthy stems from your mature plant. Look for pieces about 4-6 inches long. Using your sharp shears, make a clean cut just below a leaf node (that little bump where leaves emerge). Remove the leaves from the bottom half of the cutting.
- Prepare for Rooting: If you’re using rooting hormone, dip the cut end into it, tapping off any excess.
- Plant Your Cuttings: Fill your small pots with your prepared potting mix and lightly moisten it. Make a small hole in the center of each pot with your finger or a pencil. Gently insert the cutting into the hole, ensuring the leaf nodes are buried. Firm the soil around the base.
- Create a Humid Environment: Water the soil gently. Then, cover the pot with a clear plastic bag, securing it with a rubber band, or place it under a propagation dome. Make sure the plastic doesn’t touch the leaves too much – if it does, prop it up a bit.
- Placement: Find a bright spot with indirect light. Avoid direct sun, as it can scorch your tender cuttings.
2. Water Propagation (Quick Peek at Progress)
This is a fantastic method if you’re curious to watch the roots develop!
- Prepare the Cuttings: Similar to stem cuttings, take 4-6 inch cuttings, making a clean cut below a leaf node. Remove the lower leaves.
- Place in Water: Pop your cuttings into a clean jar or vase filled with room-temperature water. Make sure the leaf nodes are submerged, but don’t let any leaves sit in the water. They’ll rot and contaminate the water.
- Change the Water Regularly: Every few days, change out the water to keep it fresh.
- Placement: Just like with soil cuttings, place them in bright, indirect light.
The “Secret Sauce” (Pro Tips)
Here are a few little tricks I’ve learned over the years that can make a big difference:
- Bottom Heat is Your Friend: If you can, placing your pots on a heat mat designed for seedlings can significantly speed up root development. It mimics the warmth of spring soil. My Hibiscus micranthus cuttings absolutely love a little cozy warmth from below!
- Don’t Be Afraid to Mist: While the plastic bag or dome creates humidity, a light misting of the leaves every day or two can also be beneficial, especially in drier environments. Just a gentle spray will do.
- Patience from Prevention: When using water propagation, if you notice any leaves turning yellow or slimy, remove them immediately. This is the first sign of rot, and it can spread quickly through your cuttings and the water. It’s much easier to nip it in the bud!
Aftercare & Troubleshooting
Once you see tiny roots emerging (you might be able to see them peeking out the drainage holes or through the soil), it’s time for a little tweak.
- Acclimatization: Slowly start to acclimate your cuttings to normal humidity. If they’re in a bag, gradually open the bag for longer periods each day. If under a dome, lift the dome for a few hours daily.
- Transplanting: Once the roots are well-established and you have new growth, it’s time to pot them into individual, slightly larger pots with your regular potting mix.
- Signs of Rot: The biggest enemy here is overwatering leading to rot. You’ll see stems turning black and mushy, or the entire cutting wilting and becoming soft. If this happens, unfortunately, it’s usually a lost cause. Ensure your soil is draining well and you’re not keeping it constantly waterlogged. If you’re water propagating and see slime or smell a foul odor, that’s rot.
A Little Encouragement
Watching a tiny cutting transform into a vibrant new plant is one of the most satisfying parts of gardening. Don’t get disheartened if not every cutting takes – it’s all part of the learning process! Be patient, enjoy the journey, and soon you’ll have an abundance of beautiful Hibiscus micranthus to admire and share. Happy propagating!
Resource:
https://identify.plantnet.org/k-world-flora/species/Hibiscus%20micranthus%20L.f./data