Hello there, fellow garden enthusiasts! I’ve got a real treat for you today. We’re going to talk about a plant that deserves a spot in everyone’s garden, and even better, how to create more of them yourself. We’re diving into the wonderful world of Hibbertia vieillardii.
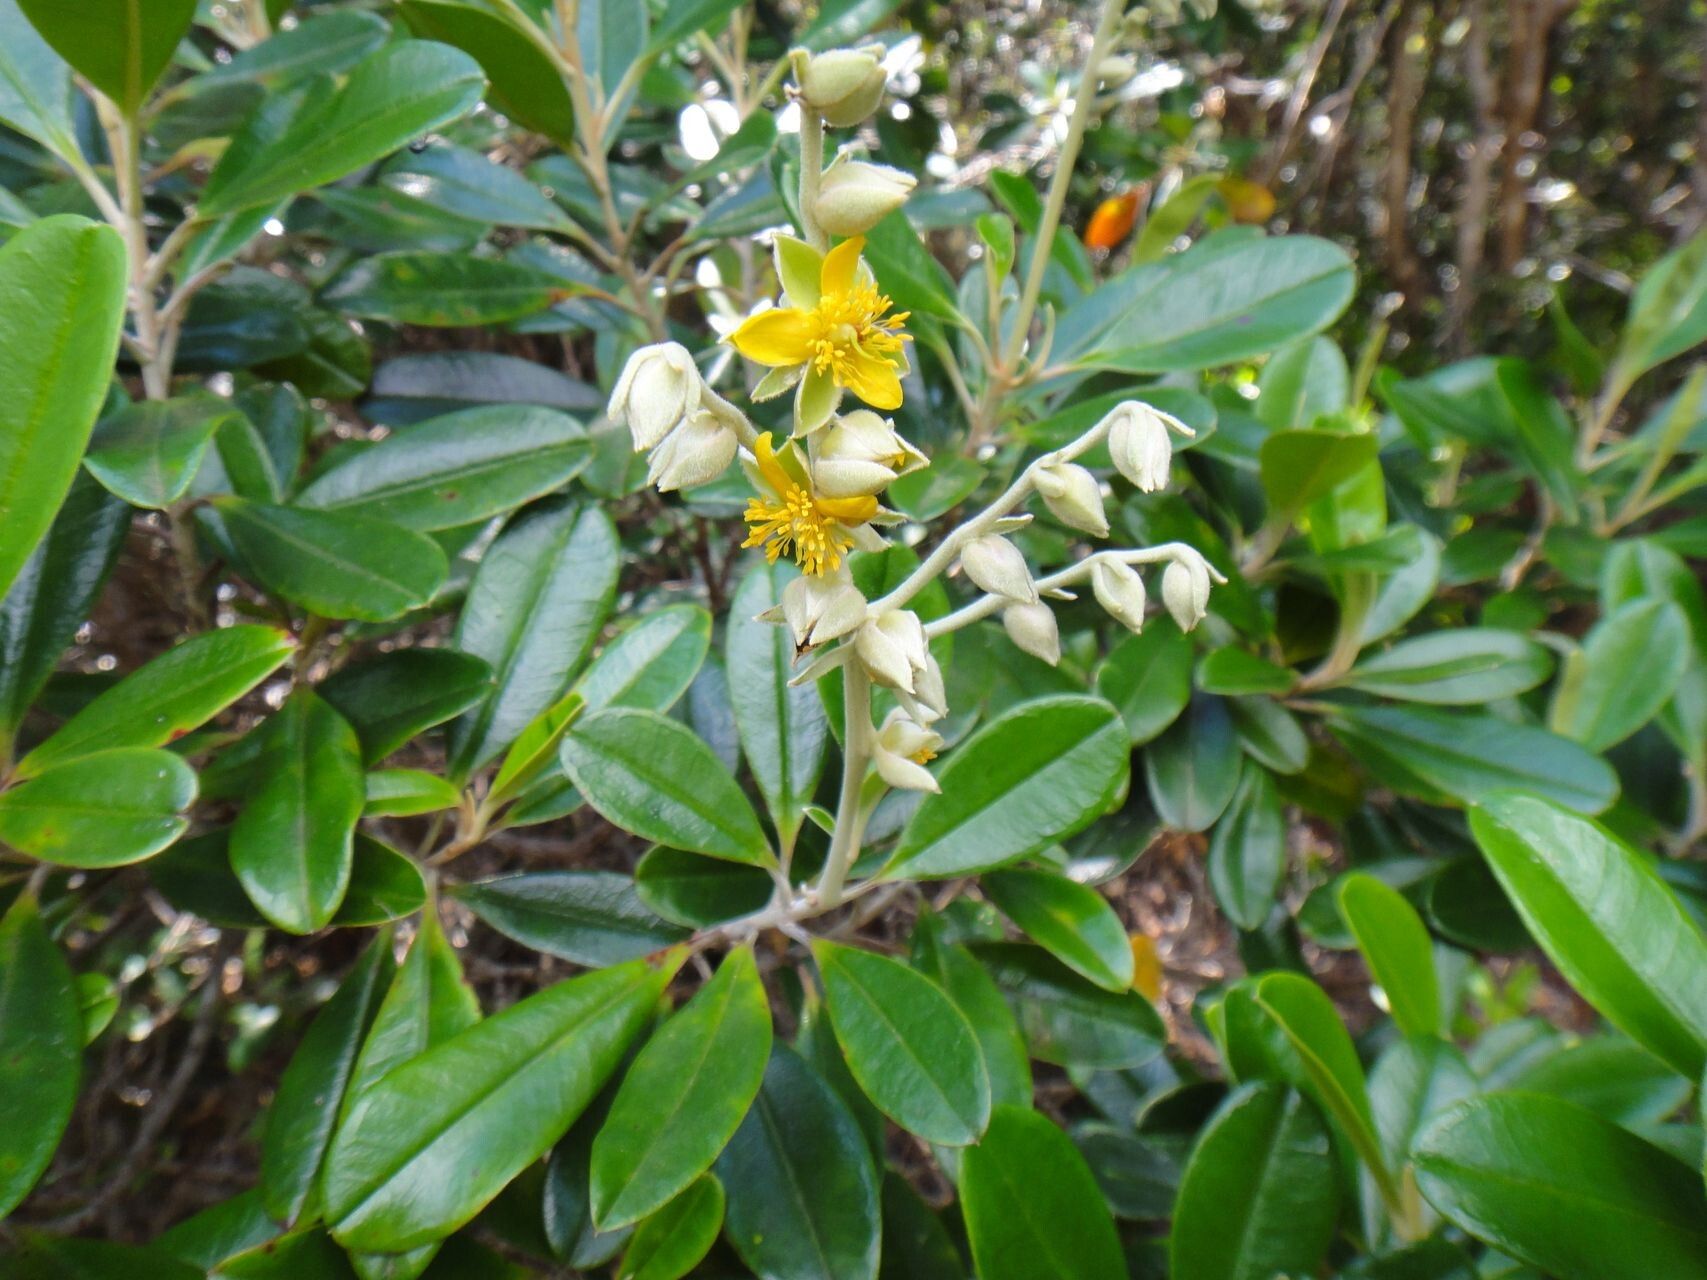
This little gem, often called Snake Lily or a host of other charming names depending on where you are, is such a delight. Its bright, cheerful yellow flowers are a real pick-me-up, especially when they pop against its glossy, dark green foliage. And the best part? Propagating it is a wonderfully rewarding endeavor. While it might seem a little intimidating at first, I promise, with a few pointers, you’ll be well on your way to growing a whole new army of these beauties. Honestly, it’s not too challenging, even for those just starting out on their propagation journey.
The Best Time to Start
When it comes to getting the best results, timing is everything. For Hibbertia vieillardii, your prime opportunity is usually in the late spring or early summer. This is when the plant is actively growing, full of energy, and most receptive to taking root. You want to be working with healthy, new growth – not the old, woody stems. Think of it like giving a cutting a good head start when it’s feeling its most vigorous!
Supplies You’ll Need
Gathering your tools beforehand makes the whole process smoother. Here’s what I usually have on hand:
- Sharp pruning shears or secateurs: Clean cuts are crucial for healthy propagation.
- Rooting hormone (powder or gel): This isn’t strictly essential, but it can really boost your success rates.
- Small pots or seed trays: Make sure they have good drainage. About 3-4 inches in diameter is usually perfect.
- A good quality potting mix: I prefer a mix that’s well-draining. A blend of peat moss, perlite, and a bit of compost works wonders. You can also buy specific propagation mixes.
- A spray bottle: For misting your cuttings.
- Clear plastic bags or a propagator lid: To create a humid environment.
- Labels and a permanent marker: So you don’t forget what you planted where!
- A small trowel or dibber: For making holes in the potting mix.
Propagation Methods
Let’s get our hands dirty! The most common and effective way to propagate Hibbertia vieillardii is through stem cuttings.
- Select Your Cuttings: Head out to your Hibbertia vieillardii plant when it’s in its prime growth phase. Look for healthy, non-flowering shoots that are about 4-6 inches long. They should be supple but not too soft. Carefully snip them off using your clean pruning shears, making a cut just below a leaf node (where a leaf attaches to the stem).
- Prepare the Cuttings: Once you have your cuttings, gently remove the lower leaves. You want to strip away the leaves from the bottom half of the stem. This prevents them from rotting once they’re in the soil. Leave about 2-3 leaves at the top.
- Apply Rooting Hormone (Optional but Recommended): Dip the cut end of each stem into your rooting hormone, tapping off any excess. This little bit of magic encourages root development.
- Plant Your Cuttings: Fill your small pots or trays with your well-draining potting mix. Use your dibber or a pencil to make a hole in the center of the soil. Gently insert the prepared cutting into the hole, ensuring the leaf node where you removed the lower leaves is buried. Firm the soil around the stem.
- Water and Cover: Water the pots gently but thoroughly. Then, cover the pots with a clear plastic bag or place them in a propagator. This creates a mini-greenhouse, keeping the humidity high, which is vital for cuttings to root without drying out. You can secure the bag with a rubber band.
The “Secret Sauce” (Pro Tips)
Here are a few little tricks I’ve learned over the years that can make a real difference:
- Bottom Heat is Your Friend: If you can, place your pots on a heated propagator mat or a warm windowsill. A gentle warmth from below can significantly speed up root formation. It mimics the warmth of summer soil and really gives those roots a nudge.
- Don’t Drown Them! While humidity is key, standing water is the enemy of cuttings. Make sure your potting mix is moist but not waterlogged. If you see water pooling on the surface after watering, you’ve added too much. A light misting from your spray bottle is often enough to maintain humidity without oversaturating.
- Location, Location, Location: Find a bright spot for your cuttings, but avoid direct, harsh sunlight. Dappled shade or a bright, indirect light is ideal. Too much sun can scorch those delicate cuttings before they have a chance to establish.
Aftercare & Troubleshooting
Once your cuttings are planted, patience is key! Keep the soil consistently moist but not soggy, and maintain that humid environment with the plastic cover. You’re looking for signs of new growth, like tiny leaves unfurling or a slight tug on the stem when you gently pull it. This usually takes anywhere from 4 to 8 weeks.
The most common problem you might encounter is rot. If you see your cutting turning mushy and black, it’s likely succumbed to rot. This is usually a sign of too much moisture and not enough air circulation. You might need to adjust your watering or remove the plastic cover for a few hours each day. Sometimes, unfortunately, a cutting just doesn’t make it, and that’s okay! Don’t get discouraged; just try again.
Once your cuttings have developed a good root system and are showing vigorous new growth, you can gradually remove the plastic cover over a few days to acclimate them to the normal humidity levels. Then, it’s time to pot them up into individual, slightly larger pots. Continue to water them as you would a mature plant, keeping them in a bright, protected spot.
A Little Patience Goes a Long Way
Propagating plants is such a beautiful way to connect with nature and expand your garden bounty. It’s a journey, and like all good gardening things, it requires a bit of patience and a lot of love. Don’t be afraid to experiment, and most importantly, enjoy the process of watching these little sprouts turn into magnificent plants. Happy propagating!
Resource: