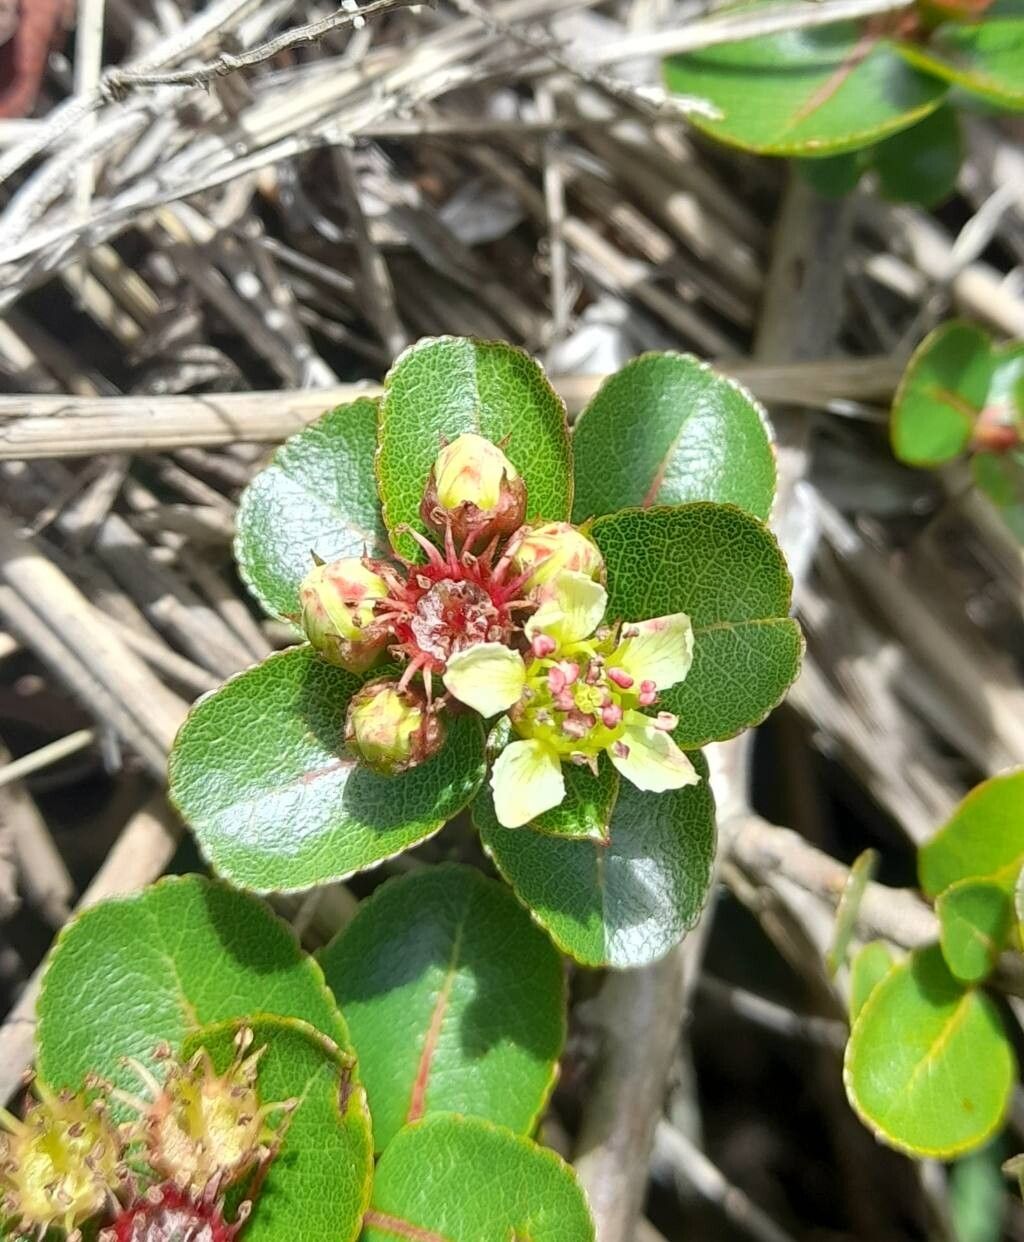
Hey there, fellow plant lovers! Today, we’re diving into the wonderful world of propagating Hesperomeles obtusifolia, also known as the little teaberry. If you’ve ever admired its glossy, leathery leaves and delightful clusters of white flowers, followed by those cheerful red berries, you’re in for a treat. Not only is it a beautiful addition to the garden, but coaxing new life from an existing plant is one of the most satisfying parts of gardening.
Now, you might be wondering if this is a tricky plant to propagate. I’m happy to report that Hesperomeles obtusifolia is generally quite forgiving, making it a great choice for those just starting on their propagation journey. With a little patience and a few key steps, you’ll be well on your way to more of these lovely shrubs.
The Best Time to Start
For the best chance of success with Hesperomeles obtusifolia, I’ve found that late spring to early summer is your golden window. This is when the plant is actively growing, and its stems have a bit of maturity but haven’t become overly woody. You’re essentially looking for new growth that has begun to firm up slightly. Think of it as “semi-hardwood” cuttings. Starting after the first flush of spring growth is usually perfect.
Supplies You’ll Need
Gathering your tools beforehand makes the whole process smoother. Here’s what I typically have on hand:
- Sharp pruning shears or a clean knife: Essential for making clean cuts. A dull tool can crush stems and make rooting difficult.
- Rooting hormone (optional but recommended): Powder or gel forms work well. It really gives your cuttings a boost.
- Well-draining potting mix: A good blend for me is 50% peat moss or coco coir and 50% perlite or coarse sand. This ensures good aeration and prevents waterlogging. You can also buy specialized rooting mixes.
- Small pots or seed trays: Clean containers are a must to avoid diseases.
- Plastic bags or a humidity dome: To create a mini-greenhouse effect for your cuttings.
- Watering can or spray bottle: For gentle watering.
- Gloves: To keep your hands clean and protect them if you have sensitive skin.
Propagation Methods
There are a couple of tried-and-true ways to propagate Hesperomeles obtusifolia. Stem cuttings are my go-to for this plant.
Stem Cuttings
This is my favorite method because you can get several new plants from just one parent shrub.
- Take Your Cuttings: Select healthy, vigorous stems that are about 4-6 inches long. Look for stems that are a bit firm but still have some flexibility. Using your clean pruning shears, make a cut just below a leaf node (where a leaf attaches to the stem). This is where the magic generally happens. Remove any lower leaves, and also trim any flowers or developing berries – we want the plant to focus all its energy on growing roots, not producing fruit or flowers right now.
- Prepare the Cuttings: If you’re using rooting hormone, dip the cut end of each stem into the powder or gel. Tap off any excess.
- Plant Your Cuttings: Fill your pots or trays with your well-draining potting mix. Make a small hole in the center of each pot with your finger or a pencil. Gently insert the prepared cutting into the hole, ensuring the lower leaf nodes you’ve cleared are below the soil line. Firm the soil gently around the base of the cutting to ensure good contact.
- Water In: Water your newly potted cuttings thoroughly but gently. You want the soil to be moist, not waterlogged.
- Create a Humid Environment: This is crucial! Cover the pots with a clear plastic bag (make sure the bag doesn’t touch the leaves if possible by using stakes) or place them under a humidity dome. This traps moisture and keeps the cuttings from drying out while they try to root.
The “Secret Sauce” (Pro Tips)
Here are a few little tricks that have helped me over the years:
- Don’t let the leaves touch the water: If you decide to try water propagation (which is less successful for Hesperomeles obtusifolia in my experience, but some folks love it), make sure NO leaves are submerged. Rot happens fast if they are. For cuttings in soil, this tip still applies – prune off lower leaves so they aren’t buried.
- Bottom heat works wonders: If you have a heating mat designed for seedlings, placing your pots on it can significantly speed up the rooting process. It encourages root development from the bottom up.
- Cleanliness is key: I can’t stress this enough. Sterilize your pruners between cuts, wash your pots thoroughly, and use fresh potting mix. This goes a long way in preventing fungal diseases that can kill your precious cuttings.
Aftercare & Troubleshooting
Once your cuttings are planted, find a spot for them that offers bright, indirect light. Avoid direct sunlight, which can scorch the tender new growth. Keep the soil consistently moist but not soggy. You should start to see signs of new leaf growth within 4-8 weeks, which is a good indicator that roots are forming.
If you see wilting, yellowing leaves, or mushy stems, it’s often a sign of overwatering or poor drainage. Your cutting might be rotting. If you catch it early, you can try to gently pull it out, inspect the roots (or lack thereof), and repot in fresh, dry mix. Sometimes, sadly, a cutting just doesn’t make it. Don’t beat yourself up; learn from it and try again!
A Encouraging Closing
Propagating plants is a journey, not a race. There will be successes, and there will be lessons learned. Be patient with your little Hesperomeles obtusifolia cuttings. Celebrate every tiny new leaf and every bit of growth. You’re nurturing new life, and there’s truly nothing quite like it. Happy propagating!
Resource: