Hello fellow garden enthusiasts! It’s so wonderful to connect with you all today. I’ve been digging in the dirt and nurturing plants for two decades now, and I’m always eager to share what I’ve learned. Today, we’re going to talk about a truly elegant grass: Helictotrichon sempervirens, or Blue Oat Grass, as it’s more commonly known.
Oh, That Lovely Blue!
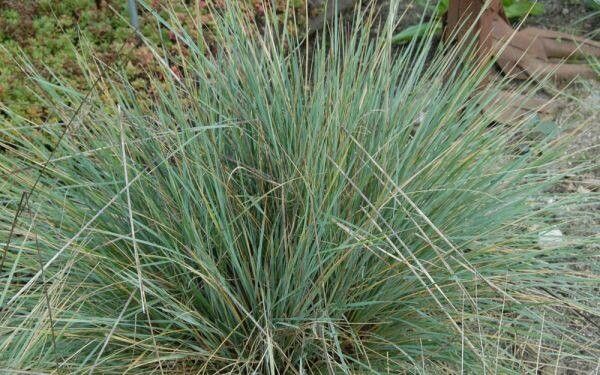
If you’re looking for a plant that brings a touch of sophisticated cool to your garden, Blue Oat Grass is it. Its striking blue-gray foliage forms lovely arching mounds that provide texture and color even when it’s not in bloom. It’s a relatively low-maintenance performer, but there’s something incredibly satisfying about creating more of these beauties from a single plant. For beginners? I’d say it’s leaning towards the easier side, especially with a bit of know-how.
When to Get Your Hands Dirty
The absolute best time to propagate Blue Oat Grass is in the spring, just as new growth is really kicking off. You can also have success in early autumn, but spring gives you the longest growing season for your new plants to establish. You want to pick a plant that’s actively growing, not stressed from heat or drought.
Your Propagation Toolkit
Gathering your supplies beforehand makes the whole process smoother. Here’s what you’ll want to have on hand:
- Sharp, clean pruning shears or a knife: For making clean cuts.
- Small pots or trays: With drainage holes, of course!
- A good quality potting mix: I prefer a mix that’s light and airy. You can buy a sterile seed-starting mix or make your own by combining equal parts all-purpose potting soil, perlite, and coarse sand.
- Rooting hormone (optional but helpful): A powdered or liquid form can give your cuttings a boost.
- Watering can or spray bottle: For gentle watering.
- Labels and a marker: Don’t underestimate the power of labeling!
- A plastic bag or propagation dome: To create a humid environment.
Bringing New Blue Oat Grass to Life
Blue Oat Grass is primarily propagated by division. It’s the most straightforward and reliable method for this clumping grass. Here’s how we do it:
- Gently excavate: In the spring, carefully dig up the entire clump of your Blue Oat Grass. A garden fork can help loosen the soil around the edges before you lift it.
- Examine the root ball: Once it’s out of the ground, you’ll see that the clump is made up of many smaller shoots radiating from a central root system.
- Divide with care: There are a couple of ways to do this. You can carefully pull the sections apart by hand, especially if the clump is young and hasn’t become too dense. For older, tougher clumps, it’s best to use two garden forks, back-to-back, inserted into the center of the clump. Then, gently rock them back and forth to split the plant. Alternatively, you can use your clean pruning shears or knife to cut through the root ball if needed, ensuring each section has a good amount of roots and several healthy shoots.
- Potting up your divisions: Plant each division into its own pot filled with your prepared potting mix. Make sure the crowns (where the leaves emerge from the roots) are at soil level.
- Water thoroughly: Give your newly potted divisions a good, gentle watering to settle the soil around the roots.
My Little “Secret Sauce”
I’ve learned a few tricks over the years that can really boost your success rate. Here are a couple for Blue Oat Grass:
- Don’t go overboard with the water right away. After that initial soaking, you want the soil to just be consistently moist, not waterlogged. Overwatering is the quickest way to invite root rot. Let the top inch of soil dry out slightly between waterings.
- Think about a little warmth. While not strictly essential for division, placing your newly potted divisions in a spot that gets gentle morning sun or even using a propagation mat can encourage root development. It’s like a warm hug for those baby roots!
Welcoming Your New Sprouts
Once your divisions are potted, place them in a spot that gets bright, indirect light. Avoid direct, hot sun, which can stress the young plants. Keep the soil consistently moist but not soggy. You should start to see new growth emerging within a few weeks.
What if things go wrong? The most common issue you might encounter is rot. If you see your divisions going limp and mushy, or the leaves turning yellow and wilting despite being watered, it’s likely a sign of too much moisture. In this case, you might need to pull the plant out, trim away any rotten parts, and replant in fresh, drier soil. If you’ve managed to get them potted and they’re showing new shoots, that’s a fantastic sign they’re on their way!
Happy Gardening!
Propagating Blue Oat Grass is a truly rewarding experience. It’s a wonderful way to expand your garden without spending a dime, and there’s a special joy in nurturing something from a division to a full-grown plant. Be patient, enjoy the process, and don’t be afraid to get your hands dirty. Happy growing!
Resource: