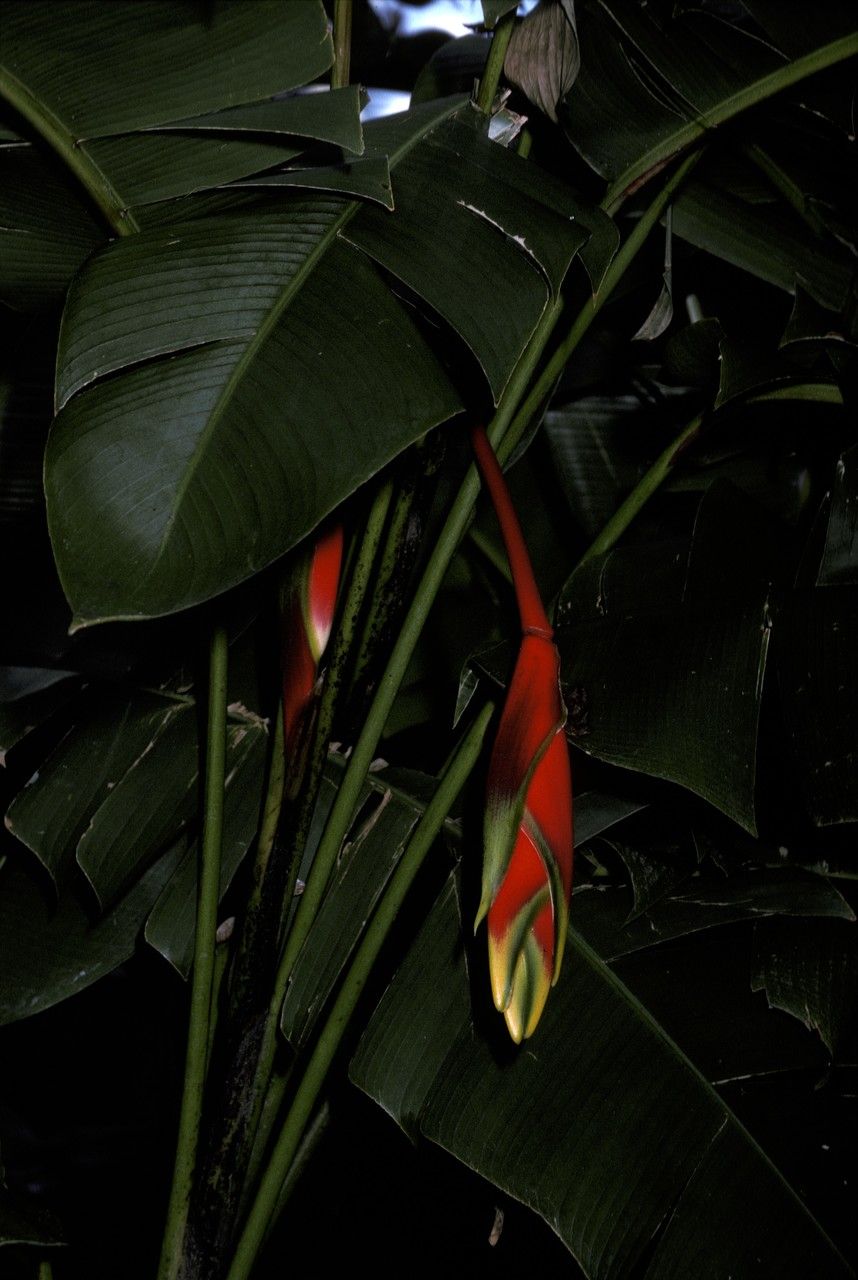
Oh, Heliconia marginata! If you’re looking for a plant that injects pure tropical drama into your garden, you’ve found a winner. Its vibrant, paddle-shaped leaves and stunning flower bracts, often a fiery orange or red with distinct green margins, are truly showstoppers. And the best part? Successfully propagating these beauties is incredibly rewarding. While they require a bit more attention than your average houseplant, I promise you, it’s far from impossible. Think of it as earning your stripes in tropical gardening!
The Best Time to Start
For Heliconia marginata, your prime propagation window is during its active growing season. This typically spans from late spring through summer, when the plant is putting out lots of new growth and has ample energy to spare. You’re looking for healthy, well-established plants that are at least a year old to ensure they have enough vigor to share. Trying to propagate during dormancy is like asking someone to run a marathon when they’re still in bed – it’s just not going to work out.
Supplies You’ll Need
Gathering your tools will make the whole process smoother. Here’s what I always have on hand:
- Sharp pruning shears or a clean knife: For making clean cuts.
- Potting mix: A light, well-draining mix is crucial. I often use a custom blend of equal parts peat moss, perlite, and coarse sand. You can also find good quality, commercial mixes designed for aroids or tropicals.
- Rooting hormone (optional but recommended): A powder like Clonex or a liquid solution can give your cuttings a nice boost.
- Small pots or trays: Clean and with drainage holes are essential.
- Plastic bags or a propagator: To maintain humidity around your cuttings.
- Small labels and a waterproof marker: To keep track of your projects!
- Watering can with a fine spray: Gentle watering is key.
Propagation Methods
Heliconia marginata is most commonly propagated through division, which is my go-to method. It’s straightforward and usually yields the best results.
Division Method:
- Wait for the right moment. The best time to divide is in early spring, just as new growth is starting to emerge.
- Gently unpot the parent plant. Carefully lift the entire clump from its container. If it’s in the ground, you might need to dig around it a bit to loosen it.
- Inspect the root ball. You’re looking for distinct clusters or “pups” that have their own root system and at least one or two healthy pseudobulbs (the swollen base of the stem).
- Use your hands or a sharp tool to separate the clumps. If the roots are tightly intertwined, don’t be afraid to use your clean knife or shears to make the division. Patience here is a virtue! Ensure each division has a good amount of roots attached.
- Pot up the divisions. Plant each new division in its own pot, using your well-draining potting mix. Make sure the top of the pseudobulb is just at or slightly above the soil line.
- Water thoroughly. Give them a good soak initially to help settle the soil.
While stem cuttings are possible for some heliconias, it’s less common and often more challenging for marginata to root reliably this way. Division is your most dependable route.
The “Secret Sauce” (Pro Tips)
After years of coaxing these tropical beauties, I’ve picked up a few tricks that make a real difference:
- Don’t overwater after division! This is a big one. While they need moisture, sodden soil is the fastest way to rot young divisions. Wait until the top inch of soil feels dry before watering again.
- Humidity is your friend, but watch the leaves! When you’re getting new divisions established, covering them with a plastic bag creates a humid microclimate. However, make sure the leaves aren’t directly touching the plastic. This can lead to fungal issues. If you see condensation building up heavily, open the bag for a few hours to let it air out.
- Bottom heat works wonders. Heliconias absolutely love warmth. If you have a heat mat designed for propagation, placing your pots on it can significantly speed up root development. It mimics the cozy warmth of their tropical native soil.
Aftercare & Troubleshooting
Once your divisions are potted up, they need a little TLC. Keep them in bright, indirect light – no harsh direct sun, please! Monitor the soil moisture, watering only when the top layer feels dry.
The biggest troubleshooting issue you might encounter is rot. This usually stems from overwatering or poor drainage. If you notice the pseudobulb turning mushy or black, or the leaves wilting and yellowing without any new growth, it’s likely rot. Unfortunately, if it’s extensive, the cutting may not be salvageable. If it’s minor, you can try to ease up on watering and ensure good air circulation. It’s always better to err on the side of slightly too dry than too wet.
A Encouraging Closing
Propagating Heliconia marginata is a journey of observation and patience. Don’t be discouraged if your first attempt isn’t perfect. Every gardener has had their share of gardening mishaps! Celebrate the tiny successes, learn from any challenges, and most importantly, enjoy the process of nurturing new life. Soon enough, you’ll have a whole collection of these spectacular plants to admire and share. Happy gardening!
Resource:
https://identify.plantnet.org/k-world-flora/species/Heliconia%20marginata%20(Griggs)%20Pittier/data