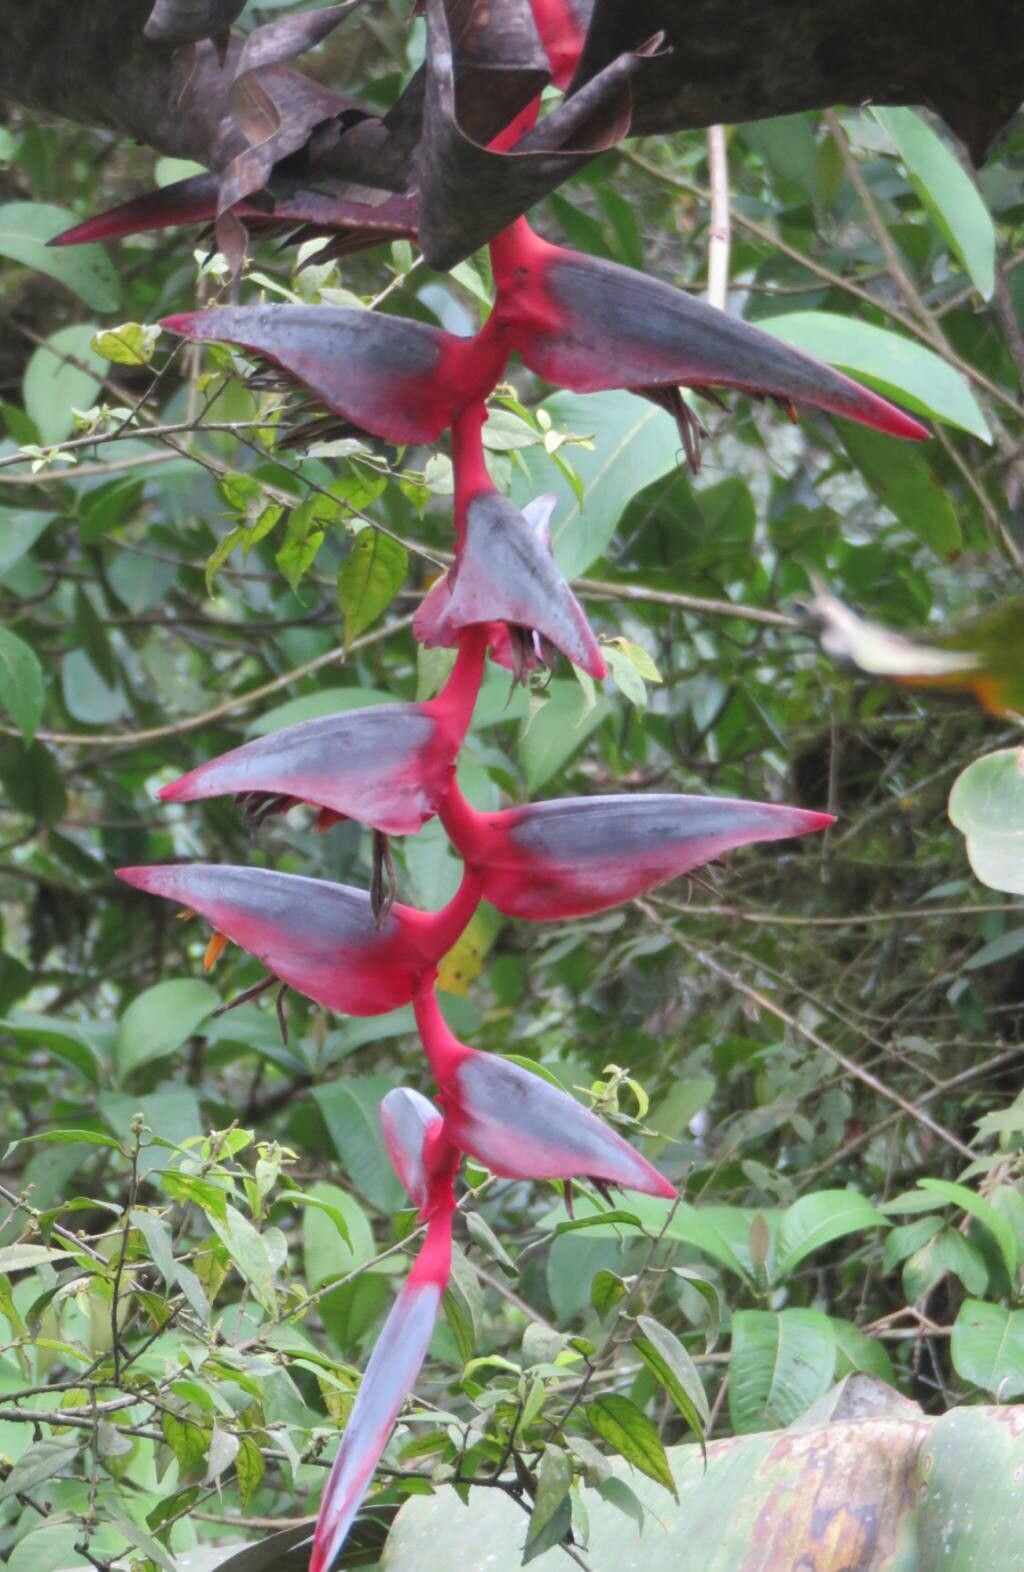
Hello, green thumbs! If you’ve ever marveled at the vibrant, almost sculptural beauty of Heliconia griggsiana, you’re not alone. These tropical beauties, with their upright, brilliantly colored bracts, bring a real wow factor to any garden. And guess what? Propagating them is absolutely achievable, even if you’re just dipping your toes into the world of plant magic. While they aren’t as fussy as some orchids, they do have their little preferences, so a little know-how goes a long way.
The Best Time to Start
For Heliconia griggsiana, the sweet spot for propagation is usually during its active growing season. Think late spring through summer. This is when the plant has plenty of energy stored up and is eager to put out new growth, making it more responsive to our propagation efforts. Trying to split or take cuttings when the plant is dormant is like asking a sleepy bear to run a marathon – it’s just not going to go well.
Supplies You’ll Need
Gathering your supplies beforehand makes the whole process so much smoother. It’s like preparing your ingredients before you start cooking!
- Sharp pruning shears or a clean, sharp knife: For making clean cuts that heal well.
- Potting mix: A well-draining mix is crucial. I like a blend of peat moss or coco coir, perlite, and a bit of compost. Aim for something that doesn’t hold too much moisture.
- Rooting hormone (optional but recommended): This helps give your cuttings a good start. Look for one with indole-3-butyric acid (IBA).
- Small pots or containers: Clean ones are a must to prevent disease.
- Watering can with a fine spray: To avoid disturbing your newly planted cuttings.
- Plastic bags or a propagation dome: To create a humid microclimate.
Propagation Methods
Heliconia griggsiana is most commonly and successfully propagated through division. Think of it as gently helping the plant create its own babies.
- Assess Your Heliconia: Look for a mature Heliconia plant that has started to produce multiple shoots or stems emerging from the base. This indicates it’s ready to be divided.
- Excavate Gently: Carefully dig around the base of the plant with a spade or trowel, going wider than you think necessary. The goal is to lift the entire root ball out of the ground with as little disturbance as possible.
- Clean Up: Once the plant is out, gently shake off some of the excess soil. This will reveal the rhizome system – the thick, fleshy underground stems from which new shoots grow.
- Identify Division Points: Look for natural separations on the rhizome where you can see distinct growths with their own roots. You want to divide it into sections that each have at least one healthy shoot and a good amount of root.
- Make the Cut: Using your sharp pruning shears or knife, carefully cut through the rhizome to separate the divisions. Ensure each division has a healthy piece of rhizome and roots attached. If you’re using rooting hormone, lightly dust the cut surfaces on the parent plant and the divisions. A word of caution: Resist the urge to make gigantic divisions. Smaller, well-established pieces often recover faster.
- Pot Up Your New Plants: Plant each division in its own pot filled with your well-draining potting mix. Make sure the top of the rhizome is just at or slightly below the soil surface. Water thoroughly.
- Create a Humid Environment: Cover each pot with a plastic bag or place them under a propagation dome. This is key to keeping the humidity high while the plant establishes its roots. You can secure the bag with a rubber band around the pot rim.
The “Secret Sauce” (Pro Tips)
Here are a couple of little tricks that have served me well over the years:
- Don’t Over-Water the Divisions: It’s tempting to drown them with love, but soggy soil is the enemy of newly divided rhizomes. They can rot very quickly. Water them well initially, then allow the top inch of soil to dry out before watering again.
- Introduce Gentle Heat: If you can, placing your potted divisions on a warm gravel tray or a seedling heat mat can really give them a boost. Heliconias love warmth, and bottom heat encourages root development. Just make sure it’s not scorching hot!
- Watch for Rotting Rhizomes: This is the most common pitfall. If you see your rhizome turning mushy and black, it’s likely rot. You can try to cut away the rotten parts with a very clean knife and repot in fresh, drier soil, but often, it’s a sign the division wasn’t salvageable.
Aftercare & Troubleshooting
Once your new Heliconia griggsiana divisions have started to show signs of new leaf growth (this can take a few weeks to a few months!), they are on their way! Gradually acclimate them to lower humidity by opening the plastic bags a little more each day over a week or two. Continue to water when the top inch of soil feels dry.
The main thing to watch out for is rot. As I mentioned, this is usually caused by too much moisture. If you see wilting that isn’t due to dryness, or the tell-tale blackening of the rhizome, it’s time to investigate. Another sign of stress is yellowing leaves, but this can also be a sign of transplant shock, so patience is key. If you’ve divided a healthy plant and used good technique, your chances of success are excellent.
Propagating Heliconias is a truly rewarding endeavor. It allows you to multiply these spectacular plants and share their tropical magic. Be patient, observe your new plants, and don’t be discouraged if every single division doesn’t make it. Gardening is a journey, and each step, even the learning ones, brings us closer to understanding the wonders of the plant world. Happy propagating!
Resource:
https://identify.plantnet.org/k-world-flora/species/Heliconia%20griggsiana%20L.B.Sm./data