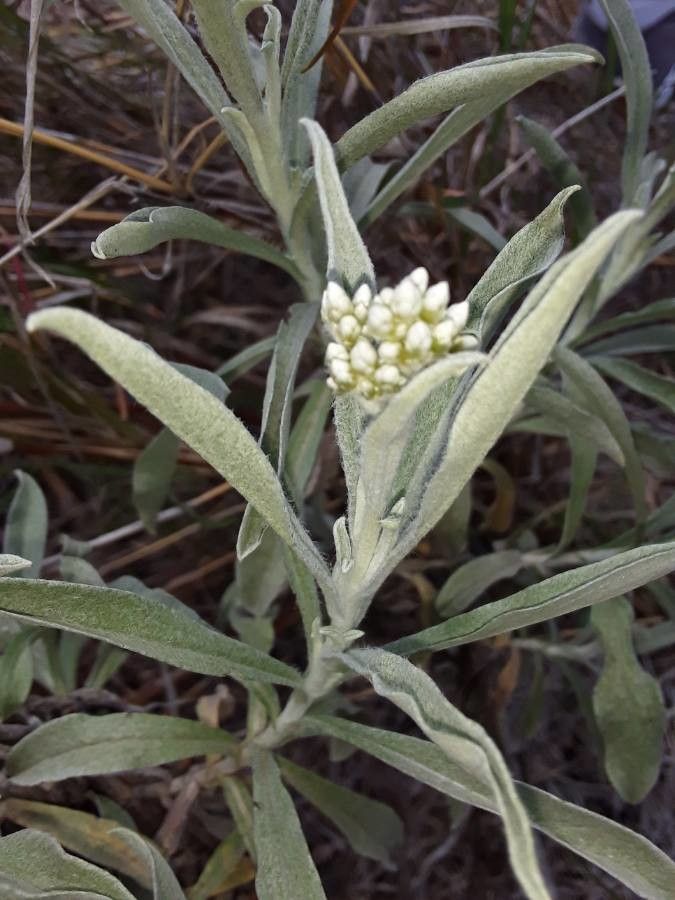
Hello fellow garden enthusiasts! I’m so excited to chat with you today about a truly charming plant: Helichrysum globosum. If you haven’t met it yet, imagine tiny, papery globes of sunshine topping wiry, silver-green stems. It’s utterly delightful in the garden, adding texture and a touch of whimsical charm. And the best part? It’s surprisingly rewarding to propagate. If you’re a beginner feeling a bit nervous, don’t be. With a little care, you’ll find this task quite manageable.
The Best Time to Start
For the most success, I find early to mid-spring is the sweet spot for propagating Helichrysum globosum. The plants are just starting their vigorous growth after winter, and the cuttings will have plenty of time to establish themselves before the heat of summer. Aim for stems that are soft and new, not woody and mature.
Supplies You’ll Need
Here’s a little kit to get you started:
- Sharp, clean pruning shears or a sharp knife: Crucial for making clean cuts.
- Rooting hormone powder or gel (optional but recommended): Helps encourage root development.
- A well-draining potting mix: I like a blend of equal parts peat moss, perlite, and coarse sand. You can also buy commercial seed-starting or propagation mixes.
- Small pots or seedling trays: Cleanliness is key here!
- Plastic bags or humidity domes: To create a humid environment.
- Watering can with a fine rose or a spray bottle: For gentle watering.
- A bright location out of direct sun: Think a windowsill or a greenhouse bench.
- Bottom heat (optional): A heat mat can speed things up considerably.
Propagation Methods
The easiest way I’ve found to multiply Helichrysum globosum is through stem cuttings. It’s straightforward and gives you a great chance of success.
- Take Your Cuttings: On a healthy, actively growing plant, select some of the new, non-flowering shoots. Using your clean shears, take cuttings that are about 3-4 inches long. Make the cut just below a leaf node, which is the little bump on the stem where leaves grow from. This is where roots are most likely to form.
- Prepare the Cuttings: Gently remove the lower leaves from your cuttings. You want to leave just a few leaves at the very top. This reduces water loss. If your cuttings are a bit limp, you can briefly dip the cut end in water.
- Apply Rooting Hormone (Optional): Dip the cut end of each cutting into your rooting hormone powder or gel. Tap off any excess.
- Pot Them Up: Fill your pots or trays with your prepared, moist potting mix. Make a small hole in the center of each pot with your finger or a pencil.
- Insert Cuttings: Gently place the prepared cuttings into the holes, ensuring the leaf nodes that you cleared of leaves are below the surface of the soil. Firm the soil gently around the base of each cutting to ensure good contact.
- Create a Humid Environment: Water the soil lightly. Then, cover the pots with a plastic bag or a humidity dome. This is vital for keeping the cuttings from drying out.
- Provide Light and Warmth: Place the pots in a bright spot, but make sure they are out of direct, hot sunlight. If you have a heat mat, place the pots on top of it. This gentle bottom heat really encourages root development.
The “Secret Sauce” (Pro Tips)
Here are a few little tricks I’ve learned over the years that can really boost your success rates:
- Don’t let the leaves touch the water if you’re doing water propagation. While Helichrysum globosum isn’t my first choice for water, if you do try it, ensure only the stem is submerged. Leaves sitting in water tend to rot quickly. For stem cuttings in soil, this isn’t usually an issue.
- Bottom heat is truly your friend. I’ve noticed cuttings take root so much faster and more reliably when they have that gentle warmth from below. Even something as simple as placing them on top of a router that’s constantly on can provide a little boost.
- Patience is a virtue, but so is vigilance. Check on your cuttings regularly. While you don’t want to disturb them too much, a quick peek to ensure the soil is still moist and there’s no sign of mold is important.
Aftercare & Troubleshooting
Once your cuttings have been in their cozy, humid environment for a few weeks, give them a gentle tug. If you feel resistance, that’s a good sign that roots have formed! You’ll also start to see new growth appearing at the top.
At this point, you can gradually acclimate them to normal conditions by removing the plastic bag or humidity dome for a few hours each day, slowly increasing the time over a week. Once they are happily growing without cover, you can treat them as you would a small seedling. Water them consistently, keeping the soil lightly moist but not waterlogged.
The most common problem you’ll encounter is rot. This usually happens if the cuttings are kept too wet, or if there isn’t enough air circulation. If you see mushy, blackened stems, unfortunately, that cutting is likely lost. Don’t get discouraged; just remove it and keep an eye on the others. If you see signs of wilting, it might just mean they need a bit more humidity or a drink.
A Rewarding Journey
Bringing new life into your garden through propagation is one of the most satisfying experiences a gardener can have. It connects you more deeply to your plants and allows you to share their beauty with others. Be patient with your little Helichrysum globosum cuttings. Nature takes its course, and with a little help and a lot of encouragement, you’ll be rewarded with a beautiful new garden display. Happy propagating!
Resource:
https://identify.plantnet.org/k-world-flora/species/Helichrysum%20globosum%20Sch.Bip./data