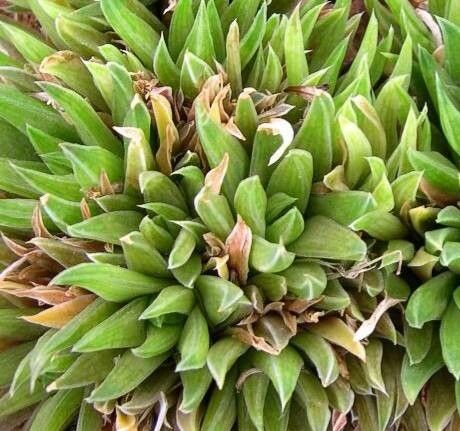
Hey there, fellow plant lovers! I’m so excited to chat with you today about one of my absolute favorite succulents: Haworthia zantneriana. If you haven’t met this little gem yet, imagine a compact rosette of plump, pointed leaves, often adorned with delicate white markings that look like tiny windows. They bring such a touch of subtle beauty and architectural interest to any windowsill or succulent collection.
One of the most rewarding things about growing succulents like Haworthia is the ability to create more of them! Propagating them yourself is incredibly satisfying and surprisingly straightforward. For Haworthia zantneriana, I’d say it’s a pretty forgiving plant to start with when it comes to propagation. Even if you’re new to the plant world, you’ll likely find success with these methods.
The Best Time to Start
Generally, the warmer months are my go-to for propagation. Think late spring through to early autumn. This is when the plant is actively growing and has the most energy to put into new roots. You’re looking for healthy, mature plants that are showing signs of vigorous growth. Trying to propagate during a plant’s dormancy period, usually in the cooler months, will just lead to frustration.
Supplies You’ll Need
Here’s what you’ll want to have on hand before you get started:
- Well-draining soil mix: A cactus and succulent mix is perfect. I often amend mine with a bit of pumice or perlite for even better drainage.
- Sharp, clean pruning shears or a knife: Sterilize them with rubbing alcohol to prevent disease.
- Small pots or seed trays: Anything that can hold your new propagations securely.
- Rooting hormone (optional but helpful!): This can give your cuttings a little boost.
- Bottom heat source (optional): A seedling heat mat can really speed things up.
- Watering can or spray bottle: For gentle watering.
- Labels: To keep track of what you’re propagating and when!
Propagation Methods
Haworthia zantneriana is most commonly and successfully propagated through offsets (also called pups) and, to a lesser extent, leaf cuttings.
Propagating Offsets
This is by far the easiest and most reliable method for Haworthia zantneriana. As the main plant grows, it will naturally produce little baby plants, or offsets, around its base.
- Gently remove the parent plant from its pot. This gives you better access to the offsets.
- Locate the offsets. You’ll see them emerging from the soil near the base of the mother plant.
- Carefully separate the offset from the parent. Use your clean knife or pruning shears to make a clean cut. Try to get a few roots attached to the offset if possible. If an offset already has roots, that’s a big bonus!
- Let the offset callous over. This is a crucial step! Place the separated offsets on a dry paper towel in a bright spot, out of direct sun, for 2-3 days. This allows the cut end to dry and form a protective callus, preventing rot when you plant it.
- Plant the offset. Fill a small pot with your well-draining soil mix. Make a small hole in the center and gently place the offset in, ensuring the calloused end is covered by soil. If it has roots, spread them out a bit.
- Water sparingly. Wait a few days after planting before watering. I usually wait until I see the leaves start to plump up again. Then, water lightly.
Leaf Cuttings (Less Common for H. zantneriana)
While Haworthia can technically be propagated from leaves, it’s generally much more challenging and time-consuming than with offsets. I usually don’t recommend this for beginners with this specific plant, but if you’re feeling adventurous:
- Select a healthy, plump leaf. Choose one that looks full and vibrant.
- Gently twist or cut the leaf from the parent plant. Make sure you get a clean break right at the base of the leaf, where it attaches to the stem.
- Allow the leaf to callous. Just like with offsets, lay the leaf on a paper towel in a bright, dry spot for 3-5 days until the cut end is completely dry.
- Place the leaf on top of the soil. You can create a shallow pot with your succulent mix. Lay the calloused end of the leaf just barely touching the soil surface. Do not bury it.
- Mist lightly. You’ll want to keep the soil very slightly moist, but never wet. A gentle misting every few days is usually enough.
- Be patient! This method can take weeks, or even months, to see any signs of life, and success rates are much lower.
The “Secret Sauce” (Pro Tips)
Here are a few tricks I’ve learned over the years that make a big difference:
- “The Dry Spell is Your Friend”: After planting your offsets, resist the urge to water them immediately. Letting them sit in dry soil for about a week encourages them to actively seek out moisture, promoting stronger root development.
- “Bottom Heat is Magic”: If you’re serious about speeding up the process, especially for leaf cuttings or offsets that are slow to root, a seedling heat mat is a game-changer. It provides gentle, consistent warmth to the soil, mimicking ideal growing conditions and significantly boosting root formation.
- “Keep Them Dry, But Not Desiccated”: When you do start watering your new propagations, err on the side of caution. It’s far better to underwater slightly and let the plant tell you when it needs more, than to overwater and invite rot. A thorough watering followed by a long drying period is the way to go.
Aftercare & Troubleshooting
Once your offsets have successfully rooted (you’ll notice them looking plumper and maybe even trying to send out a new leaf, or if you tug gently, you’ll feel resistance), it’s time to treat them like miniature versions of the parent plant. Water them thoroughly when the soil is completely dry, and provide them with bright, indirect light.
The most common problem you’ll encounter is rot. This usually happens if the cut end is constantly wet or if the plant is sitting in soggy soil. If you see a leaf or offset turning mushy, yellow, or black, it’s likely rot. Immediately remove it from the pot and from any other propagations to prevent it from spreading. You might be able to salvage a healthy part of the plant if you catch it early.
A Encouraging Closing
Growing new plants is such a rewarding journey. Don’t be discouraged if your first attempt isn’t perfect. Each plant is a learning experience, and with a little patience and these tips, you’ll be expanding your Haworthia zantneriana collection in no time. Enjoy the process, and happy propagating!
Resource:
https://identify.plantnet.org/k-world-flora/species/Haworthia%20zantneriana%20Poelln./data