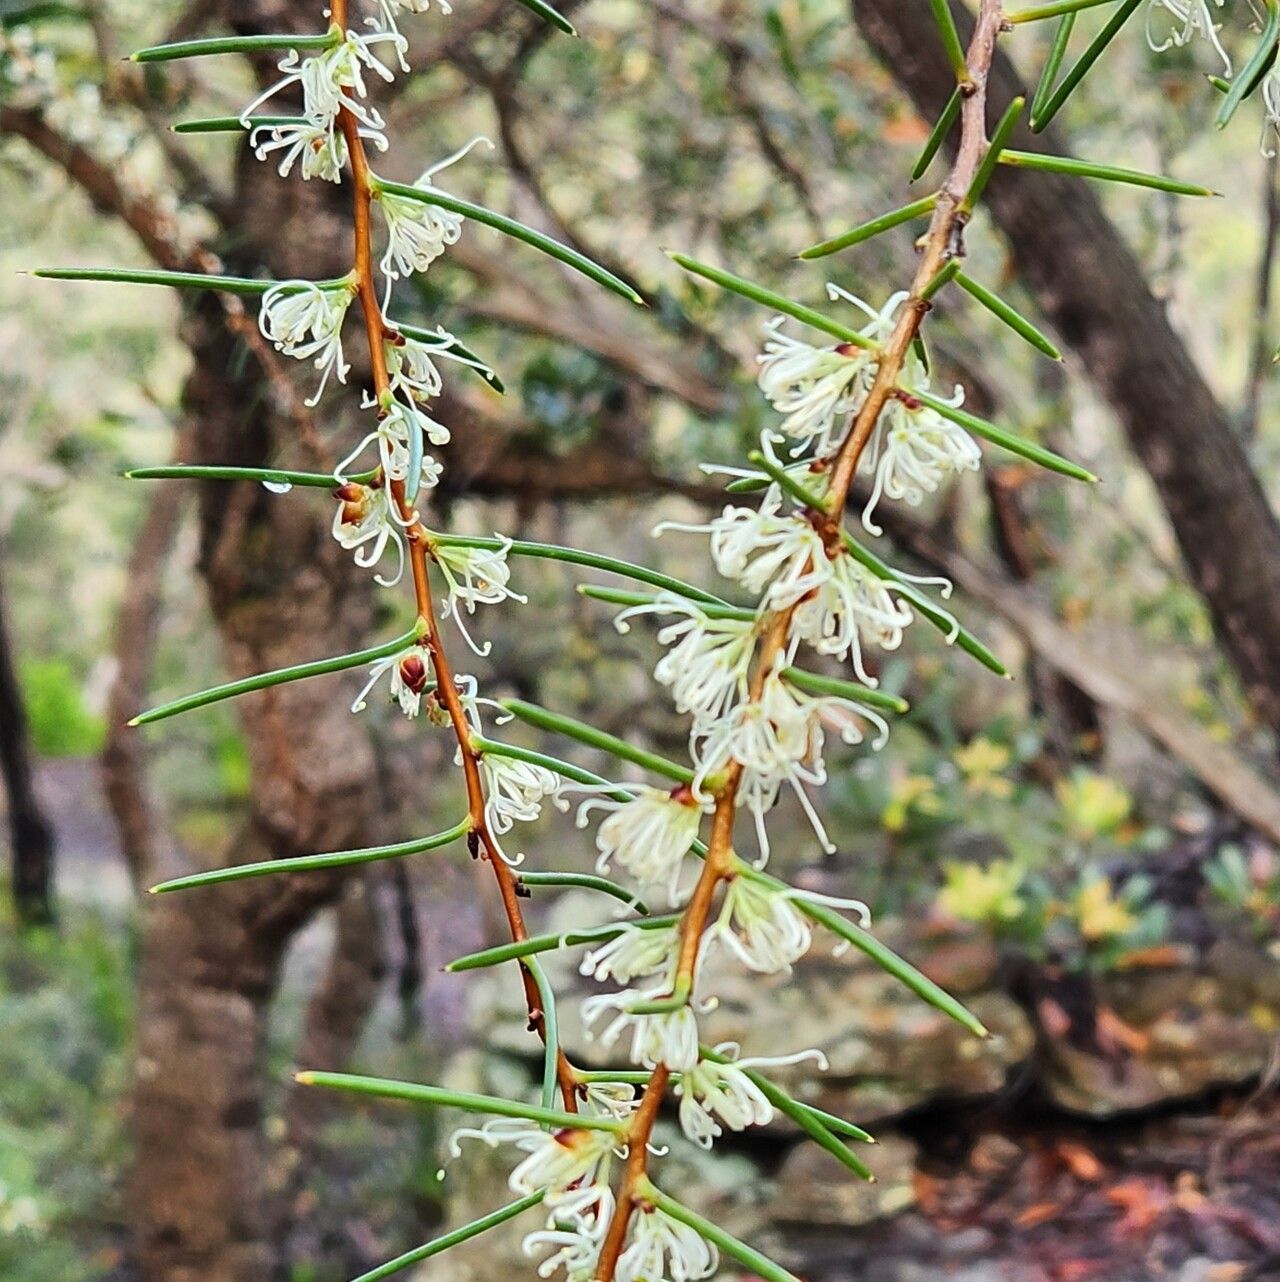
Oh, the Hakea teretifolia! If you’ve ever seen one of these beauties in bloom, you know exactly what I’m talking about. Those delicate, white, bottlebrush-like flowers dangling from their needle-like foliage are simply captivating. They have this wonderful, wild charm that just brings a smile to my face. And the best part? You can bring that magic into your own garden by propagating them!
Now, if you’re new to the gardening world, you might be wondering, “Is this a tricky one?” I’d say Hakea teretifolia is moderately easy to propagate, especially from cuttings. It’s a fantastic project for someone ready to step up their propagation game a bit. The reward of nurturing these plants from a tiny cutting to a pot-sized specimen is really something special.
The Best Time to Start
For the highest success rate with your Hakea teretifolia, the absolute best time to take cuttings is in late spring to early summer. This is when the plant is actively growing, and the new stems have a bit of firmness to them – we call this “semi-hardwood.” Avoid taking cuttings when the stems are too soft and flexible, or when they’re completely woody and old.
Supplies You’ll Need
Gathering your supplies beforehand makes the whole process so much smoother. Here’s what you’ll want to have on hand:
- Sharp Pruning Shears or a Craft Knife: For making clean cuts on your parent plant. Sterilize them first!
- Rooting Hormone: A liquid or powder form will work wonders.
- Propagation Potting Mix: A well-draining mix is crucial. I often use a blend of perlite and coarse sand, or a good quality seed-starting mix with extra perlite added.
- Small Pots or Trays: Clean pots with drainage holes are a must.
- Plastic Bag or Propagator: To create a humid environment for your cuttings.
- Water Spray Bottle: For misting.
- Labels and a Pen: So you don’t forget what you’ve planted!
Propagation Methods
Let’s get our hands dirty! I find stem cuttings to be the most reliable method for Hakea teretifolia.
Stem Cuttings
- Select Your Parent Plant: Find a healthy, vigorous Hakea teretifolia. Look for stems that are about 4-6 inches long and have started to firm up but are not old and woody.
- Take Your Cuttings: Using your sharp, sterilized shears, take a cutting just below a leaf node (where the leaves attach to the stem). Aim for a cutting that has at least two sets of leaves.
- Prepare the Cuttings: Gently remove the lower leaves from the cutting, leaving just the top couple of sets. This prevents them from rotting in the soil.
- Apply Rooting Hormone: Dip the cut end of the stem into your rooting hormone. Tap off any excess.
- Insert into Potting Mix: Make a small hole in your prepared propagation mix with a pencil or skewer. Carefully insert the cutting into the hole, ensuring the base is well-supported. Gently firm the mix around the stem.
- Water and Cover: Water the potting mix thoroughly but gently. Then, cover the pot with a clear plastic bag or place it inside a propagator. Seal it up to maintain high humidity.
- Find a Spot: Place your cuttings in a bright, indirect light location. Avoid direct sunlight, which can scorch them.
The “Secret Sauce” (Pro Tips)
Here are a couple of tricks I’ve picked up over the years that really make a difference:
- Bottom Heat is Your Friend: If you have space, placing your propagation tray on a heat mat can dramatically speed up root formation. The warmth encourages those roots to get going.
- Don’t Drown Them: When you water your cuttings, make sure no leaves are touching the surface of the water if you happen to be trying water propagation (though I prefer soil for Hakeas). Submerged leaves are a recipe for rot. If you’re using soil, water just enough to keep the mix consistently moist but not soggy. A light misting of the leaves can also help keep them turgid.
Aftercare & Troubleshooting
Once you see signs of new growth – usually tiny leaves or shoots emerging from the top – it’s a good indicator that roots are forming!
- Gradual Acclimatization: Slowly start to remove the plastic bag or open the propagator vents over a week or so. This allows the new plant to get used to normal humidity levels.
- Gentle Watering: Continue to keep the soil consistently moist but not waterlogged.
- Potting Up: Once the roots have filled the pot and you’re confident the plant is established, you can transplant it into a slightly larger pot with a good quality potting mix.
If you notice your cuttings starting to wilt and turn black or mushy, that’s usually a sign of rot. This often happens because the potting mix is too wet, or the humidity is too high without enough air circulation. Don’t despair if a few don’t make it! It happens to all of us. Just learn from it and try again.
A Encouraging Closing
Propagating Hakea teretifolia is a journey. There will be moments of excitement and perhaps a little bit of head-scratching. But with a little patience and these tips, you’ll be well on your way to creating your own little Hakea nursery. Enjoy the process, celebrate every tiny success, and before you know it, you’ll have beautiful new Hakeas to share or plant in your garden. Happy propagating!
Resource:
https://identify.plantnet.org/k-world-flora/species/Hakea%20teretifolia%20(Salisb.)%20Britten/data