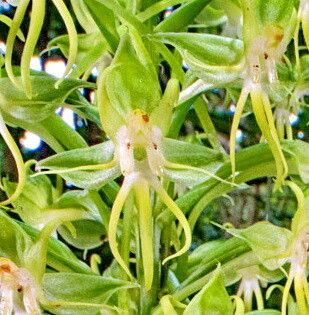
Hey there, fellow plant lovers! Have you ever admired those gorgeous Habenaria amplifolia with their lush foliage and thought, “Oh, I wish I could have more of those”? Well, you’re in luck! Propagating these beauties is a wonderfully rewarding experience, and I’m thrilled to share my tried-and-true methods with you.
Now, before we dive in, let’s be honest. Habenaria amplifolia can be a tad on the finicky side, so for absolute beginners, it might present a few learning curves. But don’t let that deter you! With a little patience and these tips, you’ll be well on your way to doubling your collection.
The Best Time to Start
The sweet spot for propagating Habenaria amplifolia is during its active growing season. Think late spring through early summer. That’s when the plant has plenty of energy to put into developing new roots and shoots. Trying to propagate when it’s dormant will likely lead to disappointment.
Supplies You’ll Need
Gathering your tools beforehand makes the whole process smoother. Here’s what I reach for:
- Sharp, sterilized pruning shears or a clean knife: For making clean cuts.
- Well-draining potting mix: A blend of orchid bark, perlite, and a bit of peat moss works wonders. You want something airy!
- Small pots or trays: Clean and with drainage holes, of course.
- Rooting hormone (optional but helpful): A powder or gel specifically for plant propagation.
- Clear plastic bag or small propagating dome: To maintain humidity.
- Watering can with a fine rose: For gentle watering.
- Spray bottle: For misting.
Propagation Methods
Habenaria amplifolia is best propagated through a couple of reliable methods.
Division
This is probably the easiest and most straightforward way to get more plants.
- Gently remove the parent plant from its pot. Notice how the tubers might be clumped together.
- Carefully tease apart the tubers. You’re looking to separate them into sections, making sure each section has at least one viable tuber and ideally a few small shoots or leaves. Don’t be afraid to get your hands in there, but be gentle!
- Trim away any damaged or mushy parts of the tubers.
- Allow the cut surfaces to dry and callus over for a few hours, or even overnight, in a dry, airy spot. This helps prevent rot.
- Pot up each division into its own small pot filled with your well-draining mix. Plant them just deep enough so the tuber is covered.
- Water lightly and place in a warm spot with bright, indirect light.
Stem Cuttings (for specific varieties)
If your Habenaria amplifolia has upright stems that develop leaves, you can try stem cuttings.
- Select a healthy stem with at least two or three nodes (where leaves emerge).
- Using your sterilized shears, take a cutting that is about 4-6 inches long. Make your cut just below a node.
- Remove the lower leaves from the cutting, leaving just a couple at the top.
- Dip the cut end into rooting hormone, tapping off any excess.
- Tuck the cutting into a pot filled with your well-draining mix. Make sure at least one node is buried in the soil.
- Water gently to settle the mix around the cutting.
The “Secret Sauce” (Pro Tips)
Here are a few little tricks that have made all the difference for me:
- Humidity is Key! After potting up your divisions or cuttings, I always pop them into a clear plastic bag or under a propagating dome. This creates a humid microclimate that encourages root formation. Just make sure to open it for a few minutes each day to allow for air circulation and prevent fungal issues.
- Avoid Leaf Drenching. If you’re water propagating (though less common for Habenaria amplifolia and more prone to rot), never let the leaves sit in the water. Only the node should be submerged. For potted cuttings, err on the side of keeping the soil consistently moist, but not waterlogged.
Aftercare & Troubleshooting
Once your cuttings or divisions start showing signs of rooting – which might be new growth appearing – it’s time to gradually acclimate them.
- Reduce humidity slowly. If they were in a bag, start by opening it a bit more each day before removing it entirely.
- Continue providing bright, indirect light. Avoid direct sun, which can scorch delicate new leaves.
- Water when the top inch of soil feels dry. It’s better to underwater slightly than to overwater at this stage.
Common signs of failure? The most frequent culprit is rot. If you notice mushy stems, yellowing leaves that quickly turn brown and fall off, or a foul smell from the potting mix, rot is likely the issue. This usually stems from too much moisture and poor air circulation. If it’s caught early, you might be able to salvage a healthy part of a tuber and let it dry out thoroughly before repotting.
A Little Patience Goes a Long Way
Growing new plants is a journey, and Habenaria amplifolia rewards that journey with beautiful results. Don’t get discouraged if your first attempt isn’t perfect. Keep observing your plants, adjust your care as needed, and most importantly, enjoy the process of nurturing new life. Happy propagating!
Resource:
https://identify.plantnet.org/k-world-flora/species/Habenaria%20amplifolia%20Cheeseman/data