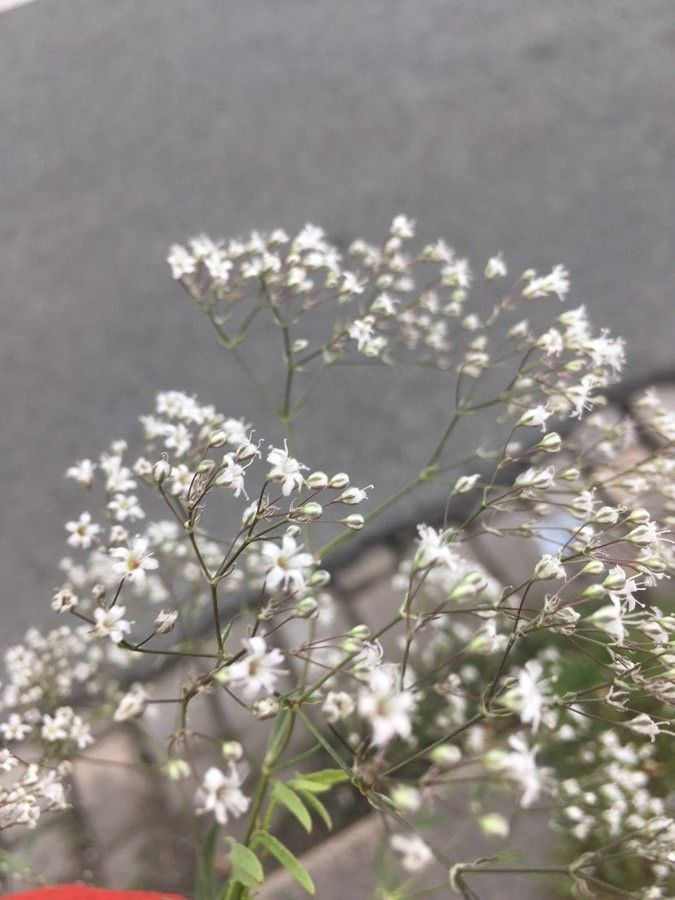
Oh, hello there! So glad you stopped by for a chat about one of my absolute favorite garden treasures: Gypsophila oldhamiana, or as we often affectionately call it, Baby’s Breath. Those delicate clouds of tiny white flowers are just pure magic, aren’t they? They perfectly fill out any bouquet and add such a ethereal touch to the garden bed. And the best part? Growing more of this beauty from your own plants is surprisingly doable and incredibly rewarding.
Some folks might shy away from propagating, thinking it’s a bit fussy. But honestly, Gypsophila oldhamiana is a pretty friendly plant to start with. You’ll likely find yourself with an abundance of lovely new plants before you know it!
When to Get Your Hands Dirty
The sweet spot for most vegetative propagation, and Gypsophila oldhamiana is no exception, is late spring or early summer. This is when the plant is actively growing and has plenty of healthy, vigorous material to work with. You’re looking for young, non-flowering shoots that are still a bit soft and bendy – not the tough, woody stems you might find later in the season.
Your Propagation Toolkit
Gathering the right supplies makes all the difference. Here’s what you’ll want to have on hand:
- Sharp Pruning Shears or a Craft Knife: Clean cuts are key to preventing disease.
- Rooting Hormone: This is a little booster that encourages roots to form. You can get it in powder or liquid form.
- Well-Draining Potting Mix: I like a blend of equal parts peat moss or coco coir and perlite or coarse sand. You can also buy specialized seed starting or cutting mixes.
- Small Pots or Trays: Clean ones, of course! Small 2-3 inch pots are perfect.
- Plastic Bags or a Propagator: To create a humid environment.
- Watering Can with a Fine Rose: Gentle watering is important.
- Labels: Because trust me, you’ll forget what’s what if you don’t label them!
Let’s Get Propagating!
We’ll focus on stem cuttings, which is generally the most reliable method for Gypsophila oldhamiana.
- Taking the Cuttings: Head out to the garden with your clean shears or knife. Look for those young, leafy shoots – aim for pieces that are about 3-4 inches long. Make a clean cut just below a leaf node (where a leaf meets the stem). This is where the magic happens for root development.
- Preparing the Cuttings: Gently remove the lower leaves from your cuttings. You want to expose a few leaf nodes along the bottom part of the stem. This gives you more surface area for roots to emerge. If there are any flower buds forming, pinch them off. They’ll just drain energy from the cutting.
- Applying Rooting Hormone: Dip the cut end of each prepared cutting into your rooting hormone, tapping off any excess. It’s like giving them a little pep talk to grow roots!
- Planting Your Cuttings: Fill your small pots with your prepared, moist potting mix. Make a little hole with your finger or a pencil, and gently insert the cut end of the cutting. Make sure some of those bare leaf nodes are buried in the soil. Firm the soil gently around the stem.
- Creating the Humid Environment: Water the cuttings gently to settle the soil. Then, cover the pots with a clear plastic bag or place them inside a propagator. This keeps the humidity high, which is crucial for cuttings while they’re trying to root. You can use stakes to prop up the bag so it doesn’t touch the leaves.
My Little “Secret Sauce” for Success
Over the years, I’ve picked up a few tricks that seem to make a real difference.
- Bottom Heat is Your Friend: If you can, place your pots on a seedling heat mat. This gentle warmth from below really encourages root formation. It’s like giving them a warm hug from the soil up.
- Location, Location, Location: Find a spot that gets bright, indirect light. Direct sun can scorch those delicate cuttings. A bright windowsill away from harsh sun is usually perfect.
- Don’t Mist Too Much: While humidity is key, sometimes over-misting can lead to fungal issues. If you’re using a sealed propagating dome or a well-sealed plastic bag, the humidity should stay high enough without constant misting. Just keep an eye on the soil – it should be consistently moist, but never soggy.
Nurturing Your New Sprouts
Once your cuttings are tucked in, patience is your best virtue. Check them periodically. You’ll know they’re happy and rooting when you see new leaf growth peeking out. This can take anywhere from a few weeks to a couple of months. Gently tug on a cutting – if you feel resistance, those roots are starting to form!
Keep the soil consistently moist but not waterlogged. If you see any leaves yellowing or developing mushy spots, it could be a sign of rot. This often happens if they’re too wet or don’t have enough air circulation. In that case, you might need to remove the affected cuttings and improve drainage or ventilation.
Go Forth and Grow!
The joy of seeing a tiny cutting transform into a flourishing plant is a truly special gardener’s reward. Don’t get discouraged if not every single cutting takes. Gardening is all about experimentation and learning. Just keep trying, enjoy the process, and soon enough, your garden will be bursting with even more of that wonderful, airy Gypsophila! Happy propagating!
Resource:
https://identify.plantnet.org/k-world-flora/species/Gypsophila%20oldhamiana%20Miq./data