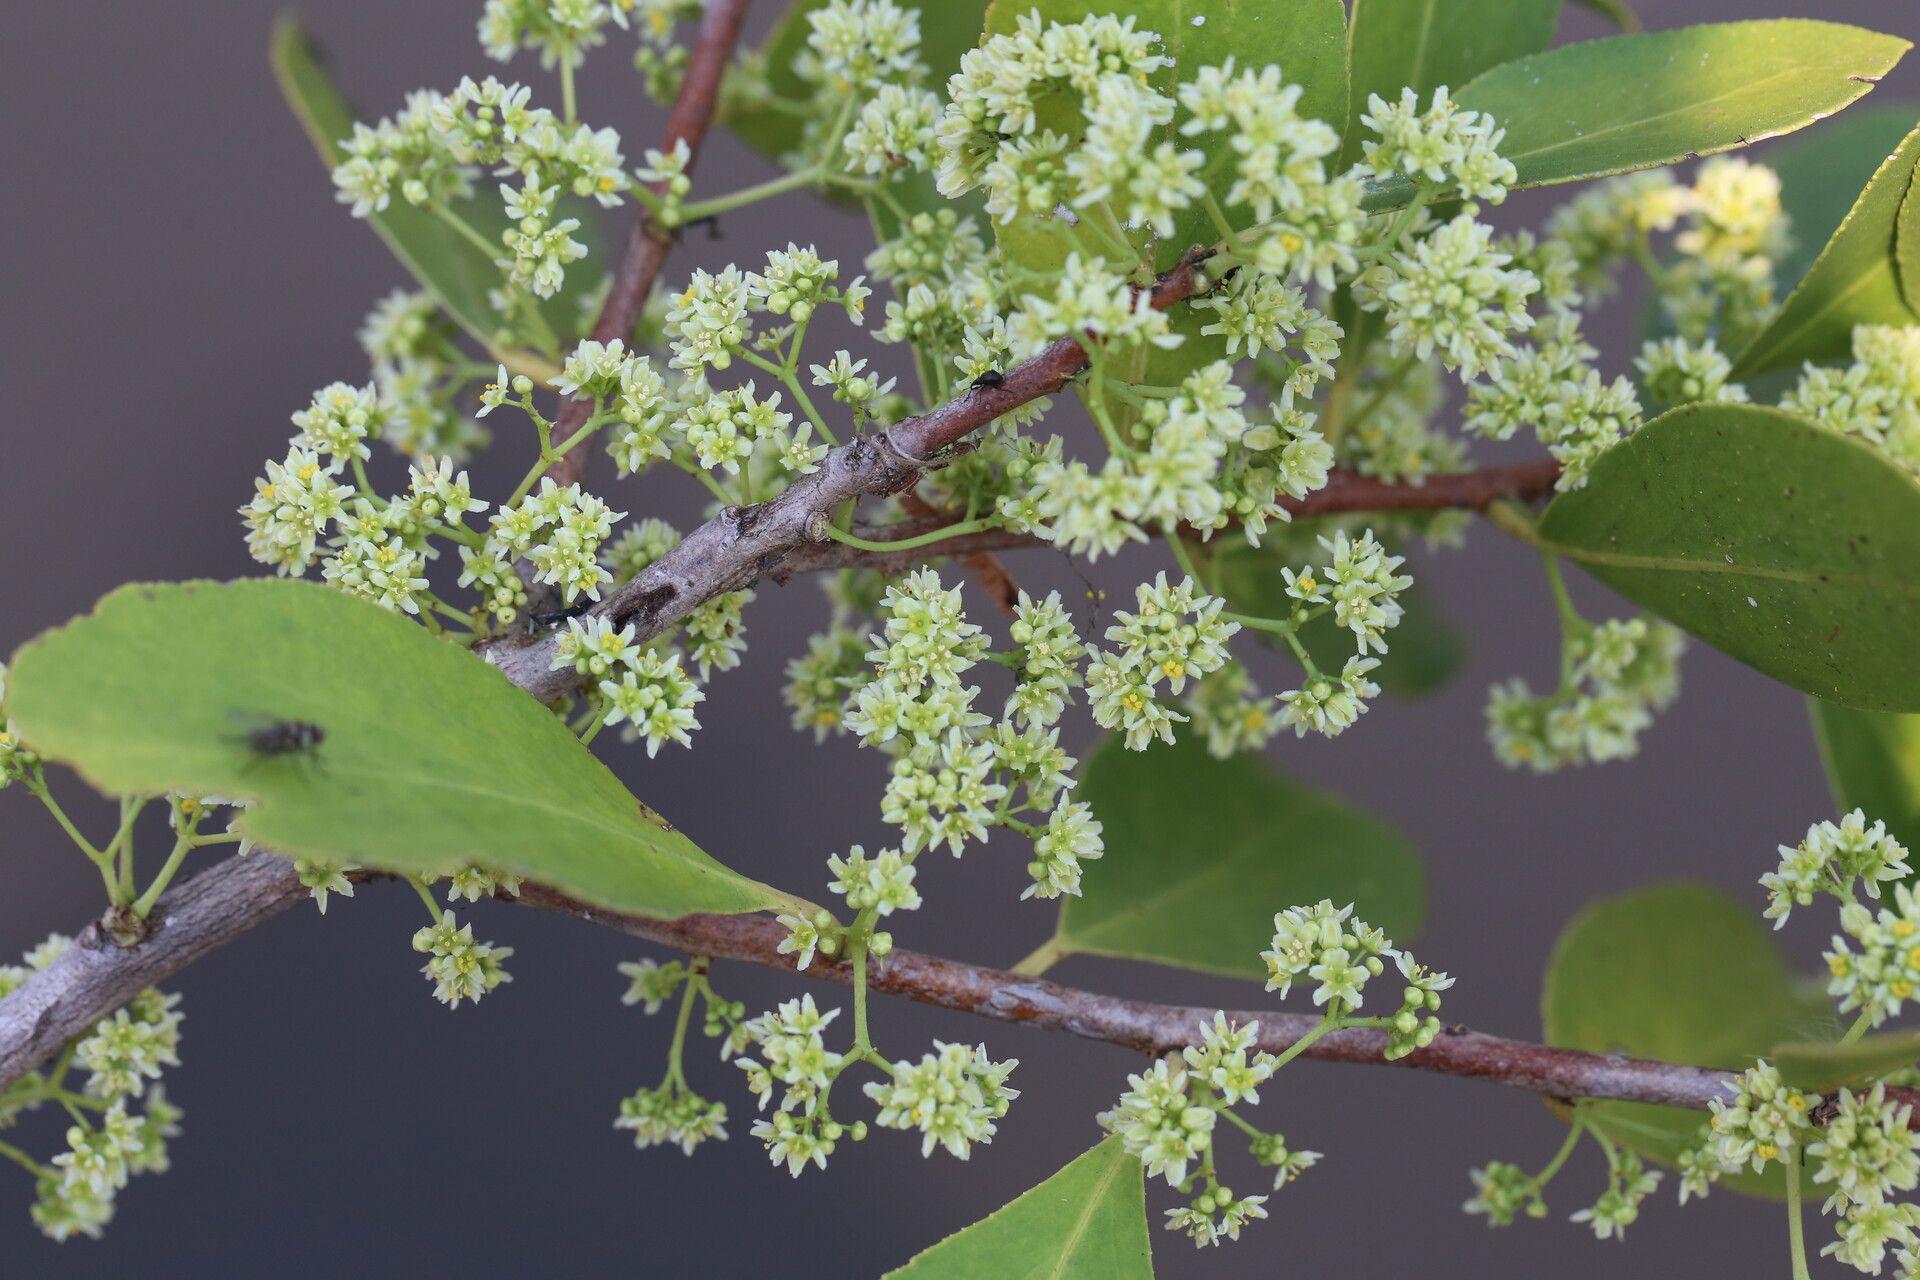
Hello there, fellow plant lover! I’m so excited to chat with you today about a plant that holds a special place in my heart: Gymnosporia senegalensis. You might also know it by its common names, like Cape May bush or pigeonwood. It’s a darling of the garden, with its delicate sprays of white flowers and lovely evergreen foliage. Plus, it’s a real magnet for our feathered friends, which is always a big win in my book! Propagating this beauty yourself is incredibly rewarding. You get to multiply your joy, share it with others, and frankly, it’s a fantastic way to connect with nature on a deeper level. If you’re a beginner, don’t fret! While it has its nuances, I find Gymnosporia senegalensis to be a pretty forgiving plant, and with a little guidance, you’ll be well on your way.
The Best Time to Start
For the absolute best chance of success with Gymnosporia senegalensis, I always recommend starting in late spring to early summer. This is when the plant is actively growing, and its stems are in that perfect “semi-hardwood” stage. You’re looking for stems that have developed a bit but aren’t yet woody and hard, nor are they super soft and leafy. Think of it as the sweet spot for rooting. This vibrant growth period means your cuttings have more energy to develop roots.
Supplies You’ll Need
Here’s what I like to have on hand before I get started:
- Sharp Pruning Shears or a Knife: Clean cuts are crucial for preventing disease. Make sure they’re nice and sharp!
- Rooting Hormone: This is a game-changer, especially for woody plants like Gymnosporia. It really encourages root development. I prefer a powder form, but liquid works too.
- Well-Draining Potting Mix: A blend of equal parts perlite, peat moss, and coarse sand is my go-to. You can also find commercial seed starting or cutting mixes that work wonderfully.
- Small Pots or Trays: Clean pots are a must. I usually opt for 4-inch pots for cuttings.
- Clear Plastic Bags or a Propagator: This helps to create a humid environment around your cuttings, which is vital for preventing them from drying out.
- Watering Can with a Fine Rose: Gentle watering is key.
- Labels and a Marker: Don’t forget to label your cuttings with the date and variety!
Propagation Methods
Let’s get down to business with how we can coax new Gymnosporia plants into existence. My favorite method for this plant is stem cuttings.
Stem Cuttings (Semi-Hardwood)
- Take Your Cuttings: On a mild morning, after the dew has dried, select healthy, vigorous stems from a mature plant. You’re looking for pieces about 4-6 inches long. Make your cut just below a leaf node. This is where the plant’s rooting hormones are concentrated and roots are most likely to form.
- Prepare the Cuttings: Gently remove the lower leaves, leaving just two or three at the very top. This reduces water loss. If your leaves are large, you can even cut them in half horizontally to further lessen transpiration.
- Apply Rooting Hormone: Dip the cut end of each stem into your rooting hormone, tapping off any excess. I like to do this in a small dish so I don’t contaminate my main supply.
- Pot Them Up: Fill your pots with your prepared potting mix. Make a small hole in the center of the soil with your finger or a pencil. Carefully insert the prepared cutting into the hole, ensuring the leaf nodes that had leaves removed are buried in the soil. Gently firm the soil around the stem.
- Water Gently: Water thoroughly but gently, so the soil is moist but not waterlogged.
- Create a Humid Environment: Cover each pot loosely with a clear plastic bag, or place them inside a propagator. You can use skewers to keep the bag from touching the leaves. Keep it out of direct, hot sun.
The “Secret Sauce” (Pro Tips)
Now, for a couple of insider tricks that have served me well over the years:
- Don’t Let Those Leaves Touch the Water: If you opt for water propagation (which I rarely do for Gymnosporia as cuttings tend to be more prone to rot), always ensure the leaves are well above the water line. Only the stem should be submerged. It’s a small detail, but it makes a huge difference in preventing fungal issues.
- Bottom Heat is Your Friend: For stem cuttings, placing your pots on a seedling heat mat can dramatically speed up the rooting process. This gentle warmth stimulates root growth from below, providing that extra encouragement your cuttings need.
Aftercare & Troubleshooting
Once your cuttings are potted up, the real waiting game begins. Keep them in a bright spot with indirect light. The soil should remain consistently moist, but never soggy. You can check for moisture by gently poking your finger into the soil.
You’ll know your cuttings have taken when you see new leaf growth! This can take anywhere from 4 to 12 weeks, so patience is key. Gently tugging on a cutting will reveal resistance if roots have formed.
The main issue you might encounter is rot. If you see a cutting turning black and mushy, it’s likely succumbed to rot, often due to overwatering or poor air circulation. Sadly, if rot sets in, it’s usually best to discard the affected cutting and try again, ensuring your conditions are drier and you have good airflow.
A Rewarding Endeavor
Propagating Gymnosporia senegalensis is such a satisfying journey. It’s a chance to witness the miracle of new life unfolding right before your eyes. Don’t be discouraged if your first attempt isn’t a runaway success – every cutting teaches you something new. Just keep at it, enjoy the process, and soon you’ll have a whole collection of these lovely plants to adorn your garden or share with friends. Happy propagating!
Resource:
https://identify.plantnet.org/k-world-flora/species/Gymnosporia%20senegalensis%20(Lam.)%20Loes./data