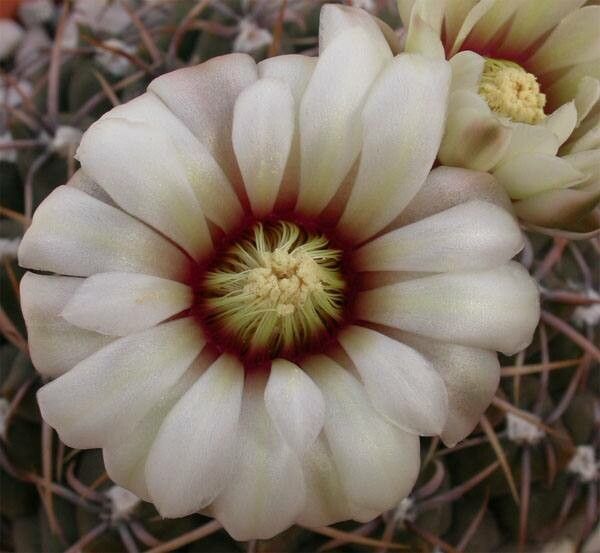
Oh, hello there! Pull up a chair, let’s chat about our prickly friends. Today, we’re diving into the wonderful world of propagating Gymnocalycium castellanosii. These little guys are just charming, aren’t they? With their neat, ribbed bodies and sometimes a splash of gorgeous color from their flowers, they bring such a unique touch to any collection. And the best part? You can easily make more of them yourself! Propagating these cacti is surprisingly straightforward, making it a truly rewarding experience, even if you’re just starting to dip your toes into the succulent and cactus world.
The Best Time to Start
For Gymnocalycium castellanosii, the sweet spot for propagation is definitely during their active growing season. Think late spring through summer. This is when the plant has plenty of energy and is naturally pushing out new growth, which means your cuttings or pups will have the best chance of taking root. Trying to propagate when the plant is more dormant, like in the middle of winter, is just setting yourself up for disappointment. We want them happy and healthy, after all!
Supplies You’ll Need
Before we get our hands dirty, let’s gather our arsenal. It’s not much, but having everything ready makes the process so much smoother:
- Well-draining potting mix: I usually go for a gritty cactus and succulent blend. You can buy it or make your own by mixing equal parts potting soil, perlite, and coarse sand.
- Sharp, clean pruning shears or a knife: Sterilize these with rubbing alcohol to prevent any nasty bug or disease transfer.
- Rooting hormone (optional but recommended): This is like a little encouragement for your cuttings.
- Small pots or trays: Terracotta pots are great because they breathe well. Make sure they have drainage holes!
- Labeled stakes or tags: Trust me, you’ll thank yourself later when you forget which little seedling is which.
- A mister bottle: For a gentle spritz of water.
- Gloves (optional): For those particularly spiky specimens.
Propagation Methods
Gymnocalycium castellanosii is pretty versatile, and you’ve got a couple of main ways to go about it.
Method 1: Offsets (Pups)
This is by far the easiest and most common method for these cacti. You’ll often see small offsets, or “pups,” growing from the base of the mother plant.
- Inspect the mother plant: Look for those little baby plants emerging from the soil line.
- Gently sever the pup: Using your clean shears or knife, carefully cut the pup away from the main stem as close to the base as you can. Try to make a clean cut.
- Allow to callus: This is crucial! Place the severed pup in a dry, well-ventilated spot away from direct sunlight for a few days to a week. You want the cut end to dry out and form a dry, protective scab (a callus). This prevents rot when you plant it.
- Plant the pup: Once callused, plant the pup into your prepared well-draining potting mix. You can place it just deep enough so it stands upright. Don’t water it just yet.
Method 2: Stem Cuttings
If you want to propagate from a larger piece of the plant or if it hasn’t produced offsets, you can take a cutting.
- Choose a healthy stem piece: Select a firm, mature segment of the cactus.
- Make a clean cut: Using your sterilized tool, cut a section about 2-4 inches long.
- Allow to callus thoroughly: Just like with offsets, the cut end MUST callus over. This can take 1-2 weeks, sometimes even longer depending on the thickness. Patience is key here.
- Plant the cutting: Once callused, plant the cut end into your gritty cactus mix. Again, don’t water immediately.
The “Secret Sauce” (Pro Tips)
Alright, let’s talk about a few things I’ve learned over the years that can really give your propagation efforts a boost:
- Bottom heat is your friend: If you have the option, placing your pots on a gentle heating mat during propagation, especially for cuttings, can dramatically speed up the rooting process. It mimics the warmth of the soil they’d find in their natural habitat.
- Don’t overwater, EVER: This is the golden rule for succulents and cacti. When you first plant your offset or cutting, wait at least a week before giving it its first light watering. Then, water sparingly, allowing the soil to dry out completely between waterings. It’s far better to underwater than to overwater when roots are forming.
- The “wiggle test” isn’t always the best test: Instead of gently tugging on your new plant to see if it has roots, I prefer to watch for visual cues. Look for signs of new growth—a slight plumpness, maybe a tiny nub of new spine development. This is a much more reliable indicator of root formation than trying to disturb it.
Aftercare & Troubleshooting
Once you’ve planted your little propagations, the waiting game begins. Keep them in a spot with bright, indirect light. Avoid harsh, direct sun, which can scorch tender new growth.
Watering: As I mentioned, water very sparingly at first. You’re aiming to keep the soil barely moist, not soggy. After a few weeks, or once you see signs of growth, you can gradually increase watering frequency, always letting the soil dry out between sessions.
Signs of Failure: The most common enemy here is rot. If your cutting or pup starts to look mushy, discolored (often black or brown and slimy), or just collapses, it’s a sign of rot. This is usually due to too much moisture combined with lack of callusing or poor drainage. Unfortunately, if rot sets in deeply, it’s often too late to save the piece. Another sign is if it just shrivels up and never seems to plump up, which can happen if it’s just too dry or the conditions aren’t right for rooting.
A Gentle Closing
Growing plants from cuttings or offsets is such a rewarding journey. It’s a beautiful way to connect with nature and see life flourish with a little bit of your care. Don’t be discouraged if your first attempt isn’t a runaway success; gardening is as much about learning as it is about growing. Be patient, observe your plants, and most importantly, enjoy the process! Happy propagating!
Resource:
https://identify.plantnet.org/k-world-flora/species/Gymnocalycium%20castellanosii%20Backeb./data