Hello there, fellow garden enthusiasts!
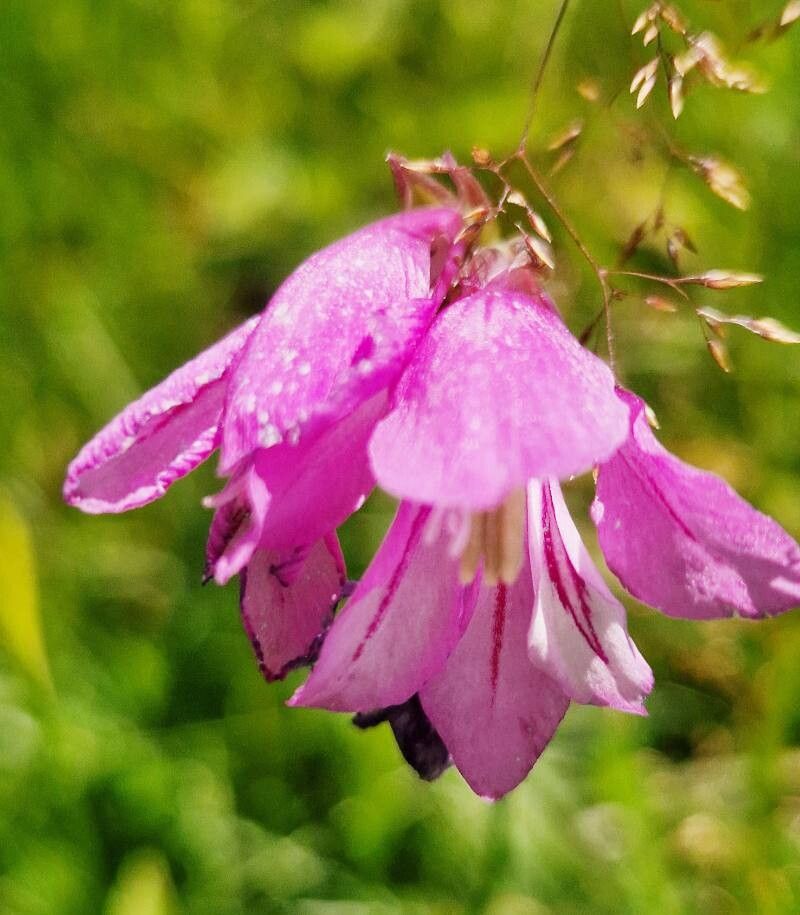
I’ve always had a soft spot for the delicate charm of Gladiolus imbricatus, also known as the European Sword Lily or Marsh Gladiolus. Those lovely, often nodding, bell-shaped flowers in shades of pink and purple add such a sweet touch to the garden. And the best part? They’re surprisingly rewarding to propagate! If you’re new to gardening, don’t let the “Gladiolus” name intimidate you. While some of their taller cousins can be a bit fussier, Gladiolus imbricatus is a fantastic plant to start your propagation journey with. It’s quite forgiving, which is always a bonus in my book!
The Best Time to Start
For Gladiolus imbricatus, the absolute sweet spot for propagation is in late spring or early summer. This is when the plant is actively growing and has plenty of energy to put into developing new roots and shoots. You’ll want to look for plants that have finished flowering or are just starting to show signs of slowing down their bloom production. It’s like catching them at their peak vitality!
Supplies You’ll Need
To get your propagation underway, gather a few essentials:
- Sharp Pruning Shears or a Clean Knife: For making clean cuts.
- Well-Draining Potting Mix: A mix designed for succulents or a blend of coarse sand and peat moss works wonders.
- Small Pots or Seed Trays: Clean ones are key to preventing disease.
- Rooting Hormone (Optional but Recommended): A powder or gel can give your cuttings a little boost.
- Watering Can with a Fine Rose: To water gently.
- Labels and a Marker: To keep track of your projects.
- A Warm, Bright Location: But avoid direct, scorching sunlight initially.
Propagation Methods
Gladiolus imbricatus is primarily propagated through division of its corms. Think of them as little underground treasures that hold the potential for a whole new plant.
Division of Corms
- Excavate Carefully: In late spring or early summer, when the foliage is starting to yellow and die back, it’s time to carefully dig up your Gladiolus imbricatus clump. Use a garden fork or trowel, working a good distance around the plant to avoid damaging the corms. Gently lift the entire clump from the soil.
- Clean Off the Soil: Once out of the ground, gently brush or rinse off as much of the soil as you can. You’ll start to see the main corm and any smaller cormels attached to it.
- Identify the Divisions: Look for where new corms have formed. You’ll see smaller offset corms, or “cormels,” attached to the base of the parent corm. Each healthy-looking cormel with an “eye” or bud is a potential new plant.
- Separate with Care: Using your clean knife or shears, carefully separate the cormels from the parent corm. Make sure each piece you separate has at least one small bud or “eye” on it. Don’t be afraid to separate even the tiniest ones; sometimes they have the most surprising resilience!
- Prepare for Planting: Allow the separated cormels to air dry for a day or two in a well-ventilated spot. This helps to heal any cuts and reduces the risk of rot.
- Pot Them Up: Fill your clean pots with your well-draining potting mix. Plant each cormel about 2-3 inches deep, with the pointed end (where the new shoot will emerge) facing upwards. Water gently.
The “Secret Sauce” (Pro Tips)
Here are a few little tricks I’ve picked up over the years that can really make a difference:
- Embrace the “Dormant” Cormels: Don’t discard those really tiny cormels! Sometimes, the smallest ones are full of life. Just pot them up separately and be patient. They might take a bit longer to establish but can still surprise you.
- A Touch of Cinnamon: Before planting, I like to lightly dust the cut surfaces of the cormels with a little ground cinnamon. It’s a natural antifungal that can help prevent rot and give your cormels a protective layer. It’s my go-to for an extra layer of insurance.
- Think “Summer Rest”: While we’re dividing them in spring/summer, remember Gladiolus imbricatus naturally goes dormant later in the year. Mimic this by allowing the soil to dry out more between waterings once you see new growth, and be prepared to let them rest over winter.
Aftercare & Troubleshooting
Once your cormels are planted, give them a gentle watering. Keep the soil consistently moist but not waterlogged. Place them in a bright location out of direct, harsh sun. You might not see much happening for a few weeks, so don’t panic! Patience is key here.
The most common issue you might encounter is rot. If you notice your cormels turning mushy, black, or smelling foul, it’s a sign of too much moisture and poor drainage. Unfortunately, a rotted cormel usually can’t be saved, so it’s back to the drawing board. Ensure your soil is airy and avoid overwatering. Yellowing leaves on a newly planted cormel can sometimes mean it’s getting too much sun too soon, so try moving it to a slightly shadier spot.
A Little Encouragement
Propagating plants is so much more than just making more of them; it’s a celebration of nature’s resilience and a deep dive into understanding a plant’s life cycle. Be patient with your Gladiolus imbricatus cormels. Watch for those first tiny green shoots to emerge – it’s such a thrill! Enjoy the process, learn from any bumps along the way, and soon you’ll have plenty of these beautiful bell-shaped flowers gracing your garden. Happy propagating!
Resource:
https://identify.plantnet.org/k-world-flora/species/Gladiolus%20imbricatus%20L./data