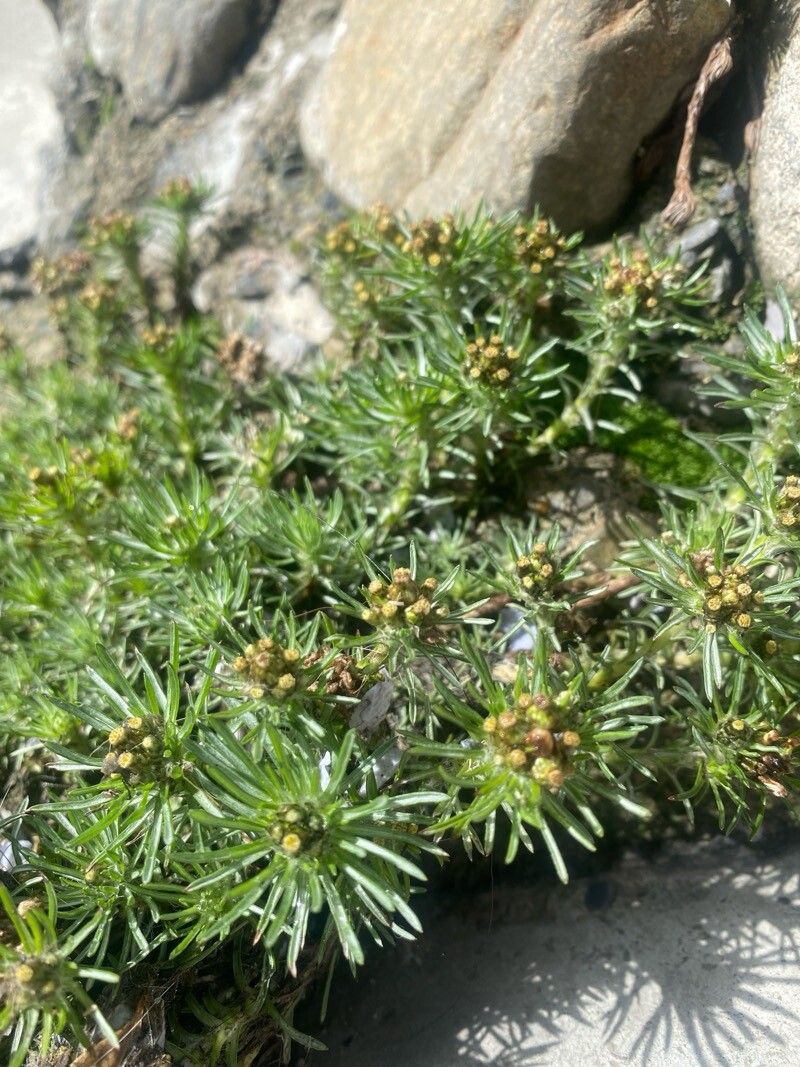
Oh, hello there! I’m so glad you stopped by. Today, we’re going to dive into the wonderful world of propagating Gamochaeta capitata. If you’re like me, you probably fell in love with its delicate, fuzzy grey foliage and those charming little papery flower buds. It’s a fantastic addition to any garden, especially for adding a touch of texture and softness. And the best part? You can easily multiply this beauty yourself! Don’t worry if you’re new to propagation; Gamochaeta capitata is actually quite forgiving. I’d say it’s a lovely plant for beginners to practice their green thumb on.
The Best Time to Start
For the highest success rate, I always recommend working with your Gamochaeta capitata in the late spring or early summer. This is when the plant is actively growing and has plenty of energy to put into developing new roots. You’ll want to take cuttings from healthy, vigorous stems that aren’t flowering or setting seed. Think of it as borrowing a bit of its youthful exuberance.
Supplies You’ll Need
Gathering your supplies beforehand makes the whole process much smoother. Here’s what I usually have on hand:
- Sharp Pruning Shears or a Craft Knife: Cleanliness is key to prevent disease.
- Small Pots or Seed Trays: Nothing too large; we want to encourage root development, not sprawling.
- Well-Draining Potting Mix: A good starting point is a mix of equal parts peat moss or coco coir and perlite or coarse sand. For this fuzzy guy, something a bit on the lighter side works best.
- Rooting Hormone (Optional but Recommended): A powder or gel can give your cuttings a helpful boost.
- Plastic Bags or a Propagator: To create a humid environment.
- Watering Can with a Fine Rose: For gentle watering.
- Labels and a Marker: So you don’t forget what you’ve planted!
Propagation Methods
Gamochaeta capitata is wonderfully adaptable, and I’ve had great success with a couple of methods.
1. Stem Cuttings: My Go-To
This is my preferred method for Gamochaeta capitata. It’s clean, efficient, and usually yields great results.
- Step 1: Take the Cuttings. Using your clean shears, select healthy, non-flowering stems about 3-5 inches long. Make your cut just below a leaf node (the point where a leaf attaches to the stem). This is where the magic happens for root formation.
- Step 2: Prepare the Cuttings. Gently remove the lower leaves from the cutting, leaving just a few at the very top. This prevents them from rotting in the soil. If your cuttings are a bit long, you can even cut them in half, as long as each piece has at least one leaf node.
- Step 3: Apply Rooting Hormone. Dip the cut end of each stem into your rooting hormone, tapping off any excess.
- Step 4: Plant the Cuttings. Fill your small pots or trays with your prepared potting mix. Make small holes with a pencil or your finger, and gently insert the prepared cuttings into the holes. Firm the soil gently around the base of each cutting to ensure good contact.
- Step 5: Create Humidity. Water the soil gently. Then, cover the pots with a clear plastic bag or place them in a propagator. Poke a few small holes in the bag to allow for some air circulation.
2. Division: For Mature Plants
If you have a well-established clump of Gamochaeta capitata, division is a super simple way to get more plants.
- Step 1: Excavate Gently. In the spring, carefully dig up the entire plant, trying to disturb the roots as little as possible.
- Step 2: Separate the Crowns. Gently pull apart the root ball into smaller sections. Each section should have a healthy root system and some foliage. If the roots are tangled, you can use a clean trowel or your hands to gently tease them apart. For tougher clumps, a sharp knife can be used.
- Step 3: Replant. Immediately replant the divisions as you would a regular plant, in well-draining soil. Water them in well.
The “Secret Sauce” (Pro Tips)
Here are a few little things I’ve learned over the years that can make a big difference:
- Don’t Drown Your Cuttings (in the Water Method, if you use it): While some plants love water propagation, Gamochaeta capitata can be prone to rot if its leaves sit in the water. If you choose this method, make sure only the stem is submerged. I personally find soil propagation more reliable for this particular plant.
- Bottom Heat is Your Friend: If you’re struggling with cuttings taking their sweet time, a gentle heat mat placed underneath your pots can significantly speed up root development. It mimics the warmth of the soil in summer and gives those roots a real nudge. Just make sure the heat isn’t too intense; you don’t want to cook your little babies!
- Don’t Give Up Too Soon: Some of my most successful cuttings have taken weeks, sometimes even a couple of months, to show signs of new growth. Resist the urge to pull them out of the soil to check for roots too often. A gentle tug is usually all you need – if there’s resistance, you likely have roots!
Aftercare & Troubleshooting
Once you see signs of new growth – tiny leaves unfurling at the tip – your cuttings have rooted! Congratulations!
- Introduce Them Gradually: If you’ve been using a plastic bag, slowly increase ventilation by opening the bag a little more each day over a week or so. This helps them acclimate to drier air.
- Watering: Water when the top inch of soil feels dry. Avoid letting them sit in soggy conditions, as this is where problems arise.
- First Feeding: Once your new plants are established and showing vigorous new growth (usually a few weeks after you see new leaves), you can start feeding them with a diluted liquid fertilizer every 2-4 weeks.
- Common Problems:
- Rotting: This is usually caused by overwatering or poor drainage. If a cutting looks mushy or black at the base, it’s likely gone. Remove it immediately to prevent spread.
- Wilting: Cuttings can wilt if they dry out completely. Make sure the soil stays consistently moist, but not waterlogged. Another cause can be too much direct sun before roots are established.
A Encouraging Closing
Remember, gardening is a journey, and propagation is a beautiful way to learn and connect with your plants. Be patient with your Gamochaeta capitata cuttings. Some will thrive, and some might not make it – and that’s perfectly okay. Every attempt is a learning experience. Enjoy the process of nurturing these little bits of life, and soon you’ll have plenty of your beloved fuzzy grey friends to share! Happy propagating!
Resource:
https://identify.plantnet.org/k-world-flora/species/Gamochaeta%20capitata%20Wedd./data