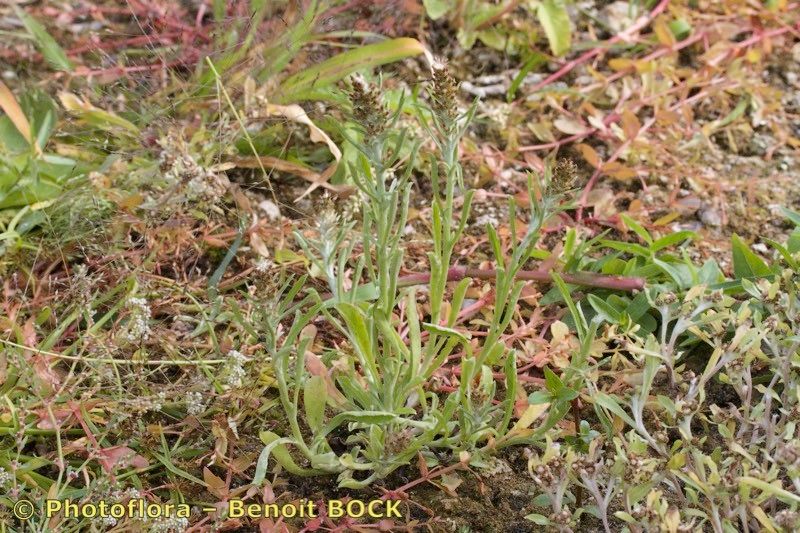
Hello fellow garden enthusiasts! Today, we’re going to dive into something I absolutely adore: growing more of the plants we love. Specifically, we’re talking about Gamochaeta antillana, a charming little plant that often flies under the radar but brings such delicate beauty to any garden space. Its silvery foliage and tiny, almost star-like flowers are truly delightful, especially when you see them dotting a sunny border or spilling out of a pot.
The rewarding part of propagating Gamochaeta antillana is how easily it reproduces once you get the hang of it. It feels like a little gardening magic trick! For beginners, I’d say this plant is moderately easy to propagate. It’s not quite as foolproof as, say, a succulent, but with a little attention, you’ll be successful.
The Best Time to Start
When it comes to getting your cuttings or divisions off to a good start, late spring to early summer is generally your sweet spot. This is when the plant is actively growing and has plenty of energy to put into developing new roots. Waiting until the plant has finished its main bloom flush can also be a good time, as it’s still robust but not depleted.
Supplies You’ll Need
Gathering your tools before you begin will make the whole process go much smoother. Here’s what I find indispensable:
- Sharp, clean pruning shears or scissors: Cleanliness is key to preventing disease.
- Sterile potting mix: A good mix for cuttings will be airy and well-draining. I often use a blend of peat moss (or coir) and perlite, or a commercial seed-starting mix.
- Small pots or seed trays: Clean pots are a must.
- Rooting hormone (optional but helpful): A powdered or liquid rooting hormone can give your cuttings a real boost.
- Plastic bags or propagation dome: To create a humid environment.
- Watering can or spray bottle: For gentle watering.
- Labels: To keep track of your new babies!
Propagation Methods
For Gamochaeta antillana, I find two main methods work particularly well: stem cuttings and division.
Stem Cuttings:
- Take your cuttings: In the active growing season, select healthy, non-flowering stems. Using your clean shears, cut a stem that’s about 4-6 inches long. Try to make the cut just below a leaf node (where leaves attach to the stem).
- Prepare the cuttings: Gently remove the lower leaves from the cutting, leaving just a few at the top. If you’re using rooting hormone, dip the cut end into it, tapping off any excess.
- Plant the cuttings: Fill your small pots or trays with your sterile potting mix. Moisten the mix thoroughly but don’t make it soggy.
- Insert the cuttings: Make a small hole in the soil with a pencil or your finger, and insert the cut end of the stem. Gently firm the soil around it. You want at least one or two leaf nodes buried in the soil.
- Create humidity: Water the soil lightly again, and then cover the pots with a plastic bag or a propagation dome. This traps moisture and helps the cuttings stay hydrated while they root. Place them in a bright spot but out of direct sunlight.
Division:
This method is great if you have an established clump of Gamochaeta antillana.
- Gently unearth: Carefully dig up the entire plant, trying to disturb the roots as little as possible.
- Separate the clumps: Examine the root ball. You should be able to see where individual crowns or sections are emerging. You can often gently pull these apart with your hands. If they’re very tough, use a clean, sharp knife or trowel to slice through the root ball.
- Replant immediately: Plant each division into its own pot filled with fresh potting soil, or directly into your garden. Water them in well.
The “Secret Sauce” (Pro Tips)
Over the years, I’ve learned a few tricks that really seem to make a difference:
- Don’t let the leaves touch the water: If you’re attempting water propagation (which I find a bit trickier for this plant but possible), make sure the leaves of your cutting are not submerged in the water. Only the stem should be in the water. Rot is a quick way to lose a cutting!
- Bottom heat is your friend: For stem cuttings, placing your pots on a heat mat designed for propagation can significantly speed up root development. It mimics the warmth of spring soil. Just ensure the mat is suitable for use with pots of soil.
Aftercare & Troubleshooting
Once you see signs of new growth on your cuttings (tiny leaves emerging from the top), it’s a good indication that roots have formed.
- Acclimate gradually: Once roots have started and you see new growth, gradually introduce your new plants to open air. Poke a few holes in the plastic bag or lift the dome for increasing periods over a few days. This prevents shock.
- Watering: Keep the soil consistently moist but not waterlogged. As the plant grows and establishes, you can begin watering it like a mature plant.
- Troubleshooting: The most common problem you’ll face is rot, usually caused by too much moisture or poor drainage. If a cutting turns black and mushy, it’s best to discard it and try again, ensuring your soil drains well and you’re not overwatering. Yellowing leaves can sometimes indicate too much water, or sometimes not enough light. Observe closely!
A Encouraging Closing
Propagating plants like Gamochaeta antillana is such a wonderful way to connect with nature and multiply the beauty in your garden or home. Don’t be discouraged if your first attempt isn’t perfect. Gardening is a journey of learning and patience. Enjoy the process, celebrate each little success, and happy propagating!
Resource:
https://identify.plantnet.org/k-world-flora/species/Gamochaeta%20antillana%20(Urb.)%20Anderb./data