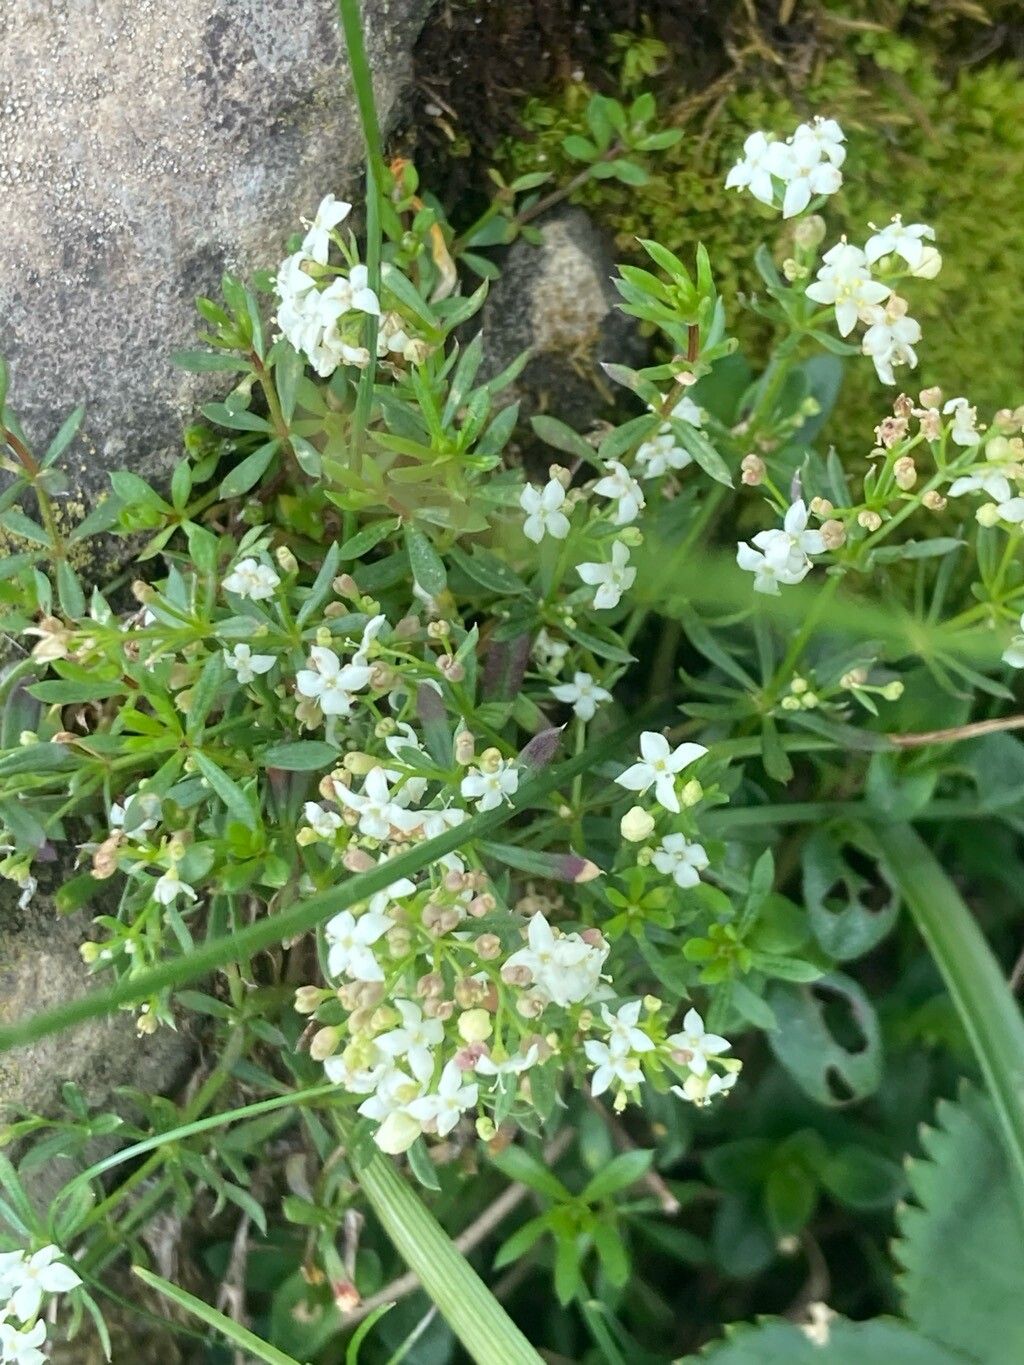
Hello there, fellow garden enthusiasts! Today, I want to share my love for a little gem in the plant world: Galium anisophyllon. You might know it as fragrant bedstraw, and oh, its delicate clusters of tiny white flowers and lovely, almost spicy scent are just so charming. It’s a fantastic plant for ground cover, cascading over walls, or even nestled into rock gardens. And the best part? It’s surprisingly rewarding to multiply. If you’re new to plant propagation, you’ll be pleased to know Galium anisophyllon is quite forgiving. You can absolutely do this!
The Best Time to Start
For the highest success rate, I find that propagating Galium anisophyllon is best done in late spring or early summer. This is when the plant is actively growing and has plenty of energy to put into developing new roots. Waiting until the new growth has hardened off a little, but is still soft, is key. Think of it like this: you want to catch it at the peak of its vigor!
Supplies You’ll Need
Here’s a little kit to get you started:
- Sharp, clean pruning shears or a razor blade: For making clean cuts.
- Rooting hormone (optional but recommended): I like to use a powdered form.
- Well-draining potting mix: A good blend of peat moss, perlite, and a little bit of compost works wonders.
- Small pots or seed trays: With drainage holes, of course!
- Plastic bags or a propagator lid: To create a humid environment.
- Watering can or spray bottle: For gentle watering.
- Labels: To keep track of your cuttings!
Propagation Methods
Galium anisophyllon is wonderfully amenable to a few different propagation techniques. Here are my favorites:
1. Stem Cuttings (My Go-To!)
This is my absolute favorite for Galium anisophyllon.
- Take your cuttings: Select healthy, non-flowering stems. Cut pieces about 4-6 inches long, making the cut just below a leaf node (where the leaves attach to the stem). Remove the lower leaves, leaving just a couple at the very top.
- Apply rooting hormone: Dip the cut end into your rooting hormone, tapping off any excess. This step isn’t strictly necessary for every plant, but it gives your cuttings a real boost.
- Plant the cuttings: Stick the prepared cuttings into your moist, well-draining potting mix. Make a hole with a pencil or your finger, then gently firm the soil around the base.
- Create humidity: Water gently and then cover the pots with a clear plastic bag or a propagator lid to keep the humidity high. You can also poke a few small holes in the bag for air circulation. Place them in a bright spot, but out of direct sunlight.
2. Water Propagation (Simple & Satisfying)
This method is so visually rewarding!
- Prepare your cuttings: Similar to stem cuttings, take 4-6 inch cuttings and remove the lower leaves.
- Place in water: Pop the cuttings into a jar or glass filled with clean water. Make sure no leaves are submerged in the water; they’ll just rot.
- Change the water: Change the water every few days to keep it fresh.
- Find a good spot: Place the jar in a location with bright, indirect light. You’ll start to see tiny roots emerging from the nodes in a few weeks.
- Pot them up: Once the roots are about an inch long, you can gently transplant them into pots filled with your well-draining potting mix.
The “Secret Sauce” (Pro Tips)
Here are a few things I’ve learned over the years that really help:
- Don’t let those leaves touch the water: Seriously, if you’re doing water propagation, this is crucial. Submerged leaves are a fast track to rot and disappointment.
- Bottom heat is your friend: Galium anisophyllon loves a bit of warmth from below. Placing your pots on a heat mat designed for seedlings can significantly speed up root development and increase your success rate, especially if your house is a bit on the cooler side.
- Patience is key, but so is observation: Check your cuttings regularly. You’re looking for signs of new growth or resistance when you gently tug (a sign of roots!). If you see mold or rot, remove affected cuttings immediately and improve air circulation.
Aftercare & Troubleshooting
Once your cuttings have developed a good root system (you’ll see new growth, or they’ll feel firm when gently tugged), it’s time to treat them like little young plants.
- Gradual acclimatization: If you used a plastic bag or propagator, gradually remove the cover over a few days before taking them out completely. This helps them adjust to normal humidity.
- Watering: Keep the soil consistently moist but not soggy. Water when the top inch of soil feels dry.
- Light: Continue to provide bright, indirect light. As they get stronger, you can gradually introduce them to more sun.
- Troubleshooting: The biggest issue you’ll encounter is rot. This is usually due to overwatering and poor air circulation. If you see stems turning mushy or black, it’s likely rot. You might be able to salvage healthy parts if you caught it early. Another sign of failure is if cuttings simply shrivel up and don’t show any signs of rooting – this could be due to dryness, lack of rooting hormone, or just not being viable cuttings. Don’t be discouraged; just try again!
A Little Encouragement to Finish
Propagating plants is such a beautiful way to connect with nature and expand your garden without spending a fortune. Be patient with your Galium anisophyllon cuttings. Sometimes they take their time, and that’s perfectly okay. Enjoy the process of nurturing these new lives, and soon you’ll have even more of that delightful fragrance and charm to share! Happy propagating!
Resource:
https://identify.plantnet.org/k-world-flora/species/Galium%20anisophyllon%20Vill./data