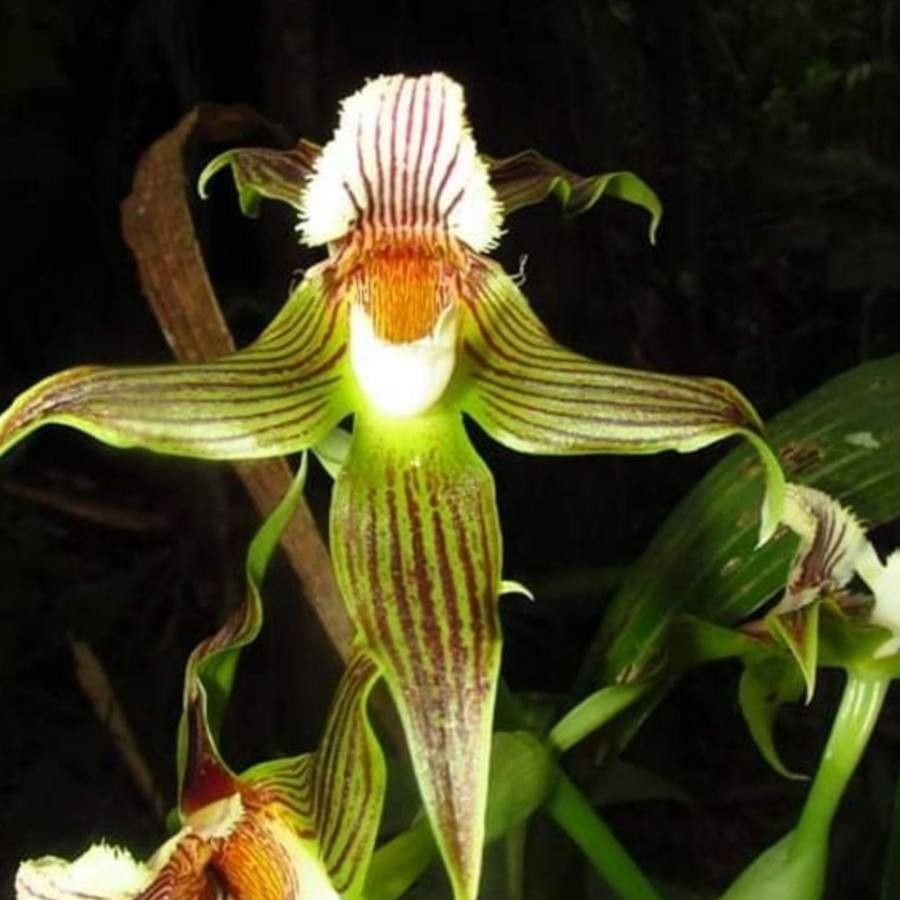
Hey there, fellow plant lovers! Today, we’re diving into the wonderful world of Galeottia grandiflora. If you’ve ever admired this orchid with its stunning blooms and intoxicating fragrance, you know how special it is. Adding more of these beauties to your collection through propagation is incredibly rewarding. Now, I’ll be honest, Galeottia grandiflora can be a tad fussy for absolute beginners, but don’t let that deter you! With a little patience and the right approach, you can definitely succeed. Think of it as a rewarding challenge that’ll make you feel like a true orchid wizard.
The Best Time to Start
For Galeottia grandiflora, the active growing season is your golden ticket. This usually means spring and early summer. You want the plant to be healthy and putting on new growth. Trying to propagate when it’s dormant or stressed is just asking for disappointment. I usually wait until I see new root or leaf growth actively starting.
Supplies You’ll Need
Gathering your tools before you start is half the battle won! Here’s what you’ll want to have on hand:
- Sharp, sterile pruning shears or a scalpel: Cleanliness is paramount with orchids to prevent disease.
- Orchid bark mix: A fast-draining mix specifically formulated for orchids is best. You can prepare your own with components like medium-grade orchid bark, perlite, and charcoal.
- Small pots or seed trays: Ensure they have good drainage.
- Sphagnum moss: For keeping things humid.
- Rooting hormone (optional but helpful): A powder or gel can give young cuttings a boost.
- Clear plastic bags or a propagation dome: To create a humid environment.
- A spray bottle: For gentle misting.
- Rubbing alcohol or bleach solution: For sterilizing your tools.
Propagation Methods
The most reliable way to propagate Galeottia grandiflora is through division. These orchids grow in clumps, and when the clump gets large enough, you can gently separate it.
Division Method:
- Gently remove the plant from its pot. If it’s stuck, a gentle squeeze of the pot can help loosen it.
- Carefully clean away as much of the old growing medium as you can. You want to see the rhizomes (the thickened stems that grow horizontally) and the roots clearly.
- Inspect the plant for natural divisions. Look for sections of the rhizome that have at least 2-3 pseudobulbs (the swollen leaf bases) and healthy roots attached.
- Using your sterile shears or scalpel, carefully cut the rhizome to separate the divisions. It’s okay if a few roots are lost in the process; the key is to have healthy ones remaining.
- Dust any cut surfaces with a fungicide powder – this is an optional but wise precaution to prevent rot.
- Pot each division into its own small pot with fresh orchid bark mix. Ensure the pseudobulbs are just at the surface of the mix, not buried.
- Water lightly, just enough to settle the medium. Avoid overwatering, especially in the initial stages.
The “Secret Sauce” (Pro Tips)
Now, for a couple of things I’ve learned over the years that make a real difference:
- Don’t over-pot: It’s tempting to put a division into a pot that seems too big, thinking it will grow into it. Resist this urge! A pot that’s too large will hold too much moisture, and young divisions are very susceptible to rot. A snug fit is much better.
- Patience with watering: After dividing, I’ll often wait a few days to a week before watering. This allows any minor damage to the roots to callus over, which helps prevent rot. When you do water, water thoroughly, then let the mix almost dry out before watering again.
Aftercare & Troubleshooting
Once your division is potted, it needs some TLC.
- Humidity is key: Place the newly potted divisions in a location with high humidity. A clear plastic bag or a propagation dome works wonders. Just make sure to vent it daily for a few minutes to allow for air circulation and prevent fungal issues.
- Bright, indirect light: Think of the dappled sunlight you might find under a larger tree. No direct sun, which will scorch delicate new growth.
- Patience with roots: It can take several weeks, even months, for new roots to establish. Don’t be tempted to pull on the plant to check for root development. You’ll know roots are forming when you see them emerging from the drainage holes or looking plump and green from the surface of the potting mix.
What if things go wrong? The most common issue is rot. Signs of rot include mushy, brown, or black pseudobulbs and roots. If you spot this, remove the affected parts immediately with your sterile tool and repot into fresh, drier medium. Sometimes, you might see new growth starting but no roots. This is where patience comes in! Consistent humidity and avoiding overwatering are your best friends here.
A Little Encouragement
Propagating orchids like Galeottia grandiflora is a journey. There will be moments of excitement and maybe a few head-scratching ones. But the thrill of watching a new plant thrive from a piece of your beloved original is truly unparalleled. Be patient, pay attention to its needs, and enjoy the process of nurturing new life. Happy gardening!
Resource:
https://identify.plantnet.org/k-world-flora/species/Galeottia%20grandiflora%20A.Rich./data