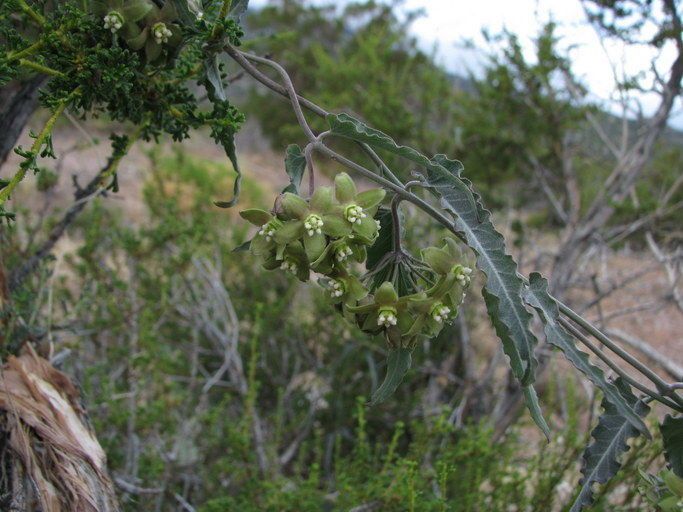
Hello fellow plant lovers! I’m so excited to chat with you today about a real gem in the succulent world: Funastrum crispum. You might know it by one of its common names, like Curly Whorl or Twisted Vine. This plant is just a delight to have around. Its architectural, architectural, twisted stems and subtle, star-shaped flowers have a way of adding a unique texture and interest to any collection. And the best part? Propagating Funastrum crispum is incredibly rewarding. It’s a fantastic plant for beginners to try their hand at, which is always a bonus!
The Best Time to Start
When it comes to getting the most bang for your propagation buck, spring and early summer are your golden ticket. This is when the plant is actively growing, brimming with energy. New growth is usually the easiest to root, so keep an eye out for those fresh, vibrant stems. Trying to propagate when the plant is dormant, like in the dead of winter, can be a bit of a uphill battle.
Supplies You’ll Need
Before we dive in, let’s gather our tools. A well-prepared station makes all the difference!
- Sharp Pruning Shears or a Clean Knife: For making clean cuts.
- Well-Draining Potting Mix: A cactus and succulent mix is ideal. You can also make your own by combining equal parts potting soil and perlite or coarse sand.
- Small Pots or Seedling Trays: For your new baby plants. Make sure they have drainage holes!
- Rooting Hormone (Optional but Recommended): This gives your cuttings a little head start.
- Watering Can or Spray Bottle: For gentle watering.
- Patience! This is the most important tool of all.
Propagation Methods
Funastrum crispum is pretty forgiving, and I’ve found two methods work wonders.
Stem Cuttings
This is my go-to for Funastrum crispum. It’s straightforward and usually yields excellent results.
- Select Your Cutting: Look for a healthy, non-flowering stem that’s at least 4-6 inches long. You want to see at least a couple of leaf nodes along the stem.
- Make the Cut: Using your clean shears or knife, make a clean cut right below a leaf node. This is where the magic happens for root development.
- Remove Lower Leaves: Gently strip off the leaves from the bottom 2-3 inches of the stem. This prevents them from rotting when buried.
- Callus Over (Optional but Helpful): Let the cut end sit for a day or two in a dry, airy spot. This allows the wound to callus over, which helps prevent rot.
- Apply Rooting Hormone (Optional): Dip the callused end into rooting hormone. You don’t need a lot, just a light coating. Tap off any excess.
- Plant the Cutting: Make a small hole in your well-draining potting mix with your finger or a pencil. Insert the callused end of the cutting into the hole, ensuring at least one leaf node is buried. Gently firm the soil around the base of the cutting.
- Water Lightly: Water sparingly, just enough to moisten the soil. You don’t want to waterlog it.
Water Propagation (Use with Caution!)
While I love a good water propagation for some plants, with Funastrum crispum, you have to be a bit more careful.
- Prepare the Cutting: Follow steps 1-3 from the stem cutting method.
- Place in Water: Find a clean jar or glass. Fill it with water and place the cutting in, ensuring that the leaves do not touch the water. Submerged leaves will quickly rot. Change the water every few days to keep it fresh.
- Wait for Roots: Roots should start to appear within a few weeks. Once the roots are about an inch long, it’s best to transplant them into soil rather than letting them grow too long in water.
The “Secret Sauce” (Pro Tips)
Here are a couple of things I’ve learned over the years that make a real difference.
- Bottom Heat is Your Friend: Placing your pots on a propagation mat or a sunny windowsill that receives gentle warmth from underneath can significantly speed up root development. It mimics the warmth of spring.
- Don’t Overwater, Ever! This is the most common mistake. Succulents are built to store water, and their roots are very susceptible to rot. Err on the side of underwatering until you see new growth. Let the soil dry out between waterings.
- Patience with the Callus: While I mentioned callusing for cuttings, for water propagation, even a slight callus before going into water can help, but it’s less critical than for soil propagation.
Aftercare & Troubleshooting
Once you see those little roots starting to form, or if you’ve replanted a water-rooted cutting, it’s time for a bit of tender loving care.
- Gentle Watering: Continue to water sparingly. Water only when the soil is dry to the touch. For cuttings in soil, you might water every week or two depending on your climate. For water-propagated ones that are now in soil, treat them like a mature succulent.
- Bright, Indirect Light: Place your new propagations in a spot with bright, indirect sunlight. Direct, scorching sun can be too intense for delicate new roots.
- Signs of Trouble: The biggest red flag is rot. If your cutting turns mushy, black, or slimy, it’s likely rotted. This usually means too much moisture. If you catch it early, you might be able to salvage a healthy part of the stem and try again. Another sign of stress is wilting that doesn’t improve after watering – this could also indicate root issues.
A Encouraging Closing
Propagating plants is a beautiful dance with nature. It takes a bit of practice, a keen eye, and a whole lot of patience. But when you see those first tiny roots emerge, or a new leaf unfurl on your propagated Funastrum crispum, there’s a special kind of joy that comes with it. Don’t be discouraged if your first attempt isn’t perfect. Learn from it, keep trying, and most importantly, enjoy the journey of growing your own green treasures! Happy propagating!
Resource:
https://identify.plantnet.org/k-world-flora/species/Funastrum%20crispum%20(Benth.)%20Schltr./data