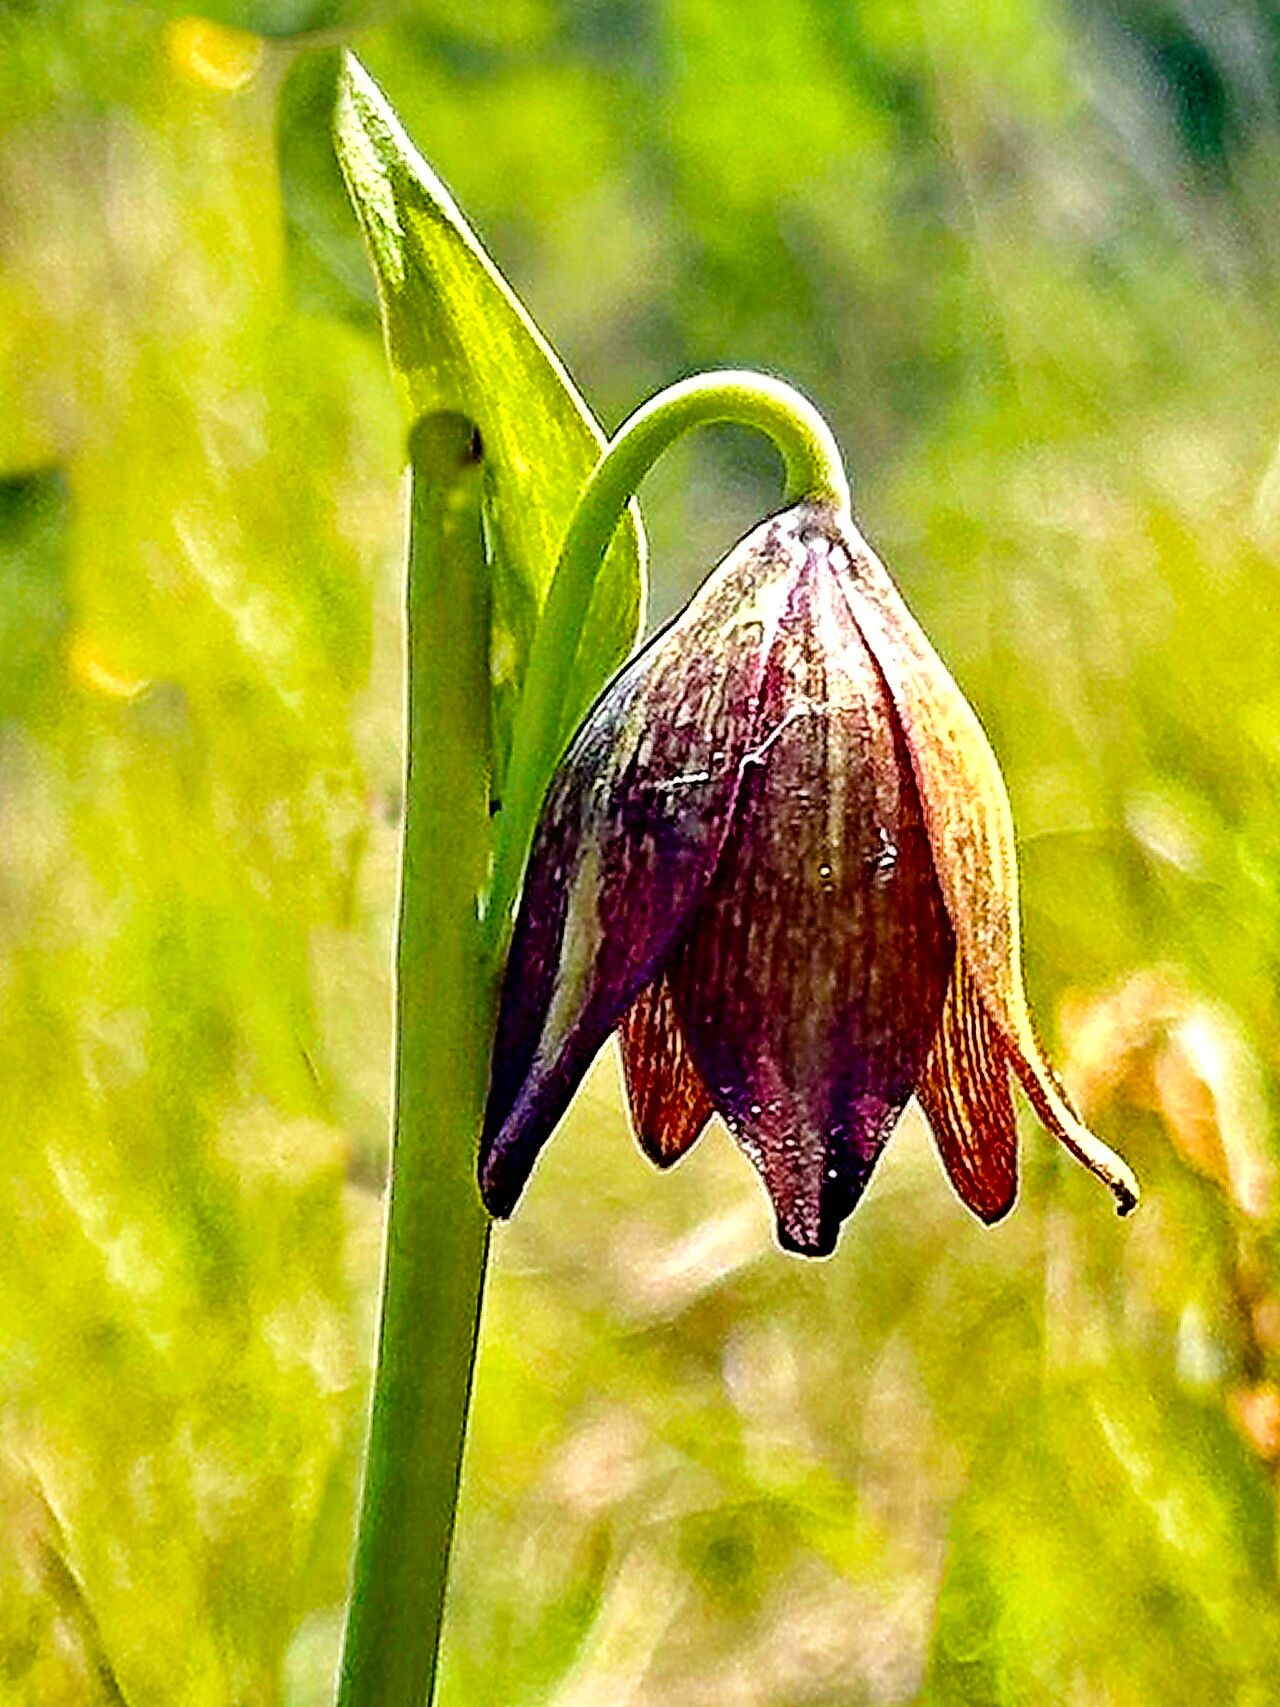
Ah, the Fritillaria biflora! Isn’t it just a charmer? With its delicate, bell-shaped flowers, often a lovely soft brown or purplish-brown, it brings such a unique elegance to the early spring garden. It’s one of those plants that makes you pause and smile. And the best part? Bringing more of these beauties into your life by propagating them yourself is incredibly rewarding. Don’t be intimidated; while not as straightforward as a geranium cutting, propagating Fritillaria biflora is absolutely achievable, especially with a little guidance. I’ve had success, and I know you will too.
The Best Time to Start
For Fritillaria biflora, the sweet spot for propagation is right after it finishes flowering and starts to go dormant. You’ll notice the foliage turning yellow and dying back. This is when the bulb has stored up its energy, and it’s the perfect time to work with it. Think late spring to early summer. Trying to propagate when it’s actively growing can really stress the plant, and we don’t want that.
Supplies You’ll Need
Gathering your supplies beforehand makes the whole process so much smoother. Here’s what I always have on hand:
- Sharp, clean trowel or small spade: For gently lifting the bulbs.
- Small, sharp knife or pruning shears: Sterilized, of course.
- A good quality, well-draining potting mix: I often use a mix of equal parts potting soil, perlite, and coarse sand. It needs to let water drain away quickly.
- Rooting hormone (optional but helpful): Especially if you’re working with bulb offsets.
- Small pots or trays: With drainage holes are non-negotiable!
- A watering can with a fine rose: To avoid disturbing delicate new growth.
- Labels and a pen: To keep track of what you’ve planted and when.
Propagation Methods
Fritillaria biflora is primarily propagated through division, which is essentially separating the offsets or “daughter” bulbs that grow around the main bulb.
Division
- Wait for dormancy: As I mentioned, this is key. Let the foliage die back naturally.
- Gently excavate: Using your trowel, carefully dig around the main Fritillaria bulb. You want to lift it out of the soil without damaging the bulb itself or any offsets attached to it. Sometimes, you can gently shake away some of the excess soil to see what you’re working with.
- Inspect and separate: Look closely at the main bulb. You’ll often see smaller bulbs, called offsets, attached. These are mini versions of the main bulb. With a clean, sharp knife, carefully cut or twist away any offsets that detach easily. If an offset is firmly attached, it might be better to leave it until the next year, or be very precise with your knife. The goal is to have each division be its own viable bulb.
- Clean and dry (briefly): Some gardeners like to let the cut surfaces of the offsets air dry for a day or two in a shady, well-ventilated spot. This helps to callous over any wounds, reducing the risk of rot before planting.
- Plant your divisions: Fill your small pots with your well-draining mix. Make a shallow hole in the center and plant the offset bulb with its pointed end facing upwards. Generally, you plant them about as deep as they are tall. If you have larger divisions, you can plant them individually. Smaller ones can sometimes be grouped a few to a pot, as long as they have space to grow.
- Water gently: Give the newly potted bulbs a light watering. You don’t want to drench them at this stage.
- Provide ideal conditions: Place the pots in a cool, sheltered location with bright, indirect light. Avoid direct sun, which can scorch the delicate bulbs.
The “Secret Sauce” (Pro Tips)
Here are a couple of my own little tricks that have really helped me with tricky propagations like this:
- Don’t overwater offsets: This is probably the most common mistake. Rot is the enemy of newly divided bulbs. It’s much better to err on the side of under-watering than over-watering, especially in the initial stages. Let the soil dry out slightly between waterings.
- Consider bottom heat for faster rooting (optional): If you’re really keen to speed things up, especially if starting a bit earlier in the season, placing your pots on a gentle seedling heat mat can encourage faster root development. Just make sure the heat isn’t too intense – think warm, not hot.
Aftercare & Troubleshooting
Once your little Fritillaria babies are planted, patience is your best friend. You likely won’t see much action above ground for a while, as they’re busy establishing roots.
- Watering: Water sparingly until you see signs of new growth. Once they start actively growing, you can water more regularly, but always ensure the soil drains well.
- Bulbing up: It can take a year or two for a new offset to grow into a flowering-sized bulb. Don’t be discouraged if you don’t see flowers the first spring. The plant is busy growing its roots and developing its bulb.
- Signs of trouble: The biggest culprit is rot. If you notice your bulbs turning mushy, dark, or smelling foul, it’s a sign of too much moisture or poor drainage. There’s often not much to be done once rot sets in, so prevention through good watering and soil practices is crucial.
A Encouraging Closing
Propagating plants like Fritillaria biflora is such a joy. It’s about connecting with your garden on a deeper level, understanding its cycles, and becoming a more confident grower. Be patient with these little bulbs; they’re working hard beneath the soil. Watch, wait, and enjoy the process. Soon enough, you’ll have even more of these enchanting bells gracing your garden beds. Happy propagating!
Resource:
https://identify.plantnet.org/k-world-flora/species/Fritillaria%20biflora%20Lindl./data