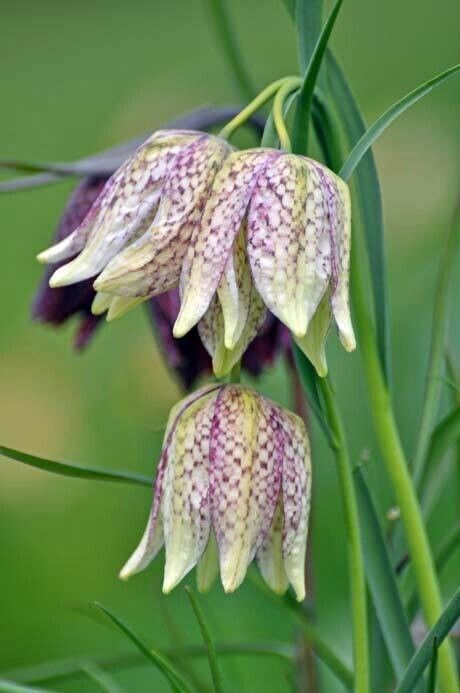
Hello fellow garden enthusiasts! Today, we’re diving into the fascinating world of Fritillaria agrestis, also known as the California fritillary. If you’ve ever seen these lovely, nodding bells gracing a wildflower meadow with their delicate beauty, you know exactly why they capture our hearts. Their unique charm is truly something special to behold, and the satisfaction of nurturing a new plant from scratch? Well, that’s a reward like no other!
Now, I won’t sugarcoat it – Fritillaria agrestis can be a bit of a diva to propagate for absolute beginners. It’s not quite as straightforward as a common houseplant. But don’t let that deter you! With a little patience and the right approach, you can absolutely bring more of these beauties into your garden. Consider this your friendly guide from someone who’s been there, dug that, and learned a thing or two along the way.
The Best Time to Start
The absolute sweet spot for propagating Fritillaria agrestis is right after the plant has finished flowering and the foliage begins to yellow and die back. This means the bulb is actively storing energy for its next growth cycle. Trying to propagate too early, while the leaves are still green and vibrant, is usually a recipe for disappointment. You want to catch it at that restful, yet energetic, stage. Think late spring to early summer, depending on your climate.
Supplies You’ll Need
Gathering your supplies beforehand makes the whole process smoother. Here’s what I recommend having on hand:
- Well-draining potting mix: A mix specifically for bulbs or succulents is ideal. I often amend regular potting soil with perlite and horticultural grit to ensure excellent drainage.
- Small pots or propagation trays: Clean, shallow containers work best.
- Sharp, sterilized pruning shears or a knife: For making clean cuts.
- Horticultural grit or coarse sand: For topping off pots and improving drainage.
- Labels and a marker: To keep track of what you’ve planted!
- Watering can or spray bottle: For gentle watering.
- Rooting hormone powder (optional): This can give a little boost, though fritillarias can often root without it.
Propagation Methods
Fritillaria agrestis primarily propagates through the division of its bulbs. It doesn’t typically produce offsets “daughter bulbs” in large numbers, making direct division the most reliable method.
Bulb Division:
- Digging Up Bulbs: Once the foliage has completely died back, you can carefully dig up the bulbs. Use a trowel or garden fork and gently loosen the soil around the plant. Try not to disturb the bulbs too much.
- Cleaning the Bulbs: Gently brush away excess soil. You’re looking for the main bulb and any smaller bulblets that have formed at its base. These bulblets are your new plants!
- Separating the Bulblets: If you find small bulblets attached, carefully twist or cut them away from the parent bulb. Make sure each bulblet has at least a tiny bit of basal plate (where the roots will grow from).
- Drying the Bulbs (Crucial Step!): This is vital for preventing rot. Place the separated bulbs in a cool, dry, and well-ventilated spot for a few days (or even a week) to allow the cut surfaces to callous over. Don’t let them dry out completely; you just want them to form a protective dry layer.
- Planting Your New Fritillarias: Fill your pots or trays with your well-draining potting mix. Plant the bulblets with the pointy end facing up, burying them about 1-2 inches deep, depending on their size. I like to top the pot with a layer of horticultural grit – it helps prevent the bulb from sitting in excess moisture and deters pests.
- Watering (Lightly!): Water very sparingly. You want the soil to be barely moist, not wet. Think of it as a gentle misting.
The “Secret Sauce” (Pro Tips)
Alright, here are a couple of tricks I’ve learned that can make a difference:
- Don’t Overwater, Ever: This is probably the biggest pitfall with fritillarias. They absolutely detest soggy feet. Err on the side of too dry rather than too wet, especially during their dormant period.
- Give Them a Cool Dormancy: While the bulbs are dormant and being dried, keeping them in a cool, dark place (like a garage or unheated shed) is very beneficial. This mimics their natural environment and helps them prepare for their next blooming season.
- Patience with Bulblet Size: Those tiny bulblets will take a couple of years to mature into flowering-sized bulbs. Don’t be discouraged if you don’t see blooms immediately. They need time to grow and store energy.
Aftercare & Troubleshooting
Once your bulblets are planted, place the pots in a place that mimics their natural growing conditions – typically bright light but avoid scorching direct sun until they start to show signs of growth.
- Watering: Continue to water sparingly. You’ll want to moisten the soil when it’s dry to the touch, but never let it become saturated. As soon as you see new shoots emerge, you can increase watering slightly, but still ensure excellent drainage.
- Signs of Failure: The most common culprit is rot. If you notice a mushy, dark bulb, it’s likely rotted due to too much moisture. Yellowing or wilting leaves on new growth can also indicate stress from improper watering or soil conditions.
- Transplanting: Once the bulblets have grown into substantial bulbs (which usually takes a year or two), you can transplant them into their permanent garden spot. Plant them at least 4-6 inches deep in well-draining soil, in a location that gets good sun.
A Little Encouraging Closing
Propagating Fritillaria agrestis might take a bit more finesse than some other plants, but the reward of seeing those beautiful bells eventually nod in your own garden is absolutely worth the effort. Remember to be patient with your new charges. Gardening is a journey, and every successful propagation is a triumph, big or small. Enjoy the process, learn from it, and happy growing!
Resource:
https://identify.plantnet.org/k-world-flora/species/Fritillaria%20agrestis%20Greene/data