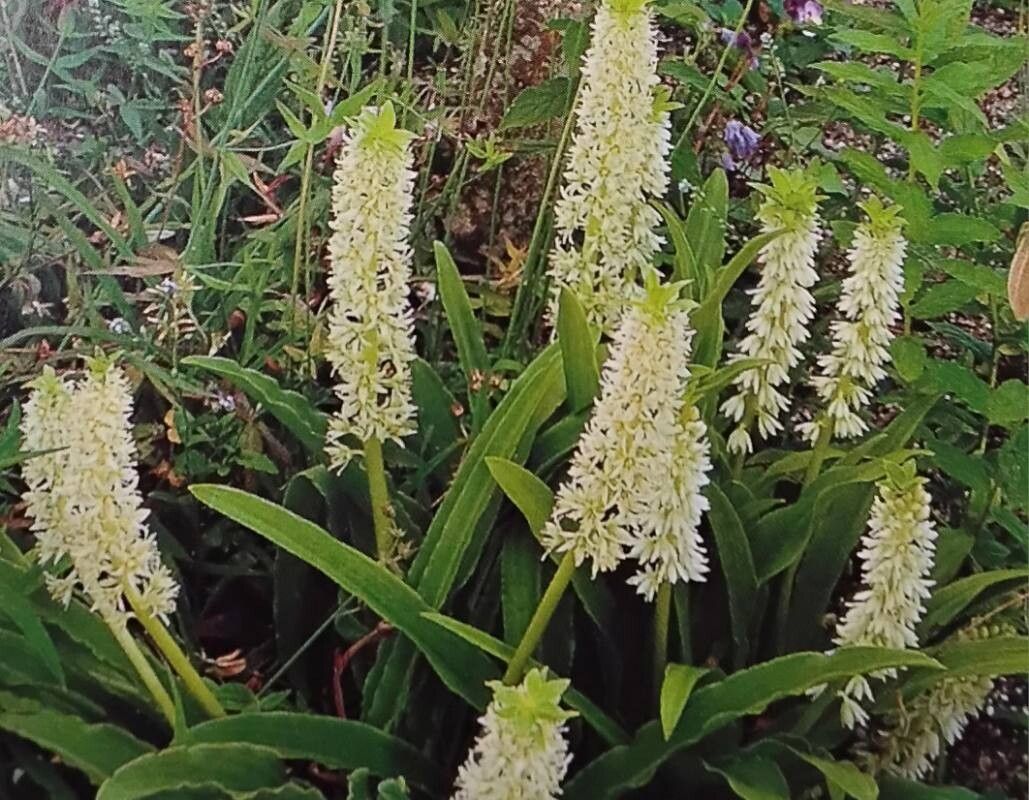
Hey there, fellow garden lovers! I’m so excited to talk to you today about one of my absolute favorite summer stars: Eucomis zambesiaca, or as I affectionately call them, the “Pineapple Lily.” Their quirky, upright flower spikes topped with a crown of little green bracts are just so much fun, aren’t they? And the best part? They smell amazing, a sweet, lightly spicy fragrance that really fills the evening air.
If you’ve got a Pineapple Lily or are tempted to get one, you’ll be thrilled to know that propagating them is quite doable! It’s a really rewarding way to multiply these beauties, and truthfully, it’s not an overly challenging task, even for those of you who are just getting your hands dirty.
The Best Time to Start
For Eucomis zambesiaca, the sweet spot for propagation is after the plant has finished flowering and the foliage starts to yellow and die back. This usually happens in late summer or early autumn. This is when the bulbs are storing energy and are in a good dormant-like state, making them more receptive to being divided or having pieces taken. You can also propagate from seed, but that takes much longer to get to flowering size.
Supplies You’ll Need
To give your Pineapple Lily cuttings or divisions the best shot, gather these handy items:
- Sharp, clean pruning shears or a trowel: For making clean cuts, which is always crucial.
- Well-draining potting mix: A mix designed for succulents or cacti works wonderfully, or you can blend some perlite or grit into your regular potting soil.
- Small pots or trays: With drainage holes, of course!
- Rooting hormone (optional but recommended for cuttings): This gives them a little boost.
- Newspaper or a clean surface: For handling the bulbs.
- Watering can or spray bottle: For gentle watering.
- Labels and a pen: To keep track of what’s what!
Propagation Methods
There are a couple of ways we can coax new Pineapple Lilies into existence from an existing one.
Division (The Easiest Way)
This is my go-to method because it’s straightforward and you’re essentially transplanting and multiplying at the same time.
- Gently extract the bulb: Once the foliage is mostly dead, carefully dig around the parent bulb. You want to lift the whole clump without damaging the bulb or any baby offsets attached.
- Gently tease apart offsets: Look for smaller bulbs, called offsets, that are attached to the main bulb. They might already have tiny roots. Gently twist or cut them away from the parent bulb with your clean shears. If an offset is quite large and has its own roots, all the better!
- Let them dry (optional but good for larger divisions): If you’ve taken larger chunks or offsets without many roots, let them sit in a dry, shady spot for a day or two. This allows any cut surfaces to callous over, which helps prevent rot.
- Plant them up: Fill your pots with your well-draining mix. Plant each offset or division so the top of the bulb is just at or slightly below the soil surface. Give them a light watering.
Leaf Propagation (A Little More Patience)
This method is a bit more experimental but can be very satisfying.
- Take healthy leaves: Choose a few strong, healthy leaves from the parent plant just as they are starting to mature, usually mid-growing season.
- Cut cleanly: Using your sharp shears, cut a leaf from the base of the plant as close to the bulb as possible. You want to include the entire leaf.
- Remove the base: Trim off the very bottom, fleshy part of the leaf where it connects to the bulb.
- Dip in rooting hormone: If you’re using rooting hormone, dip the cut end into it.
- Plant them: Insert the cut end of the leaf about an inch deep into your well-draining potting mix. You can plant several leaves in one pot, spaced a few inches apart.
- Water gently: Mist the surface of the soil lightly. You want it moist, but not soggy.
The “Secret Sauce” (Pro Tips)
Here are a couple of little tricks I’ve picked up over the years that seem to make all the difference for these guys.
- Don’t overwater the divisions: This is probably the most common mistake! Once divided and planted, give them a good drink, but then let the soil dry out significantly between waterings. They’re bulbs, they store water, and sitting in soggy soil is their worst enemy. Think “drought tolerant” once planted.
- Consider bottom heat for leaf cuttings: If you’re trying the leaf propagation method, placing the pots on a gentle heat mat designed for seedlings can really encourage root formation and speed things up. It mimics the warmth they’d find underground.
Aftercare & Troubleshooting
Once your new Pineapple Lilies are planted, treat them gently.
- Watering: Water sparingly at first for divisions. For leaf cuttings, mist them regularly to keep the soil slightly moist. As new growth appears on divisions, you can gradually increase watering to mimic the parent plant’s needs, always ensuring good drainage.
- Light: Keep them in a bright spot, but out of direct, harsh sunlight for the initial rooting period. Once they’re established and growing, they’ll love full sun.
- Signs of trouble: The biggest culprit is rot. If your division or cutting turns mushy and black, it’s usually a sign of too much moisture. Unfortunately, this is often fatal. If you see mealybugs, a quick wipe with a cotton swab dipped in rubbing alcohol usually does the trick.
A Encouraging Closing
Propagating Eucomis zambesiaca is a journey. You might not get every cutting to take, and that’s completely okay! Gardening is all about observation and a little bit of luck. Be patient, enjoy the process of nurturing these little bits of potential, and soon you’ll have even more Pineapple Lilies to fill your garden with their quirky charm and delightful scent. Happy gardening!
Resource:
https://identify.plantnet.org/k-world-flora/species/Eucomis%20zambesiaca%20Baker/data