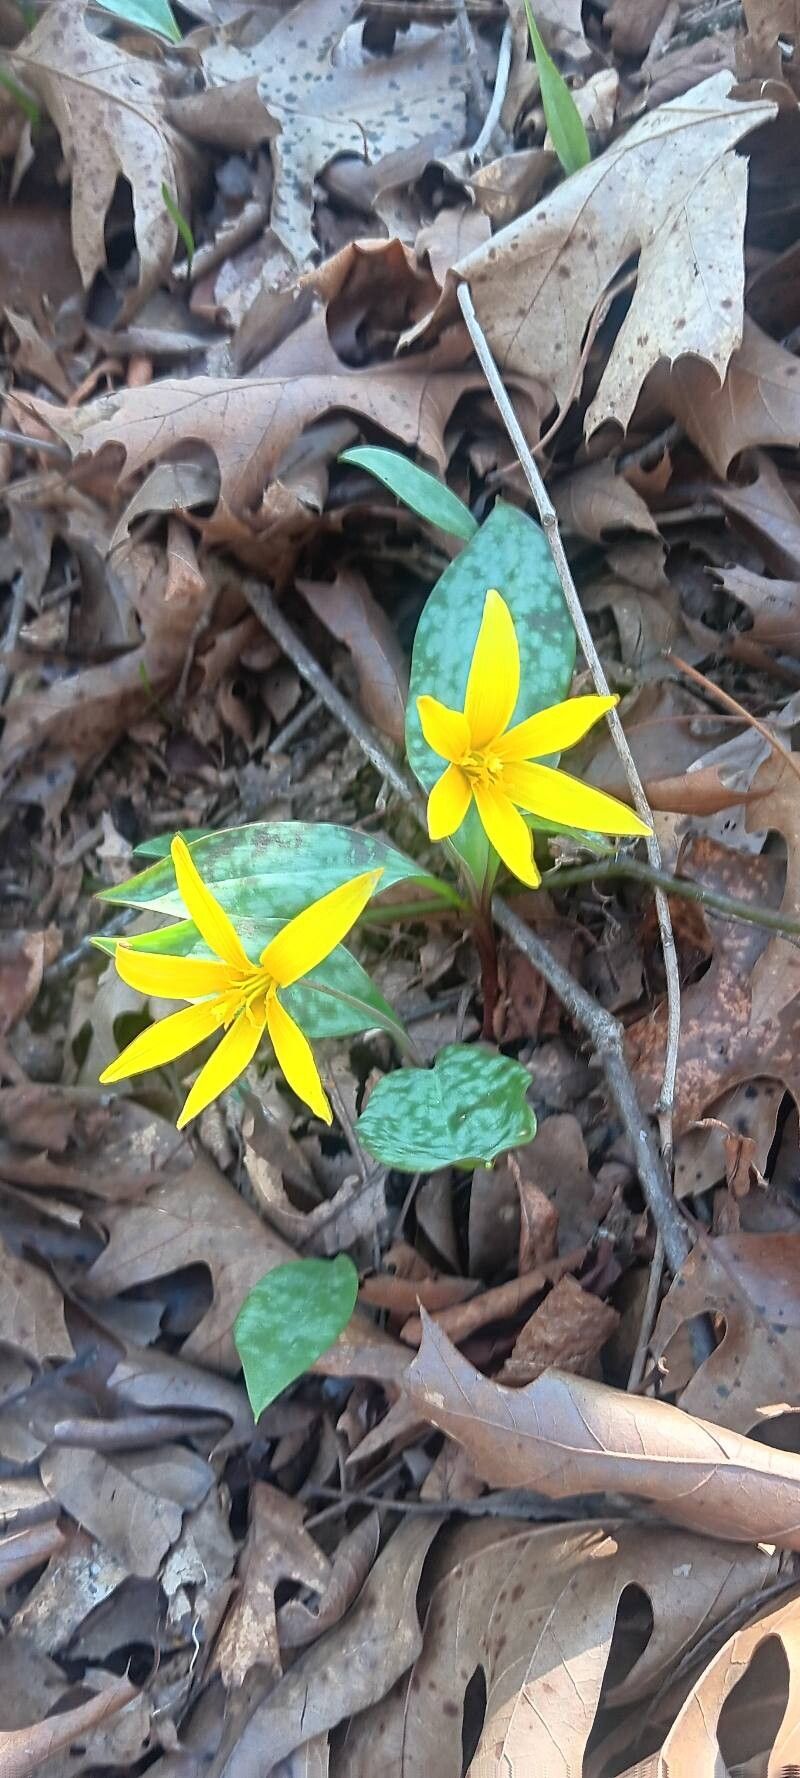
Hello fellow garden enthusiasts! Today, I want to chat about a truly special bloom: Erythronium rostratum, also known as the Beaked Yellow Violet or Yellow Dogtooth Violet. These woodland beauties are a treasure, with their delicate, nodding yellow flowers that herald the arrival of spring. Seeing them unfurl in my garden brings me so much joy, and sharing that joy by propagating them makes it even better.
Now, I won’t sugarcoat it – Erythronium rostratum isn’t the absolute easiest plant to propagate for a complete beginner. They need a bit of understanding and the right conditions. But with a little patience and these tips, I promise it’s a wonderfully rewarding journey!
The Best Time to Start
For Erythronium rostratum, the absolute best time to think about propagation is right after the plant has finished flowering and as its leaves begin to yellow and die back. This usually happens in late spring to early summer. This “dormant” or “dying back” phase is crucial because the plant is storing energy in its bulbs for the next season, making it more robust for the propagation process. Trying to propagate when the leaves are bright green and lush can shock the plant and yield disappointing results.
Supplies You’ll Need
Here’s what I gather before I get my hands dirty:
- A good quality, well-draining potting mix: I like a blend of approximately 2 parts peat moss or coco coir to 1 part perlite or horticultural grit. You want it airy!
- Sharp, clean pruning shears or a small garden knife: For careful division.
- Small pots or trays: Clean ones, about 4-6 inches deep. Drainage holes are a must!
- A watering can with a fine rose attachment: To avoid disturbing tiny roots.
- Perlite or horticultural grit: For top dressing and improving drainage.
- Optional: A rooting hormone powder (though often not strictly necessary for divisions).
Propagation Methods
The most reliable way to propagate Erythronium rostratum is through division. These plants produce offsets, which are like mini bulbs that grow attached to the main bulb.
- Locate your dormant plants: Gently dig around the area where your Erythronium was flowering. You’re looking for the main bulb and any smaller, attached bulbs. Be very gentle – the bulbs are quite delicate.
- Carefully separate the offsets: Using your clean pruning shears or knife, carefully cut or gently twist away any offsets that have their own root nubs. You want them to have at least a few roots attached. If an offset is tightly fused and doesn’t seem to have its own roots, it’s often best to leave it attached to the parent bulb.
- Allow offsets to callus: Once separated, lay the offsets out in a dry, shaded spot for a few hours, or even overnight. This allows the cut or broken surfaces to form a protective callus, which helps prevent rot when planted.
- Potting the offsets: Fill your clean pots with your well-draining potting mix. Plant each offset about 2-3 inches deep, with the pointed end (where the leaves will emerge) facing upwards.
- Water gently: Water the pots thoroughly but gently. You want the soil to be moist, but not waterlogged.
- Mulch them in: I like to add a thin layer of perlite or horticultural grit on top of the soil. This helps keep the surface cool and discourages fungal growth.
The “Secret Sauce” (Pro Tips)
- Don’t overwater newly planted divisions. This is probably the number one mistake people make. Wait until the top inch of soil feels dry before watering again. Remember, they are dormant and don’t need much!
- Mimic their natural habitat. Erythronium rostratum loves dappled shade and moist, but well-draining soil. Recreate this in their new pots by placing them in a shady spot and ensuring that water can escape easily.
- Be patient with flowering. It can take a year or two for a newly divided offset to gather enough energy to bloom. Don’t get discouraged if you don’t see flowers immediately! Just focus on healthy leaf growth first.
Aftercare & Troubleshooting
Once your offsets are potted, place them in a cool, shady location. They can stay in these pots over the summer, as long as the soil doesn’t completely dry out. You can even tuck them into a shady corner of your garden bed, mulched well.
The most common issue you might encounter is rot. If you notice a bulb becoming mushy and discolored, it’s likely due to too much moisture and poor drainage. Unfortunately, rot is usually fatal, so prevention through good soil and careful watering is key. If you see any signs of mold on the surface of the soil, increase air circulation and be sure not to water again until it’s dry.
A Encouraging Closing
Propagating Erythronium rostratum is a special kind of gardening. It’s about understanding a plant’s natural life cycle and giving it the best possible chance to thrive. Don’t be disheartened if some don’t make it; that’s part of the learning process. Each successful division is a victory, and soon you’ll have even more of those joyous yellow blooms to admire. Happy planting, and enjoy the magic!
Resource:
https://identify.plantnet.org/k-world-flora/species/Erythronium%20rostratum%20W.Wolf/data