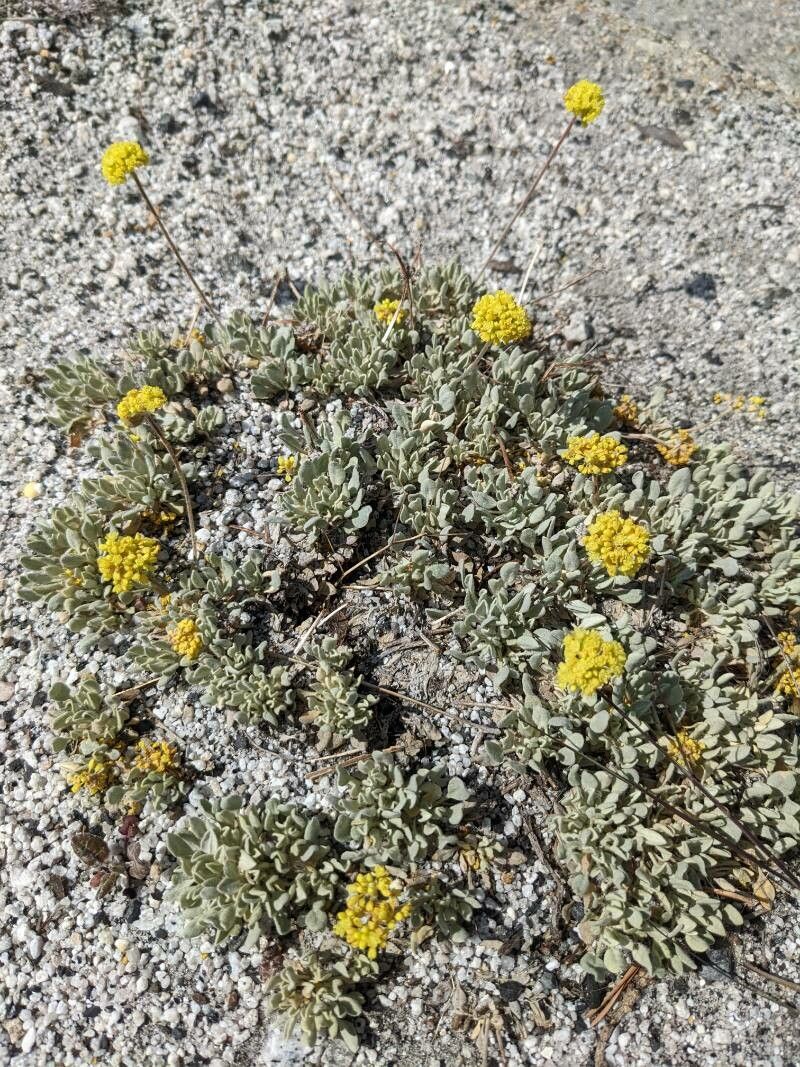
Oh, hello there! Pull up a chair. Let’s chat about a real gem in the garden: Eriogonum incanum, or as I affectionately call it, Silverleaf Buckwheat. If you’re looking for a plant that whispers elegance with its delicate silvery foliage and airy blooms, you’ve found your match. And the best part? Bringing more of this beauty into your life through propagation is incredibly rewarding. Don’t let the scientific name scare you; while it requires a little care, Eriogonum incanum is quite manageable, even for those of you just starting to get your hands dirty.
The Best Time to Start
For Eriogonum incanum, the sweet spot for propagation is definitely late spring to early summer. You want to catch it just as it’s hitting its stride for the season. Think about when the plant is actively growing, putting out fresh shoots, but before it’s getting too stressed by the peak heat of summer. This active growth phase means it has more energy to heal from cuttings or division and to start developing those precious roots.
Supplies You’ll Need
Gathering your tools beforehand makes the whole process much smoother. Here’s what I always have on hand:
- Sharp, clean pruning shears or a sharp knife: For making clean cuts.
- Rooting hormone powder or gel: This is a helpful boost, especially for cuttings.
- Well-draining potting mix: A coarse mix, perhaps a blend of perlite, coarse sand, and a little peat moss or coco coir. You want to avoid anything that holds too much moisture.
- Small pots or nursery trays: With drainage holes, of course!
- A spray bottle: For misting.
- Labels and a permanent marker: Trust me, you’ll thank me later for these!
- (Optional) A small heated propagation mat: For an extra edge on rooting.
Propagation Methods
Eriogonum incanum is a joy to propagate, and I find stem cuttings to be the most reliable and rewarding method. Division is also an option, but let’s focus on cuttings first.
Stem Cuttings
- Take Your Cuttings: In late spring or early summer, look for healthy, non-flowering shoots. You want to select stems that are somewhat firm but still flexible – think pencil-thick. Make a clean cut just below a leaf node (that’s where a leaf grows from the stem). Aim for cuttings that are about 4-6 inches long.
- Prepare the Cuttings: Gently remove the lower leaves from your cuttings, leaving just a few at the top. This prevents them from rotting once they’re in the soil. If you’re using rooting hormone, dip the cut end of each stem into the powder or gel, tapping off any excess.
- Plant Your Cuttings: Fill your small pots with your well-draining potting mix. Make a small hole in the center of the soil with your finger or a pencil. Insert the cut end of each cutting into the hole, ensuring the bottom leaf nodes are buried. Gently firm the soil around the stem.
- Water and Mist: Water the soil lightly to settle it around the cuttings. Then, lightly mist the foliage with your spray bottle.
Division
If you have a well-established clump of Eriogonum incanum, division is a great option.
- Dig Up the Plant: In early spring, before new growth really takes off, carefully dig up the entire plant with as much of its root ball intact as possible.
- Separate the Divisions: Gently shake away some of the excess soil. You can often carefully pull apart the clumps by hand. If the roots are tightly intertwined, you might need a clean, sharp knife or trowel to divide the root ball into sections, making sure each section has a good amount of roots and at least one or two healthy shoots.
- Replant: Immediately replant your divisions into prepared soil, either back in their original spot or into new containers with fresh potting mix. Water them in well.
The “Secret Sauce” (Pro Tips)
Now, for a few little tricks I’ve picked up over the years that really make a difference:
- Air Circulation is Key: When rooting cuttings, don’t cram too many together, and avoid covering them too tightly with plastic. Good airflow prevents fungal diseases and rot, which is so disheartening! A loose plastic bag tent over the pot works well, but make sure to open it daily for a few minutes.
- Watch the Water Level: If you ever decide to try water propagation (though I find it less successful with Eriogonum incanum than soil), ensure no leaves are submerged. Even a single leaf touching the water can invite rot and spoil the whole cutting.
- Bottom Heat is Your Friend: For the impatient among us (myself included!), a heated propagation mat placed underneath the pots can significantly speed up root development. It mimics the warmth of spring soil and encourages those roots to form.
Aftercare & Troubleshooting
Once you see signs of new growth—tiny little leaves or even just a slight resistance when you gently tug on a cutting—that’s a good indicator that roots are forming!
- Gradual Acclimation: When you notice roots, gradually introduce your new plants to more light and less humidity. If they were under a plastic tent, start by removing it for longer periods.
- Consistent Moisture: Keep the soil consistently lightly moist, but never soggy. Overwatering is the most common pitfall and can quickly lead to root rot, which you’ll often see as the stem turning mushy and black at the soil line, or the leaves turning yellow and wilting despite a wet soil.
- Patience with Growth: Don’t expect overnight miracles. Eriogonum incanum can be a bit slow to establish, so be patient! If a cutting doesn’t take, don’t fret. Just learn from it and try again.
A Little Encouragement
Propagating plants is a journey, a wonderful way to connect with nature’s incredible cycle of renewal. Be patient with your Eriogonum incanum, celebrate every little bit of progress, and most importantly, enjoy the process of bringing more of that silvery charm into your garden. Happy propagating!
Resource:
https://identify.plantnet.org/k-world-flora/species/Eriogonum%20incanum%20Torr.%20&%20A.Gray/data