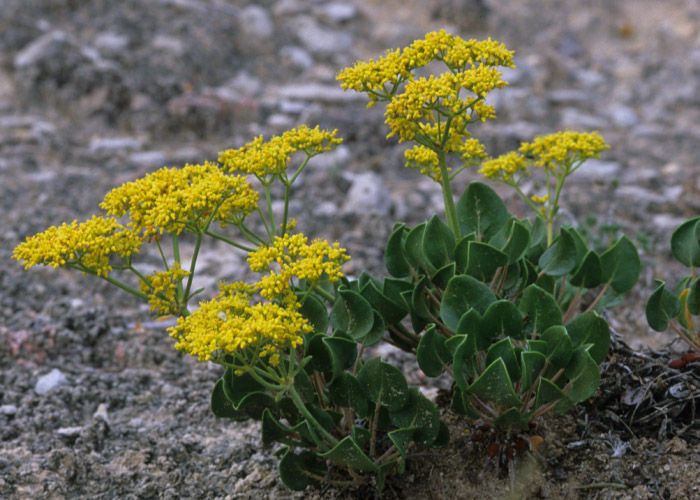
Hey there, fellow plant enthusiasts! I’m so excited to chat with you today about a gem in the garden: Eriogonum gypsophilum. You might know it by its common name, Gypsophila Buckwheat, and let me tell you, it’s a real showstopper. Its delicate, airy blooms are just divine, and they bring a touch of wild, natural beauty to any space. Plus, there’s something incredibly satisfying about coaxing new life from a parent plant. If you’re new to propagation, you might find Eriogonum gypsophilum a bit of a delightful challenge, but don’t let that deter you! With a little patience and these tips, you’ll be well on your way.
The Best Time to Start
For the highest success with propagating Eriogonum gypsophilum, I always aim for late spring to early summer. This is when the plant is actively growing and has plenty of energy to put into rooting. You’re looking for stems that are semi-hardwood – they’ve lost that brand-new, floppy greenness but aren’t yet tough and woody. Think of a pencil that’s starting to firm up.
Supplies You’ll Need
Before we get our hands dirty, let’s gather our tools. Think of it like preparing for a little garden science experiment!
- Sharp Pruning Shears or a Craft Knife: Cleanliness is key here to prevent disease.
- Rooting Hormone (Optional but Recommended): This gives your cuttings a little boost. Look for one that’s suitable for woody or semi-woody cuttings.
- Seed Starting Mix or a Well-Draining Potting Mix: I like to use a mix that’s roughly 50% perlite or coarse sand and 50% peat moss or coco coir. You want excellent drainage!
- Small Pots or Trays: Clean pots are essential. Small ones are fine for cuttings.
- Plastic Bags or a Propagator: To create a humid environment for your cuttings.
- Watering Can with a Fine Rose: For gentle watering.
- Labels and a Marker: Because we all forget what we planted where!
Propagation Methods
Eriogonum gypsophilum is most commonly and successfully propagated by stem cuttings. This method really allows you to capture the plant’s desirable traits.
Stem Cuttings:
- Take Your Cuttings: On a dry morning, select healthy, non-flowering stems. Use your sharp shears to cut pieces about 4-6 inches long. Make your cut just below a leaf node (where a leaf attaches to the stem). This is where the magic happens for root development.
- Prepare the Cuttings: Gently remove the lower leaves from the cutting, leaving just two or three at the top. If your cuttings have any flower buds, pinch them off. They’ll just drain energy from the cutting.
- Apply Rooting Hormone (Optional): If you’re using rooting hormone, dip the cut end into the powder or gel, tapping off any excess.
- Plant Your Cuttings: Fill your small pots with your well-draining mix. Make a small pilot hole in the soil with your finger or a pencil. Carefully insert the cut end of the stem into the hole, ensuring the nodes where you removed leaves are below the soil surface. I usually plant 2-3 cuttings per pot, giving them a little space.
- Water Gently: Water thoroughly until you see water draining from the bottom of the pot.
- Create Humidity: Cover the pot loosely with a plastic bag or place it in a propagator. Make sure the leaves don’t touch the plastic if possible. This creates a mini-greenhouse effect.
The “Secret Sauce” (Pro Tips)
Here are a few things I’ve learned over the years that can really make a difference:
- Don’t Be Afraid of a Clean Cut: A clean cut with sharp tools is non-negotiable. It minimizes the chance of disease entering the cutting. If your shears are a bit dull, grab a sharp knife.
- Bottom Heat is Your Friend: A heated propagator or a heat mat placed under your pots can significantly speed up root development, especially if your indoor temperatures are on the cooler side. It mimics the warmth of summer soil.
- Individuality Matters: Sometimes, it’s worth trying to root just one or two cuttings per pot. This reduces competition and ensures each cutting gets maximum resources. It also makes it easier to check for rooting without disturbing others.
Aftercare & Troubleshooting
Once your cuttings are planted, place them in a bright location with indirect sunlight. The key here is consistent moisture but not waterlogged soil. Check the soil moisture regularly; it should feel damp, like a wrung-out sponge.
You’ll know your cuttings have rooted when you can gently tug on them and feel resistance, or when you start to see new growth emerging from the top. This can take anywhere from 4 to 8 weeks, sometimes longer.
The most common problem you’ll encounter is rot. If you see your cutting turning mushy, black, or developing a moldy appearance, it’s likely rotted. This is usually due to too much moisture and poor air circulation. Unfortunately, there’s no coming back from rot, so you’ll need to discard it and start again, perhaps with drier soil or better ventilation.
Happy Planting!
Propagating Eriogonum gypsophilum is a rewarding journey. It requires a little patience, a touch of observation, and a lot of gentle care. Don’t get discouraged if your first attempt isn’t a runaway success. Every gardener has had cuttings that didn’t make it! Learn from it, adjust your approach, and try again. The joy of seeing that tiny new plant unfurl its first leaves is truly special. Happy propagating!
Resource: