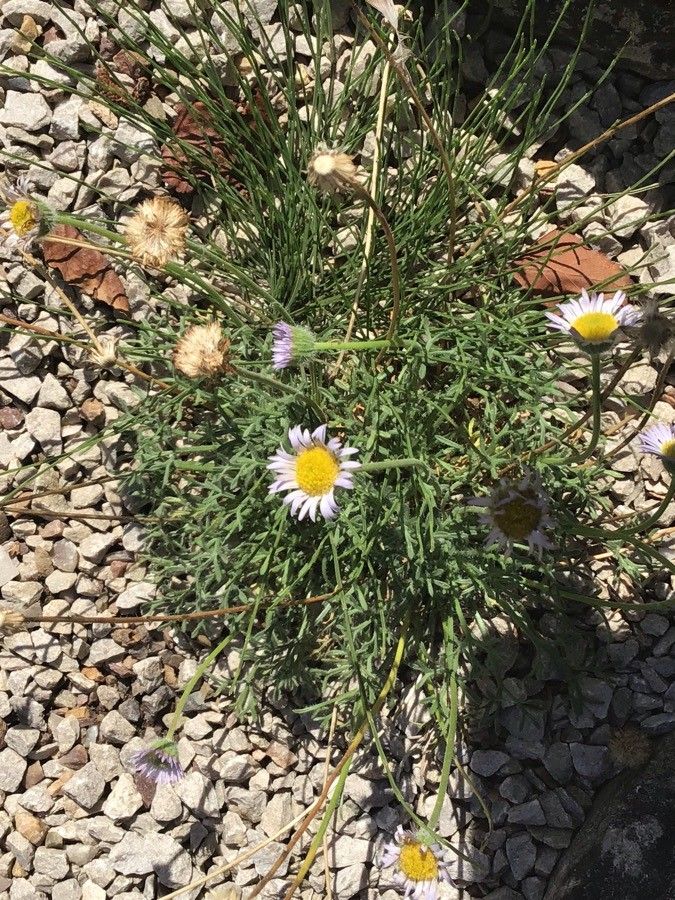
Hey there, fellow plant lovers! Today, we’re diving into the wonderful world of Erigeron compactus, often calledalpine daisy or dwarf fleabane. If you’ve ever fallen for those charming bursts of daisy-like flowers, usually in pretty shades of pink, purple, or white, then you’re in for a treat. Propagating this little gem is a fantastic way to fill your garden (or your friends’ gardens!) with more of its cheerful presence.
For beginners, I’d say propagating Erigeron compactus falls somewhere in the “moderately easy” category. It’s not completely foolproof from the get-go, but with a little attention and the right approach, you’ll be rewarded with a whole patch of these beauties in no time. It’s truly satisfying to watch a tiny cutting transform into a thriving plant; it feels like a bit of gardening magic!
The Best Time to Start
My sweet spot for propagating Erigeron compactus is late spring to early summer. This is when the plant is actively growing, and the stems are generally more pliable and ready to root. You want to catch it when it’s putting on a good show but before it gets too woody. Aim for cuttings taken from healthy, non-flowering stems.
Supplies You’ll Need
To get cracking, here’s what you’ll want to have on hand:
- Sharp pruning shears or a clean, sharp knife: For taking neat cuttings. Dull tools can crush the stems, making it harder for them to root.
- A well-draining potting mix: I like a mix of seedling starter soil and perlite (about a 50/50 blend). This helps prevent waterlogging.
- Small pots or seed trays: Clean ones are essential to avoid introducing diseases.
- Rooting hormone (optional but recommended): This stuff really gives your cuttings a boost. Look for a powder or gel specifically for stem cuttings.
- A mister or spray bottle: For keeping the cuttings moist without drowning them.
- Clear plastic bags or a propagation dome: To create a humid environment.
- Labels and a marker: So you don’t forget what you planted where!
Propagation Methods
Let’s get our hands dirty! I find stem cuttings to be the most reliable and successful method for Erigeron compactus.
- Take Your Cuttings: In late spring or early summer, locate a healthy stem that isn’t flowering. Using your clean shears or knife, make a cut just below a leaf node (where a leaf meets the stem). You’re aiming for cuttings that are about 3-4 inches long. Remove the lower leaves from the cutting, leaving just a few at the top.
- Prepare the Cutting: If you’re using rooting hormone, dip the cut end into the powder or gel. Tap off any excess.
- Plant Your Cuttings: Fill your small pots or trays with the prepared potting mix. Make a small hole in the center of the soil with your finger or a pencil. Gently insert the cut end of the stem into the hole, pushing it down so the leaf nodes you removed are buried. Firm the soil gently around the stem.
- Water and Cover: Water the soil lightly until it’s moist but not soggy. Then, cover the pot or tray with a clear plastic bag or place it under a propagation dome. This traps humidity, which is crucial for cuttings. Place the pots in a bright spot out of direct sunlight.
The “Secret Sauce”
Here are a couple of my seasoned gardener insights that often make all the difference:
- Don’t let those top leaves touch the water inside the humidity dome! If the leaves are constantly sitting in moisture, they’re more prone to rot than root. Trim them back slightly if needed to keep them suspended above the water level.
- Bottom heat is a game-changer. While not strictly necessary, placing your pots on a gentle heat mat can significantly speed up root development. Just a little bit of warmth encourages those roots to get going.
Aftercare & Troubleshooting
Once your cuttings are potted, the waiting game begins! Keep the soil consistently moist but never waterlogged. Check on them every few days. If the soil feels dry, give them a light watering or a misting.
You’ll know your cuttings have rooted when you see new growth appearing at the top, or when you gently tug on the stem and feel resistance. This usually takes anywhere from 2 to 6 weeks.
The most common problem you might encounter is rot. This usually happens if the soil is too wet or there isn’t enough air circulation. If you see your cutting turning black and mushy, sadly, it’s likely a goner. Discard it and try again, making sure your soil drains well and you’re not overwatering.
A Encouraging Closing
Don’t get discouraged if your first few attempts don’t take. Gardening is all about learning and adapting! Be patient, enjoy the process of nurturing these tiny bits of potential, and celebrate every success, no matter how small. Soon you’ll have a lovely little entourage of Erigeron compactus gracing your garden. Happy propagating!
Resource:
https://identify.plantnet.org/k-world-flora/species/Erigeron%20compactus%20S.F.Blake/data