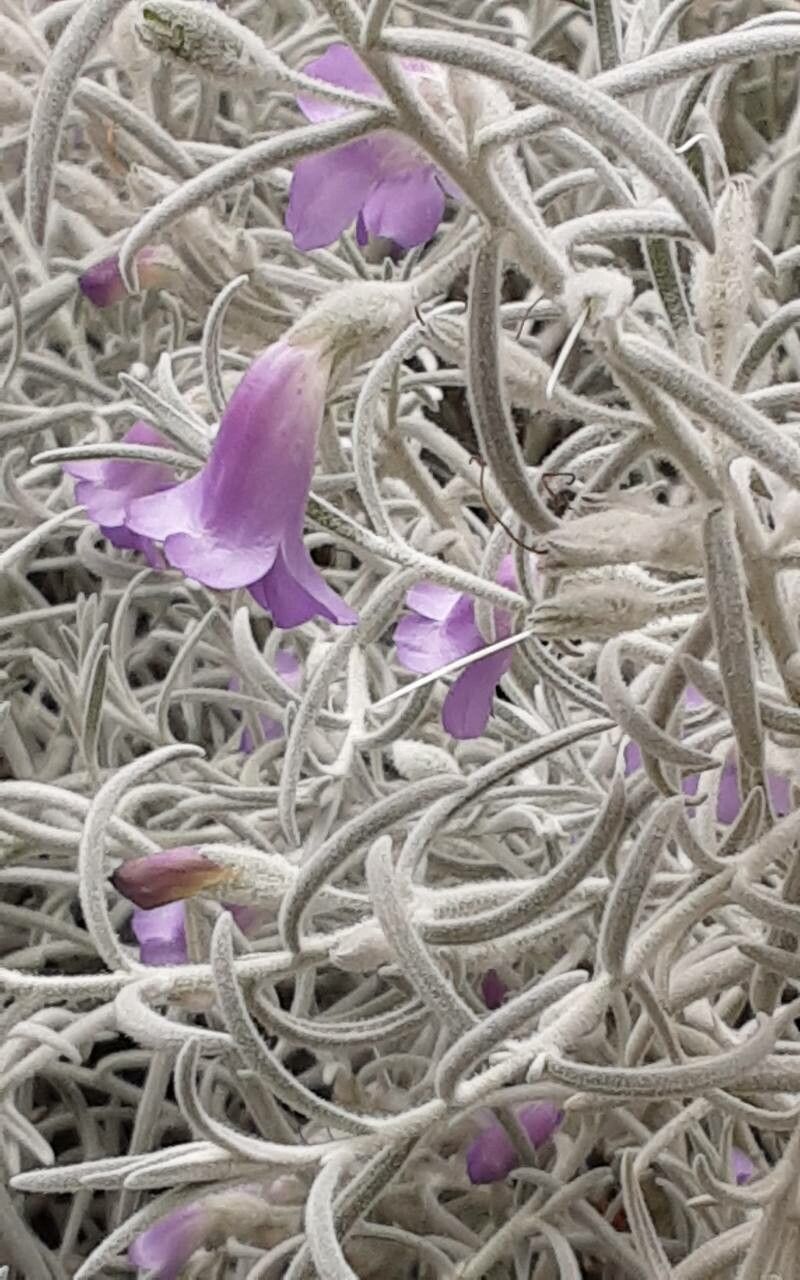
Hello dear gardeners! I’m so excited to chat with you today about a plant that has truly captured my heart, and hopefully, yours too: the Eremophila nivea, often called the “Snowbush” or “Emu Bush.” Isn’t she a beauty? Those silvery-white leaves, they just shimmer in the sunlight. Growing Eremophila nivea from scratch is such a wonderfully rewarding journey, a chance to truly understand this unique Australian native. Now, I won’t lie, it can be a tad finicky, but with a little patience and the right approach, you can absolutely succeed.
The Best Time to Start
For Eremophila nivea, spring is your golden ticket. When the plant is actively growing after the winter chill, it has the energy to produce lovely new shoots perfect for taking cuttings. Aim for semi-hardwood cuttings – that’s usually late spring to early summer. You’re looking for stems that have started to firm up but aren’t woody and old. Gently bend a new shoot; if it snaps cleanly, it’s probably a good candidate.
Supplies You’ll Need
Gathering your tools beforehand makes the whole process smoother. Here’s what I recommend:
- Sharp, clean pruning shears or a craft knife: For making those crucial, clean cuts.
- Rooting hormone powder: This is a real game-changer for Eremophila. Look for one with IBA.
- A well-draining potting mix: I often use a blend of coarse perlite, coarse river sand, and a bit of peat moss (or coco coir for a more sustainable option). Think “chunky” – we don’t want soggy feet for our cuttings!
- Small pots or propagation trays: Clean ones are essential to prevent disease.
- A clear plastic bag or propagator: To create a humid environment.
- Water mister or spray bottle: For gently misting.
- Labels and a permanent marker: To keep track of what you’ve planted!
Propagation Methods: Stem Cuttings
This is my go-to method for Eremophila nivea. It’s reliable and gives you the best chance of success.
- Take Your Cuttings: In the spring, select those healthy, semi-hardwood shoots. Cut a stem about 4-6 inches long, just below a leaf node (where a leaf attaches to the stem). Remove the lower leaves, leaving just a few at the very top. This reduces water loss.
- Prepare the Cuttings: Dip the cut end of the stem into rooting hormone powder, tapping off any excess. Don’t be shy with the hormone; it really helps!
- Plant Your Cuttings: Make a small hole in your prepared potting mix using a pencil or dowel. Insert the cutting, ensuring the leaf nodes where you removed leaves are below the soil surface. Gently firm the soil around the stem.
- Provide Humidity: Water the pots gently. Then, place each pot inside a clear plastic bag, or cover a tray of cuttings with a propagator lid. Ensure the leaves aren’t touching the plastic; you might need small stakes to hold it up. This creates a mini-greenhouse effect.
- Find the Right Spot: Place your cuttings in a bright spot but out of direct sunlight. Too much sun will scorch them.
The “Secret Sauce” (Pro Tips)
Here are a few tricks I’ve learned over the years that can make all the difference:
- Bottom Heat is Your Friend: Eremophila roots respond wonderfully to gentle warmth. If you have a heated propagator or a seedling heat mat, popping your pots on it can significantly speed up root development. Aim for around 70-75°F (21-24°C).
- Don’t Drench, Just Dampen: Overwatering is the quickest way to kill a cutting. The goal is to keep the potting mix consistently moist but not soggy. I like to check the moisture level by gently pressing the surface of the soil. If it feels dry, give it a light misting.
- Air Circulation is Key: While we want humidity, stagnant air can encourage fungal diseases. Open the propagator or bag for a few minutes each day to allow fresh air in. This will help prevent rot.
Aftercare & Troubleshooting
Be patient! Rooting can take anywhere from 4 to 8 weeks, sometimes longer. You’ll know they’ve taken when you see new leaf growth appearing at the top of the cutting. Gently tug on a cutting; if there’s resistance, roots have formed.
Once they’re rooted, gradually acclimatize them to normal conditions. Open the bag or propagator a little more each day for a week before removing it entirely. Continue to water carefully, allowing the top inch of soil to dry out between waterings.
Troubleshooting: The most common issue is stem rot. If you see the cutting turning black and mushy, it’s likely too much moisture and not enough air circulation. Unfortunately, once rot sets in, it’s usually too late. This is why good drainage, moderate watering, and ventilation are so crucial.
A Little Patience Goes a Long Way
So there you have it! Propagating Eremophila nivea might require a bit more attention than some easier plants, but the reward of nurturing these silver beauties from tiny cuttings is immense. Remember to be patient, observe your cuttings, and learn from each attempt. Happy gardening, everyone!
Resource:
https://identify.plantnet.org/k-world-flora/species/Eremophila%20nivea%20Chinnock/data