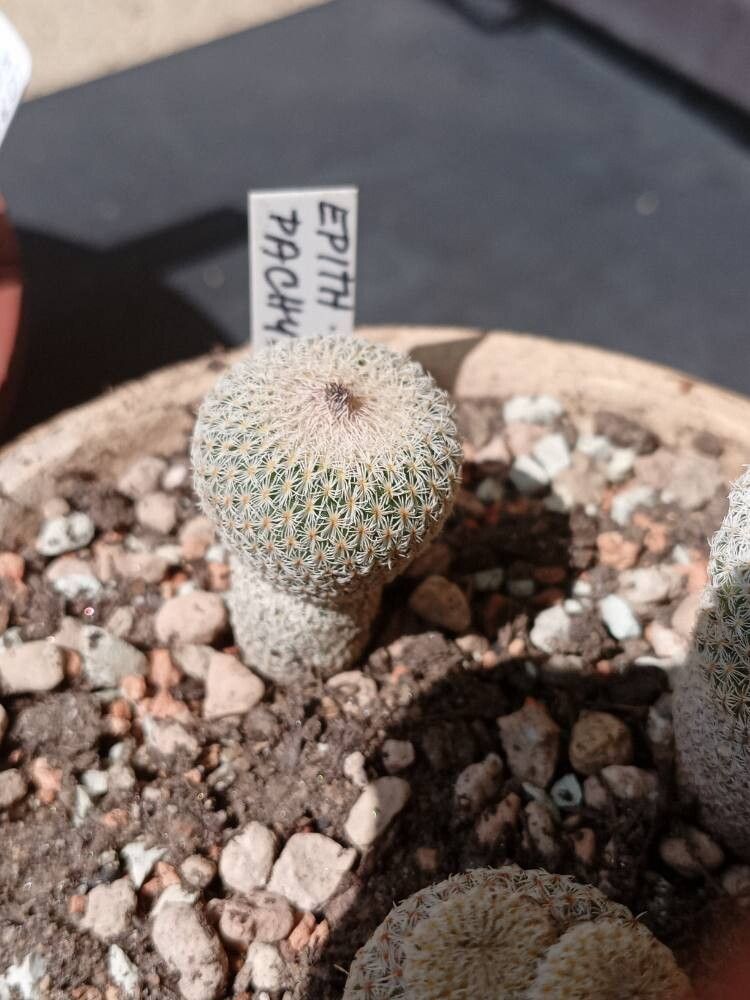
Hey there, fellow plant enthusiasts! I’m so excited to chat with you today about a truly charming little cactus: Epithelantha pachyrhiza. You might know it by its more common name, the Button Cactus. Just look at that plump, segmented body – it’s like a string of tiny pearls! There’s something incredibly satisfying about watching a new plant sprout and grow from a tiny piece of its parent. Propagating this little gem is a wonderful way to expand your collection or share the joy with friends. Now, I’ll be honest, for absolute beginners, Epithelantha pachyrhiza might be a slight challenge. It’s not the most forgiving cactus, but with a little attention and this guide, you’ll be well on your way to success.
The Best Time to Start
For Epithelantha pachyrhiza, the prime time to think about propagation is during its active growing season. This generally means spring and early summer. You’ll want to work with a healthy, well-established plant that has plenty of energy. Waiting until the weather warms up and the sun is reliably out is key. Trying to propagate when the plant is dormant, usually in the cooler months, is a recipe for disappointment.
Supplies You’ll Need
- Well-draining potting mix: A cactus and succulent mix is ideal. I often add a bit of perlite or pumice to mine for extra aeration.
- Sharp, clean pruning shears or a sharp knife: Sterilize them with rubbing alcohol to prevent introducing any nasties.
- Rooting hormone (optional but recommended): This can give your cuttings a helpful boost.
- Small pots or trays: With drainage holes, of course!
- Gloves: Even cacti have spines, right?
- A spray bottle: For gentle watering.
- A marker and labels: To keep track of your projects.
Propagation Methods
We’ll focus on the most reliable method for Epithelantha pachyrhiza: division. This cactus tends to produce offsets, those little baby plants that grow around the base of the main plant.
- Prepare the Parent Plant: Gently remove your Epithelantha pachyrhiza from its pot. It’s often easier to work with when the soil is slightly dry.
- Identify the Offsets: Look for small clumps or individual “buttons” that have started to grow from the base of the mature cactus.
- Carefully Separate: Using your clean pruning shears or knife, carefully cut or gently break away the offsets. Try to get a bit of root with each offset, if possible. If an offset looks like it’s already developing its own tiny roots, that’s fantastic!
- Let Them Callus: This is a crucial step for cacti! Place the separated offsets in a dry, well-ventilated area for 2-3 days. This allows the cut surfaces to dry and form a callus, which helps prevent rot when you plant them. Think of it like giving them a little plant bandage.
- Planting Time: Once callused, plant each offset in its own small pot filled with your well-draining cactus mix. You can press them gently into the soil, just enough to keep them upright. Don’t bury them too deeply.
- Initial Watering (Wait!): Do NOT water them immediately. Wait for about one week after planting. This gives any tiny, disturbed roots a chance to settle in.
The “Secret Sauce” (Pro Tips)
Okay, here’s what I’ve learned over the years that can really make a difference.
- Don’t Over-Pot: Resist the urge to put a tiny offset in a huge pot. They prefer to be a bit snug. Too much soil can hold too much moisture, and that’s the enemy of delicate new roots. Small pots are your friend here.
- Bottom Heat is Your Buddy: If you have a warm spot in your home, great! But for an extra boost, especially if it’s still a bit cool outside, consider placing your pots on a seedling heat mat. Just a gentle warmth from below can encourage root development significantly. You don’t want it too hot, just a nice, cozy temperature.
Aftercare & Troubleshooting
Once you’ve planted your offsets, patience is your greatest virtue.
- Watering New Growths: After that initial week-long wait, you can start watering. Water sparingly. Allow the soil to dry out completely between waterings. A good way to check is to stick your finger about an inch into the soil. If you feel any moisture, wait! A light misting with your spray bottle can also be helpful for the leaves themselves, but be careful not to let water sit in the crown.
- Light and Air: Place your newly potted offsets in a bright spot with indirect sunlight. Direct, hot sun can scorch them. Good air circulation is also important to help prevent fungal issues.
- Trouble Signs: The most common problem you’ll encounter is rot. If your offset starts to look mushy, discolored (often turning brown and soft), or just generally sad and wilting, it’s likely rot setting in. This is usually due to overwatering or, less commonly, disease. If you see signs of rot, act quickly. You might be able to salvage a healthy part of the offset by cutting it away from the rotted section, letting it callus, and trying again.
A Little Something More
Growing new plants is such a rewarding journey. It teaches you about the rhythms of nature and your own inner patience. Don’t get discouraged if the first attempt or two isn’t perfect. Every plant is a learning experience, and the joy of nurturing a new Epithelantha pachyrhiza from a tiny piece of its parent is truly special. Happy propagating!
Resource: