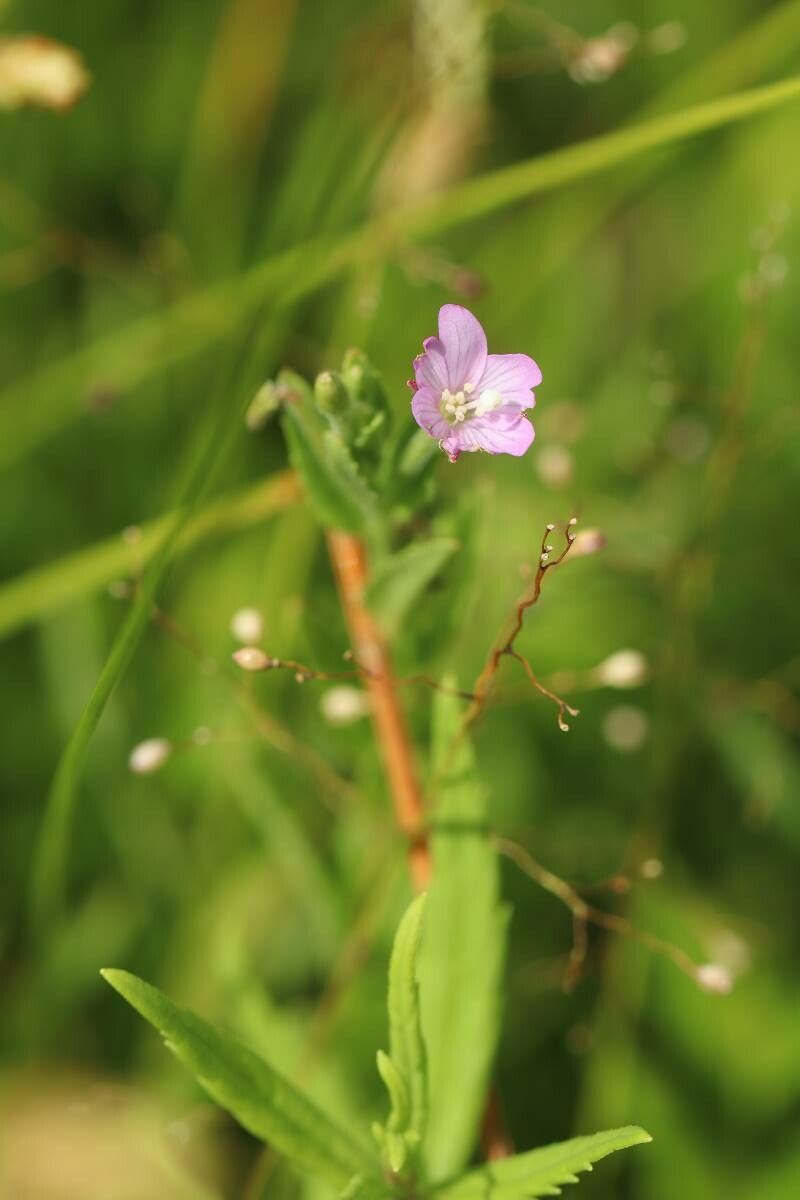
Oh, hello there! It’s so lovely to have you stop by my little corner of the digital garden. Today, we’re diving into the wonderful world of propagating Epilobium pyrricholophum, also known as the beautiful Ruby-winged Willowherb. If you’ve ever admired its delicate, almost ethereal pinkish-red flowers that dance on slender stems, you’re in for a treat. Growing new plants from existing ones is one of the most satisfying aspects of gardening for me, and the Ruby-winged Willowherb is a fantastic candidate to try your hand at. Honestly, it’s a pretty beginner-friendly plant to propagate, which makes it even more rewarding for newcomers!
The Best Time to Start
For the highest success rates with Epilobium pyrricholophum, I always recommend starting in the late spring or early summer. This is when the plant is in its active growing phase. You’ll have plenty of fresh, healthy stem growth to work with, and the warmer temperatures provide a lovely boost for rooting. Aim for stems that are neither brand new and flimsy nor old and woody. Think of that “just right” stage, like a firm but flexible pencil.
Supplies You’ll Need
Gathering your tools beforehand always makes the process smoother. Here’s what I usually have on hand:
- Sharp Pruning Shears or a Craft Knife: For clean cuts, which are crucial.
- Small Pots or a Propagation Tray: Clean and with drainage holes are a must.
- A Light, Well-Draining Potting Mix: I like a blend of equal parts seed starting mix, perlite, and a little coco coir. For this particular plant, a bit more perlite helps keep things airy.
- Rooting Hormone (Optional but Recommended): A good quality rooting powder or gel can really speed things up, especially for us impatient gardeners!
- A Watering Can or Spray Bottle: For gentle watering.
- Plastic Bags or a Mini Greenhouse: To maintain humidity around your cuttings.
Propagation Methods
The Ruby-winged Willowherb is quite adaptable, but my go-to method is stem cuttings. It’s reliable and gives you multiple baby plants from a single parent.
-
Taking the Cuttings: First, select a healthy stem on your established plant. Using your sharp pruning shears or craft knife, carefully make a cut just below a leaf node (that little bump where a leaf emerges from the stem). You’re aiming for cuttings that are about 4-6 inches long. Remove the lower leaves from your cutting, leaving just a few at the top. This prevents them from rotting in the soil.
-
Preparing the Cuttings: If you’re using rooting hormone, dip the cut end of each stem into it. Gently tap off any excess. This helps stimulate root growth.
-
Planting the Cuttings: Fill your clean pots or tray with your prepared potting mix. Make a small hole in the center of each pot with your finger or a pencil. Insert the cut end of your willowherb cutting into the hole, ensuring the leaf nodes that were buried are covered by the soil. Gently firm the soil around the base of the cutting.
-
Watering and Covering: Water the soil thoroughly but gently so it’s moist, not waterlogged. Now, it’s time to create that humid environment! You can either cover the pots with a clear plastic bag (making sure the leaves don’t touch the sides) or place them in a mini greenhouse. This traps moisture and mimics the conditions on a warm, humid day, which is perfect for rooting.
The “Secret Sauce” (Pro Tips)
Now for a couple of little tricks I’ve picked up over the years that often make all the difference:
- Bottom Heat is Your Friend: If you have a propagation mat or can place your tray on top of a gently warm surface (like a fridge or a seedling heat mat on a low setting), gentle warmth from below can significantly speed up root development. It mimics the soil temperature in summer and really encourages those roots to push out.
- Don’t Be Afraid to Mist: While you want to keep the soil moist, you don’t want to drown your delicate cuttings. Regularly misting the leaves inside the plastic cover will keep them plump and happy while they’re trying to root. It’s like giving them a little drink from above!
Aftercare & Troubleshooting
Once your cuttings have developed roots – and you’ll know this is happening when you gently tug on a stem and feel resistance, or if you see new leaf growth – it’s time for a little more involved care. Gradually acclimate your new plants to the open air by removing the plastic cover for increasingly longer periods over a few days. Once they’re used to it, you can water them more directly.
The most common issue you might encounter is rot. If you see your cuttings turning mushy or black, it’s usually a sign of too much moisture and not enough air circulation. Ensure your soil mix is draining well and try to avoid overwatering. If you do spot rot on a cutting, it’s best to discard it to prevent it from spreading to others. Don’t be discouraged; propagation is often a numbers game!
A Happy Ending
Watching those tiny roots emerge and then seeing a whole new plant unfurl its leaves is truly magical, isn’t it? Be patient with your little Ruby-winged Willowherb starts. Gardening, and especially propagation, is a journey of observation and learning. Enjoy the process, celebrate every success, and don’t be afraid to get your hands dirty. Happy propagating!
Resource: