Oh, hello there! Come on in, pull up a chair. I’ve got a fresh pot of coffee brewing, and I wanted to chat with you about one of my absolute favorite ferns: Elaphoglossum spatulatum.
Welcome to the Wonderful World of Elaphoglossum spatulatum!
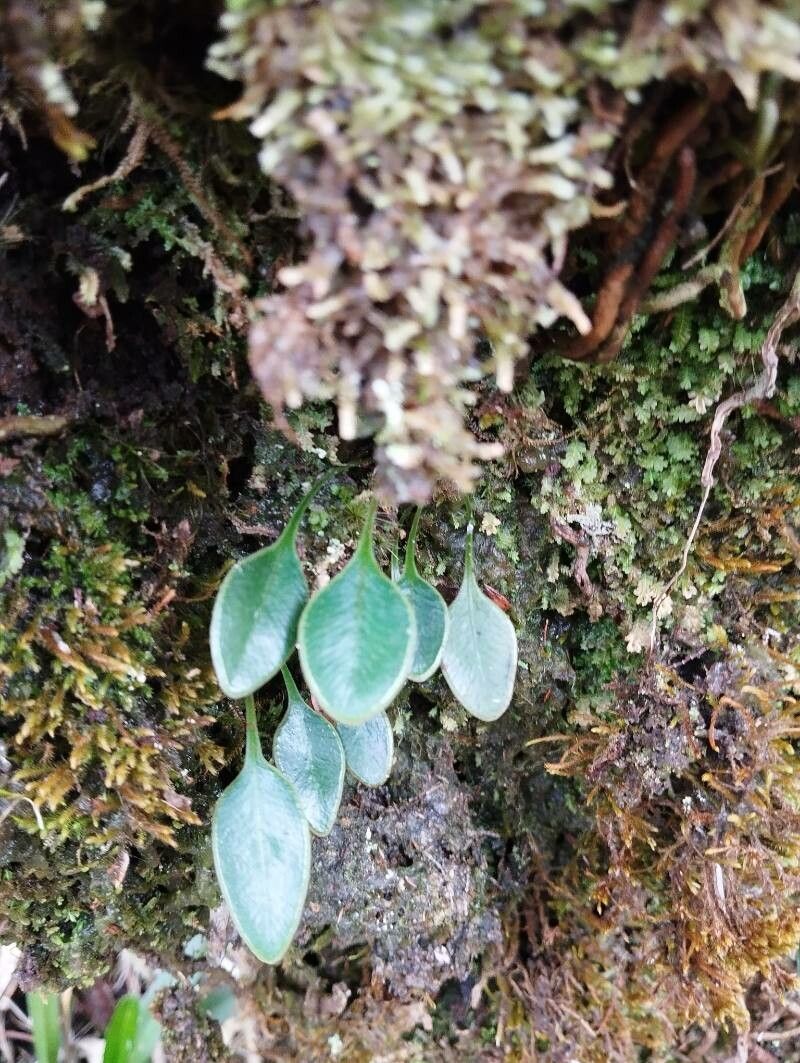
Isn’t this fern just stunning? Its glossy, spatulate leaves have this wonderful architectural quality that can really elevate any shady corner. For me, propagating it is one of those quiet joys. It’s like watching a tiny miracle unfold right before your eyes. Now, I’ll be honest, Elaphoglossum spatulatum isn’t exactly a “throw it in a pot and forget it” kind of plant when it comes to propagation. It requires a little more attention and a gentle touch. But that’s what makes it so rewarding when you finally see those first little roots emerge!
When Does the Magic Happen?
For the best shot at success with Elaphoglossum spatulatum, I’ve found that late spring to early summer is your golden window. This is when the plant is really hitting its stride, putting out fresh, vigorous growth. The days are longer, the temperatures are reliably warm (but not scorching!), and your cuttings will be full of life and ready to take root.
Your Propagation Toolkit
Before we dive in, let’s make sure you’ve got everything ready. A little preparation goes a long way!
- Sharp Pruning Shears or a Clean Knife: For making those precise cuts.
- Well-Draining Potting Mix: I swear by a blend of peat moss, perlite, and a bit of coarse sand. You want something that holds some moisture but drains like a sieve. Avoid anything too heavy.
- Small Pots or Seed Trays: Clean ones, please!
- Rooting Hormone (Optional but Recommended): A gentle hormone powder can give your cuttings a real boost.
- Plastic Bags or Clear Domes: To create that humid microclimate.
- Spray Bottle with Water: For misting.
- Labels or Plant Markers: Trust me, you’ll thank yourself later.
Let’s Get Our Hands Dirty: Propagation Methods
Elaphoglossum spatulatum can be a bit particular, but division is often the most straightforward and successful method.
Method 1: Division – The Surest Bet
This is where you’ll subdivide an existing, healthy plant into smaller sections.
- Gently Excavate: Carefully remove your mature Elaphoglossum spatulatum from its pot. You can gently tease away some of the old soil to get a better look at the root system.
- Identify Natural Breaks: Look for where the rhizomes (those thick, creeping stems that grow just below or on the soil surface) naturally divide. You’ll want to find sections that have both roots and at least one healthy frond.
- Make the Cut: Using your sharp shears or knife, carefully separate the divisions. Try to make clean cuts without crushing the roots. If you’re having trouble, a little gentle tugging might help identify the natural separation point.
- Pot Them Up: Pot each division into its own small pot filled with your prepared, well-draining potting mix. Make sure the rhizome is just at or slightly above the soil surface. Don’t bury the crown too deep.
- Water and Cover: Water the soil gently until it’s moist but not soggy. Then, place the pots inside a plastic bag or cover them with a clear dome to maintain high humidity.
Method 2: Rhizome Cuttings (More Advanced)
This method requires a bit more patience but can yield great results if you have a healthy, established plant.
- Locate a Healthy Rhizome: Look for a mature, healthy rhizome on your plant. It should be firm and free of any signs of rot.
- Make a Clean Cut: Using a sterilized knife or shears, cut a section of the rhizome about 2-3 inches long. Ensure the cutting has at least one plump bud or developing frond.
- Dip in Hormone (Optional): If you’re using rooting hormone, lightly dip the cut end of the rhizome into the powder.
- Plant the Cutting: Place the rhizome cutting onto the surface of your prepared, moist potting mix in a small pot. You can gently press it down slightly so it makes good contact, but don’t bury it. The bud or frond should be pointing upwards.
- Cover and Wait: Mist the surface lightly and cover the pot with a plastic bag or dome to keep humidity high.
The “Secret Sauce”: My Little Insider Tips
Over the years, I’ve learned a few tricks that seem to make all the difference.
- Don’t Overcrowd Your Potting Mix: This is crucial for ferns. If your mix is too dense, it suffocates the roots and encourages rot. I always tell people to aim for a mix that feels about as light as fluffy soil after a good rain. The perlite and sand really open things up.
- Bottom Heat is Your Friend: If you can, place your pots on a gentle seedling heat mat. Elaphoglossum spatulatum just loves the warmth. It encourages root development and speeds things up considerably. Not too hot, though – think a toasty warm bath, not a sauna!
- Humidity, Humidity, Humidity: These ferns are tropical darlings. They thrive in high humidity. That plastic bag or dome isn’t just for show; it’s creating a mini-greenhouse effect that prevents the cuttings from drying out before they can root.
Aftercare and When Things Go Sideways
Once your divisions or cuttings start showing signs of new growth—you should see little unfurling fronds after a few weeks to a couple of months—it’s time to gradually wean them off their high-humidity environment.
- Acclimatize Slowly: Over a week or two, gradually open the plastic bag or dome a little more each day. This helps the new plant adjust to lower humidity levels.
- Consistent Moisture: Keep the soil consistently moist but never waterlogged. The key is to feel the top inch of soil; if it feels dry, it’s time to water.
- Bright, Indirect Light: Place your new plants in a location that receives bright, indirect light. Direct sun will scorch those tender new leaves.
Now, what if things don’t go as planned? The most common culprit is rot. If you see your fronds turning brown and mushy, or the rhizome feels soft and slimy, it’s usually a sign of too much moisture and not enough air circulation. Prevention is key: use that well-draining soil, don’t overwater, and ensure good airflow once you start acclimating. If rot sets in, it’s often difficult to save the cutting, so it’s best to discard it and start again, learning from what happened.
Happy Growing!
Propagating Elaphoglossum spatulatum is a wonderful way to multiply your joy and share these beautiful plants. Be patient with yourself and with the plants. Gardening is a journey, and every attempt is a learning experience. Soon you’ll have a little fern nursery of your own! Now, tell me, are you ready to give it a go?
Resource: