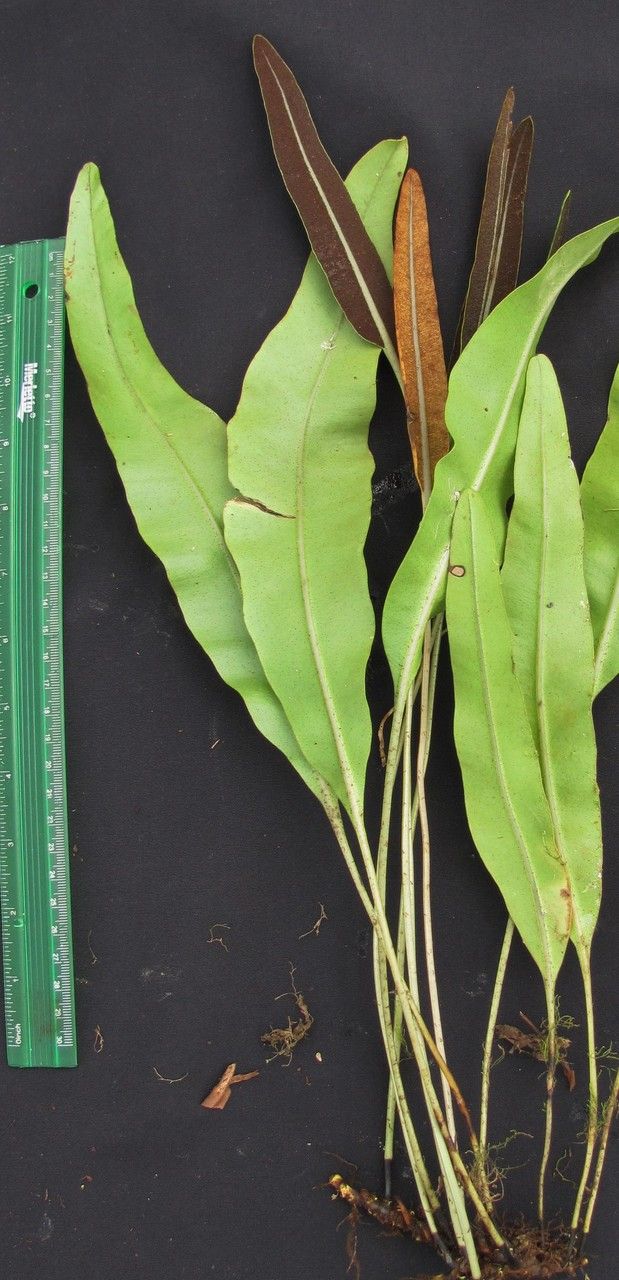
Hey there, fellow plant lovers! I’m so thrilled you’re interested in Elaphoglossum moranii. If you haven’t encountered this gem before, imagine lush, leathery, almost prehistoric-looking fronds unfurling. It’s a fern species that brings a wonderful sense of ancient wildness to any indoor jungle. Propagating it is a truly rewarding journey, like watching a tiny miracle unfold in your own hands. Now, I’ll be honest, Elaphoglossum moranii can be a bit of a diva when it comes to propagation. It’s not the easiest fern for a complete beginner, but with a little guidance and a sprinkle of patience, I promise you can achieve success!
The Best Time to Start
For the highest success rate, I always aim for the late spring or early summer. This is when the plant is actively growing and has the most energy reserves. You want to be working with healthy, vigorous material. Avoid trying to propagate from a plant that’s stressed, dry, or has just finished flowering (though Elaphoglossums don’t flower in the traditional sense, they have reproductive cycles). Think of it as tapping into nature’s peak performance.
Supplies You’ll Need
Here’s what I gather before I get my hands dirty:
- Sterilized pruning shears or a sharp knife: Cleanliness is key to preventing disease.
- Well-draining potting mix: I like a special fern mix, typically peat moss, perlite, and a bit of orchid bark. You can also make your own!
- Small pots or propagation trays: Clean and with drainage holes, of course.
- Rooting hormone powder (optional but recommended): This gives your cuttings a little boost.
- Clear plastic bags or a propagation dome: To create a humid environment.
- Watering can or spray bottle: For gentle watering.
- Optional: Heat mat: For bottom warmth, which can really speed things up for some ferns.
Propagation Methods
Elaphoglossum moranii is most commonly propagated through division and sometimes from spore, though spore propagation is a much more advanced and patient endeavor. For most home growers, division is your best bet.
Division
This is my go-to method for Elaphoglossum moranii. Ferns, as they mature, often develop multiple crowns or rhizomes that are close together. Division is simply separating these into individual plants.
- Gently remove the parent plant from its pot. Be as careful as you can with the root ball.
- Inspect the root system. You’re looking for natural separation points. You might see where new rhizomes are starting to sprout from the main one.
- Carefully separate the rhizomes. You can use your fingers to gently tease them apart. If they are very tightly joined, you might need to use your sterilized knife or shears to make a clean cut. Ensure each division has at least a couple of healthy-looking fronds and a good amount of root.
- Pot up the divisions. Use your sterilized pots and well-draining fern mix. Plant each division so the top of the rhizome is just at or slightly below the soil surface.
- Water thoroughly but gently. You don’t want to disturb the roots too much.
The “Secret Sauce” (Pro Tips)
These are little tricks I’ve learned over the years that make a difference:
- Don’t overwater after division. While ferns love humidity, soggy soil is the quickest way to rot those precious new divisions. Let the top inch of soil dry out slightly between waterings.
- Mimic their native habitat’s humidity. These ferns come from tropical, humid environments. Covering your divisions with a plastic bag or a propagation dome is crucial. Open it up for a few minutes each day to allow for air circulation and prevent fungal issues. That constant, moist air is like a spa treatment for them.
- Consider bottom heat. If you’re struggling with sluggish root development, a gentle bottom heat from a propagation mat can provide the consistent warmth these tropical plants crave. It really encourages root growth.
Aftercare & Troubleshooting
Once you’ve potted up your divisions and they’re settled, treat them like you would a mature Elaphoglossum moranii, but with a bit more tenderness. Keep them in bright, indirect light. Avoid direct sun at all costs; it will scorch those delicate new fronds. Continue to maintain high humidity.
Keep an eye out for signs of trouble. The most common culprit is rot, which usually comes from overwatering. If you see fronds turning mushy and black at the base, it’s a bad sign. Don’t despair if this happens! Remove the affected parts immediately and reassess your watering schedule. Another issue can be drying out, where fronds become crispy and brown. This usually indicates not enough humidity or too much light.
A Little Encouragement
Propagating plants is a journey, not a race. Some divisions will take off right away, while others might need a little more time to find their footing. Be patient with your Elaphoglossum moranii. Observe them closely, adjust your care as needed, and most importantly, enjoy watching these beautiful ferns multiply. Happy propagating!
Resource:
https://identify.plantnet.org/k-world-flora/species/Elaphoglossum%20moranii%20Mickel/data