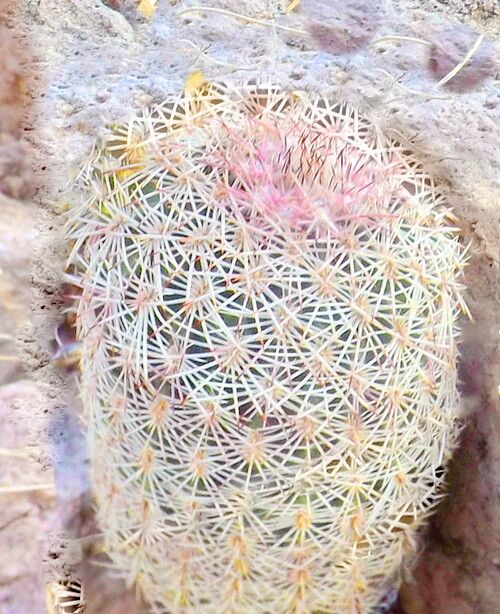
Hello there, fellow plant enthusiasts! Today, we’re diving into the charming world of Echinocereus pectinatus, often called the Hedgehog Cactus. Trust me, this little spiny marvel is a delight for any cactus lover. Its dense, vibrant spines, often in beautiful shades of pink, white, or even lavender, make it look like a miniature, huggable pincushion. Propagating it is incredibly rewarding. You get to experience the thrill of coaxing new life into being and, before you know it, you’ll have a small army of these beauties to admire or share. For those of you just starting out, I’d say propagating Echinocereus pectinatus is moderately easy, but with a few tips, you’ll be a pro in no time!
The Best Time to Start
The absolute best time to get your propagation underway is during the active growing season. For most Echinocereus species, this means late spring through early summer. You’ll know it’s the right time when the plant is actively putting out new growth and feels firm and healthy. Avoid propagating when the plant is dormant, usually in the cooler, darker months.
Supplies You’ll Need
Before we dig in, let’s gather our tools. Having everything ready makes the process so much smoother.
- Sharp, sterile knife or pruning shears: To make clean cuts.
- Cactus and succulent potting mix: A gritty, well-draining blend is crucial to prevent rot. You can also make your own with equal parts potting soil, perlite, and coarse sand.
- Small pots or propagation trays: With drainage holes, of course!
- Rooting hormone (optional but helpful): Especially for stem cuttings. Look for one formulated for cacti and succulents.
- Gloves: To protect your hands from those prickly spines!
- Newspaper or cardboard: To handle the cactus without getting pricked.
- Watering can or spray bottle: For gentle watering.
Propagation Methods
Echinocereus pectinatus is most commonly propagated through stem cuttings or by dividing offsets (pups) that grow from the base of the mother plant.
Stem Cuttings
This is how I’ve had the most success!
- The Cut: Choose a healthy stem section that has at least a few inches of growth. Using your sterilized knife or shears, make a clean cut just above an areole (the little fuzzy spot where spines grow).
- Callusing: This is a critical step! You absolutely must let the cut end dry out and form a callus. Place the cutting on a dry surface in a well-ventilated, bright spot (but out of direct, harsh sun) for at least a week, sometimes up to two weeks. You’ll see the cut end turn leathery and dry. This prevents rot when you plant it.
- Planting: Once callused, you can gently insert the callused end about 1-2 inches deep into your prepared cactus mix. You can use a chopstick to make a small hole to avoid damaging the delicate callused end. Don’t water immediately! Wait a few more days.
- Rooting: Place the pot in a bright location with indirect light, and start watering very sparingly – just enough to moisten the soil surface every week or two. Patience is key here.
Division of Offsets (Pups)
If your Echinocereus pectinatus has produced little offsets around its base, this is the easiest method!
- Careful Removal: Gently dig around the base of the mother plant to expose the offsets. Using your sterilized knife, carefully cut or twist the pup away from the main stem, making sure it has some small roots attached if possible.
- Callusing (Again!): Just like with stem cuttings, the cut end of the pup needs to callus over. Place it in a dry, well-ventilated spot for several days to a week until the wound has sealed.
- Planting: Once callused, plant the offset in its own pot filled with cactus mix, similar to how you planted the stem cuttings.
The “Secret Sauce” (Pro Tips)
Here are a few tricks I’ve learned over the years that really boost your chances of success:
- Bottom Heat is Your Friend: For stem cuttings especially, placing the pot on a gentle seedling heat mat can significantly speed up root development. It mimics the warmth of summer soil.
- Don’t Overwater, Ever: This is probably the biggest pitfall for beginners with cacti. When you think you should water, wait another day or two. The soil should be completely dry before you water again.
- Handle with Care: When moving your cuttings or pups, use folded newspaper or cardboard to cradle them. It’s much easier than trying to grab those spines!
Aftercare & Troubleshooting
Once you see signs of new growth – tiny buds or a slight increase in stem plumpness – you know your Echinocereus is happy! Continue with infrequent, thorough watering during the growing season, and reduce watering significantly in winter.
The most common issue you’ll face is rot. If you see a cutting or pup turning mushy, brown, and collapsing, it’s usually a sign of too much moisture and poor airflow. Sad, but it happens. If you catch it early, you might be able to cut away the rotted portion with your clean knife and try to let the healthy part callus and re-root. However, sometimes, it’s best to just start again with fresh cuttings.
A Encouraging Closing
Propagating Echinocereus pectinatus is a wonderfully rewarding journey. It requires patience and a keen eye for its needs, but the success you’ll feel when your new little cacti start to grow is just incredible. So, gather your supplies, embrace the prickles, and enjoy the slow, beautiful process of bringing more of these spiky treasures into your life. Happy propagating!
Resource: