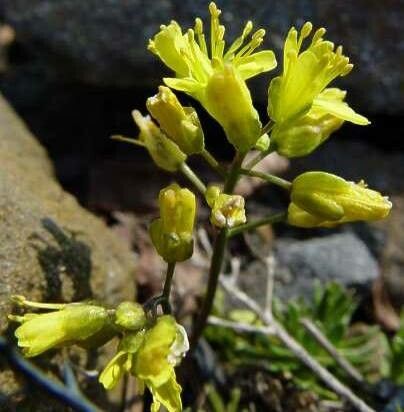
Oh, the joy of multiplying your favorite plants! Today, we’re diving into the wonderful world of propagating Draba paysonii. This little gem, with its delicate white blooms that resemble tiny stars, is an absolute delight in any rock garden or alpine collection. Seeing those fuzzy rosettes multiply feels like bottling a little bit of sunshine. Now, I’ll be honest, while Draba paysonii isn’t the most finicky plant out there, it does have a few quirks that can make propagation a tad more challenging for absolute beginners. But don’t let that deter you! With a little patience and these steps, you’ll be well on your way to a whole garden of these charming alpine beauties.
The Best Time to Start
For Draba paysonii, when you try to take cuttings, late spring to early summer is generally your sweet spot. This is when the plant is actively growing, and the new stems are firm enough to handle but still pliable. You want to avoid taking cuttings from old, woody growth or during the extreme heat of mid-summer. If you’re thinking about dividing, early spring, just as new growth begins to emerge, is ideal. This gives the divisions plenty of time to establish before the warmer weather arrives.
Supplies You’ll Need
Here’s a little kit that will help you get started:
- Sharp, clean pruning shears or a sharp knife: Essential for making clean cuts.
- Rooting hormone (optional but recommended): Helps speed up root development. Look for one specifically for cuttings.
- Well-draining potting mix: I like to use a mix of coarse sand, perlite, and a small amount of peat moss. You can also find excellent pre-made cactus and succulent mixes.
- Small pots or trays: Clean ones are a must!
- Watering can with a fine spray or mister: To avoid disturbing your tender cuttings.
- Plastic bags or propagation dome: To create a humid environment.
- Labels and a pen: For keeping track of what you’ve planted.
- A sandy, gritty soil mix for divisions: Similar to the potting mix but may have a higher proportion of sand.
Propagation Methods
Let’s get our hands dirty!
Stem Cuttings
This is my go-to for multiplying Draba paysonii.
- Select and cut: Choose a healthy, non-flowering stem that’s about 2-3 inches long. Make a clean cut just below a leaf node (where the leaves attach to the stem).
- Prepare the cutting: Gently remove the lower leaves from the cutting. This prevents them from rotting once planted.
- Apply rooting hormone (optional): Dip the cut end of the stem into rooting hormone, tapping off any excess.
- Plant your cutting: Make a small hole in your well-draining potting mix with a pencil or your finger. Insert the cutting into the hole, gently firming the soil around it.
- Water lightly: Water the soil just enough to settle it around the cutting.
- Create humidity: Cover the pot with a plastic bag or place it under a propagation dome. Ensure the leaves don’t touch the sides of the bag if possible, as this can lead to rot.
- Provide bright, indirect light: Place your cuttings in a spot that gets plenty of light but no direct sun, which can scorch them.
Division
This is a great way to propagate established clumps.
- Prepare your plant: Water the Draba paysonii the day before you plan to divide it. This will make the soil easier to work with.
- Gently unearth: Carefully lift the entire plant from its pot or garden bed.
- Separate the clumps: Using your fingers or a clean knife, gently pull or cut apart the root ball into smaller sections. Each section should have a good amount of roots attached.
- Replant: Pot up your divisions into their own containers filled with your well-draining potting mix, or replant them directly into the garden, spacing them appropriately.
- Water thoroughly: Water each division well to help the soil settle around the roots.
The “Secret Sauce” (Pro Tips)
Here are a couple of things I’ve learned over the years that really make a difference:
- Don’t overwater! This is perhaps the biggest downfall for many propagators. Draba paysonii, like most alpines, hates sitting in soggy soil. Let the potting mix dry out slightly between waterings. For cuttings, a light misting is often all they need until roots form.
- Bottom heat is your friend: If you’re struggling with stubborn cuttings or want to speed things up, placing your pots on a gentle heat mat can make a big difference. It encourages root development from the bottom up. Just make sure it’s set to a low temperature, not blazing hot!
- Air circulation is key: While you want humidity for cuttings, don’t let them sit in stagnant air. Occasionally open the plastic bag or propagation dome for a few minutes each day to allow for some air exchange. This helps prevent fungal issues.
Aftercare & Troubleshooting
Once you start seeing new growth or feel resistance when gently tugging on a cutting, that’s a good sign roots are forming!
- Gradually acclimate: Once roots are well established, slowly start to remove the plastic bag or dome over a few days to help your new plants adjust to normal humidity levels.
- Continue with bright, indirect light.
- Water as needed: Let the soil dry out a bit between waterings.
- Watch for rot: The most common problem you’ll face is rot, which looks like mushy, blackened stems or roots. This is almost always a sign of overwatering or poor drainage. If you spot it, try to remove the affected part immediately. If the whole cutting is gone, don’t get discouraged; try again with drier conditions! Brown, crispy leaves can indicate it’s too dry or getting too much direct sun.
A Little Encouragement
Propagating plants is a journey of learning and observation. Some cuttings might take immediately, while others might surprise you with their patience. Don’t be disheartened if some don’t make it. Each attempt is a lesson learned. So grab your tools, embrace the process, and get ready to share the beauty of Draba paysonii with even more of your garden! Happy propagating!
Resource:
https://identify.plantnet.org/k-world-flora/species/Draba%20paysonii%20J.F.Macbr./data