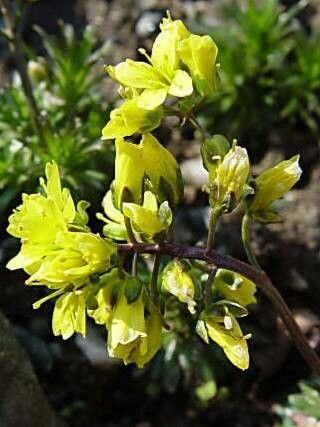
Hello fellow garden lovers! Today, we’re going to chat about a truly delightful little gem: Draba corrugata. If you’re a fan of those charming, often alpine-style plants with their delicate blooms and intriguing textures, then this one’s for you. Draba corrugata, with its often crinkled (corrugated, hence the name!) leaves and dainty flowers, brings a touch of understated elegance to any rock garden or container. The real joy, though, comes from multiplying this beauty. Propagating it yourself is incredibly rewarding, allowing you to fill your garden with more of its charm or share it with friends. Now, I wouldn’t say Draba corrugata is the absolute easiest plant for a brand-new newbie to propagate, but with a little care and attention, it’s certainly achievable and very satisfying. Don’t let that deter you!
The Best Time to Start
For Draba corrugata, I find late spring to early summer is absolutely your golden window. That’s when the plant is actively growing after its spring bloom, producing nice, firm, but not overly woody stems. You want to work with healthy, vigorous material. Starting too late in the season can mean your cuttings won’t have enough time to root before cooler weather sets in.
Supplies You’ll Need
Here’s what you’ll want to have on hand before you begin:
- Sharp Pruning Shears or a Clean Knife: For precise, clean cuts.
- Fast-Draining Potting Mix: A mix formulated for cacti and succulents, or a blend of equal parts perlite, coarse sand, and peat moss works beautifully. Draba hates soggy feet!
- Small Pots or Trays: With good drainage holes, of course.
- Rooting Hormone (Optional but Recommended): A powdered or liquid hormone can give your cuttings a helpful boost.
- Watering Can with a Fine Rose: For gentle watering.
- Labels: To keep track of what you’ve propagated and when.
- A Clear Plastic Bag or Dome: To create a humid microclimate for your cuttings.
Propagation Methods
I’ve had the most success with stem cuttings for Draba corrugata. It’s straightforward and yields excellent results if done correctly.
First, select a healthy, non-flowering stem from your mature plant. Look for a stem that’s about 3-4 inches long and feels semi-firm – not too soft and new, and not tough and woody. Using your sharp shears or knife, make a clean cut just below a leaf node. This is where rooting hormones are most likely to be produced.
Gently remove the lower leaves from the stem, leaving about two sets of leaves at the top. This helps prevent rot and directs the plant’s energy towards rooting.
If you’re using rooting hormone, dip the cut end of the stem into the hormone, tapping off any excess. Then, carefully insert the treated end into your prepared, lightly moistened potting mix. Make a small hole with a pencil or your finger to avoid rubbing off the hormone.
Now, water the potting mix gently using your fine-rose watering can. You want the soil to be moist, but not saturated.
To create that essential humid environment, I like to either cover the pot with a clear plastic bag (propping it up with a skewer or a few small stakes so it doesn’t touch the leaves) or place it under a clear propagation dome.
Keep the pot in a bright spot out of direct sunlight. Too much sun will scorch those vulnerable cuttings.
The “Secret Sauce” (Pro Tips)
Here are a couple of little tricks I’ve learned over the years that can really make a difference with Draba corrugata:
- Bottom Heat is Your Friend: I almost always place my cutting pots on a gentle warming mat. This provides consistent, mild heat to the base of the cuttings, encouraging root development. It doesn’t need to be hot, just a gentle warmth.
- Aerosol Misting, Not Soaking: Instead of watering from the top, which can dislodge cuttings or lead to rot, I often give the inside of the plastic bag or dome a light mist with water every few days. This maintains humidity without waterlogging the soil. Only water from the top if the soil feels genuinely dry. And resist the urge to peek too often – let them settle!
Aftercare & Troubleshooting
Once your cuttings have been planted, patience is key. It can take anywhere from 4 to 8 weeks, sometimes longer, for new roots to form. You’ll know they’re ready when you gently tug on a cutting and feel resistance, or better yet, when you see new leaf growth appearing!
Once rooted, gradually acclimate your new Draba to normal conditions. This means slowly removing the plastic bag or dome over a week or two. Once they’re ready, you can pot them up into their own small containers with that same well-draining soil.
The most common problem you’ll encounter is rot. If you see a cutting turning mushy and black, it’s usually a sign of too much moisture and not enough air circulation. Unfortunately, these usually can’t be saved. Yellowing leaves can also indicate issues, often too much or too little water, or not enough light. With Draba, it’s always better to err on the side of slightly dry than too wet.
A Little More Garden Joy
So there you have it! Propagating Draba corrugata is a wonderful way to expand your collection and connect with your plants on a deeper level. Don’t be discouraged if your first few attempts aren’t perfect. Gardening is a journey, and each cutting is a learning experience. Enjoy the process, celebrate the little triumphs, and soon you’ll have a whole troop of these charming plants to admire! Happy growing!
Resource:
https://identify.plantnet.org/k-world-flora/species/Draba%20corrugata%20S.Watson/data