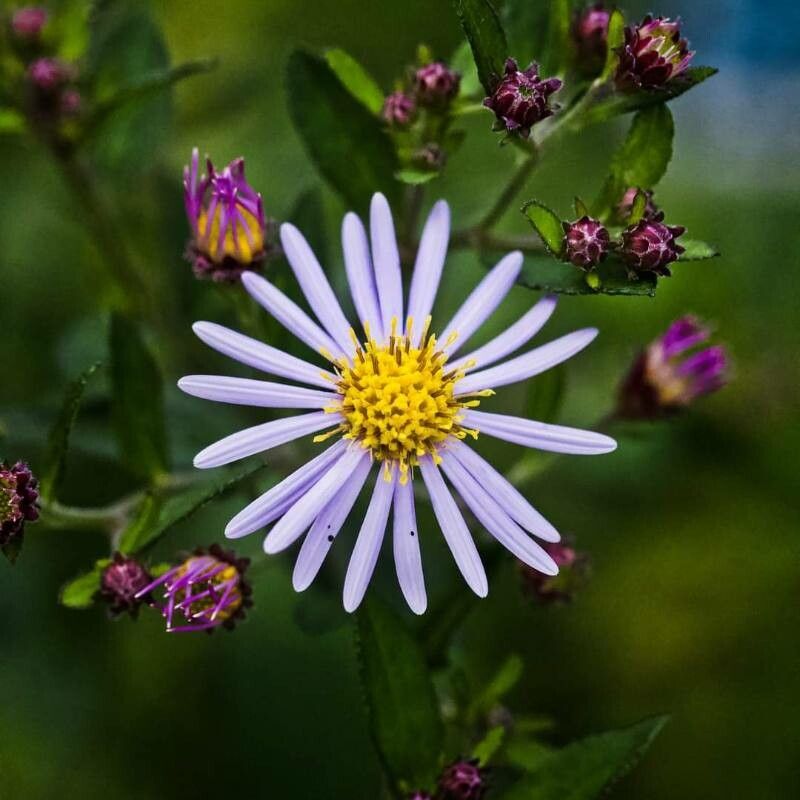
Oh, hello there! So, you’ve got your eye on Doellingeria ledophylla, haven’t you? That’s a fantastic choice. I remember the first time I saw one of these beauties unfurl its lovely foliage – it was a real moment of garden admiration. They bring such a delicate charm to any space, and the blooms are just… well, they’re pure joy in little aster-like clusters.
And the best part? Getting more of them is surprisingly rewarding. Now, if you’re just dipping your toes into the world of plant propagation, I’d say Doellingeria ledophylla is a moderately easy plant to work with. It won’t throw too many curveballs your way, which is always a plus when you’re starting out.
The Best Time to Start
When it comes to timing, I’ve found the late spring to early summer is your sweet spot for propagating Doellingeria ledophylla. Think about when the plant is actively growing, putting out those fresh, new shoots. That’s when they have the most energy and vitality to commit to becoming a new plant. Trying to do it too late in the season, when things are starting to wind down, can make things a bit trickier.
Supplies You’ll Need
Before we dive into the how-to, let’s make sure you have your toolkit ready. Here’s what I generally gather:
- Sharp Pruning Shears or a Knife: Cleanliness is key!
- Potting Mix: A good, well-draining mix is crucial. I often use a blend of peat moss, perlite, and a bit of compost. You can also buy specialized rooting mixes.
- Small Pots or Seed Trays: Make sure they have drainage holes.
- Rooting Hormone (Optional but Recommended): Helps speed up root development. I like to use the powdered form.
- Plastic Bags or a Clear Dome: To create a humid environment.
- Watering Can or Spray Bottle: For gentle watering.
- Labels: So you don’t forget what you’ve planted where!
Propagation Methods
The most reliable way I’ve found to multiply Doellingeria ledophylla is by stem cuttings and division. Let’s break them down.
Stem Cuttings: Capturing New Growth
First, grab those sharp pruning shears. You want to look for healthy, new stem growth, ideally about 4-6 inches long. Make a clean cut just below a leaf node – that’s the little bump where a leaf joins the stem.
Strip off the lower leaves, leaving just a couple at the very top. This helps the cutting focus its energy on rooting, not leaf production.
Now, dip the cut end into your rooting hormone, if you’re using it. Tap off any excess. Gently poke a hole in your prepared potting mix with your finger or a pencil, and insert the cutting. Firm the soil gently around the base to ensure good contact.
Water it in gently, and then cover the pot with a plastic bag or a clear dome to maintain humidity. Pop it somewhere bright but out of direct, harsh sunlight.
Division: When Your Plant is Ready for a Makeover
This method is fantastic for mature, well-established plants. The best time to divide is usually in early spring, just as new growth is starting.
Gently dig up the entire plant. Carefully separate the root ball into sections. You can do this by hand, or if it’s a tough root system, a clean spade or knife can help. Aim to make sure each section you divide has some healthy roots and at least one or two shoots.
Plant each division into its own pot with your fresh, well-draining potting mix. Water them well and treat them like new plants.
The “Secret Sauce” (Pro Tips)
Here are a couple of things I’ve learned that can make a real difference:
- Avoid Submerging Leaves: When you’re watering your stem cuttings, and especially if you’re experimenting with water propagation (which I find less reliable for this specific plant, but some do), make sure no leaves are touching the water. They’ll just rot and invite fungal issues.
- Bottom Heat is Your Friend: If you’re serious about speeding up root development for your cuttings, a little bit of gentle bottom heat can be a game-changer. A heating mat designed for seedlings can provide that consistent warmth that encourages roots to form more quickly. Just make sure it’s not too hot!
Aftercare & Troubleshooting
Once your cuttings have rooted (you’ll know when you see new leaf growth and a bit of resistance when you gently tug on them), it’s time for their next chapter. Gradually acclimate them to normal room humidity by opening the plastic bag or dome a little bit each day for a week. Then, you can remove it entirely. Continue to keep the soil evenly moist, but not waterlogged.
Now, trouble happens. The most common culprit with cuttings is rot. If you see your stem turning black or mushy at the base, that’s a sign of too much moisture and not enough air circulation. Sadly, it’s usually a goner, but don’t be discouraged! Just learn from it and try again. Another sign of trouble is if the leaves turn yellow and drop off, which can mean too much or too little water, or not enough light.
A Little Patience Goes a Long Way
Propagating plants is a journey, and a really wonderful one at that. It connects you to the rhythm of nature and, frankly, it’s incredibly satisfying to watch something you’ve nurtured grow into a new, thriving plant. Be patient with yourself and your new Doellingeria ledophylla babies. Enjoy the process, and before you know it, you’ll have a whole little collection! Happy gardening!
Resource: