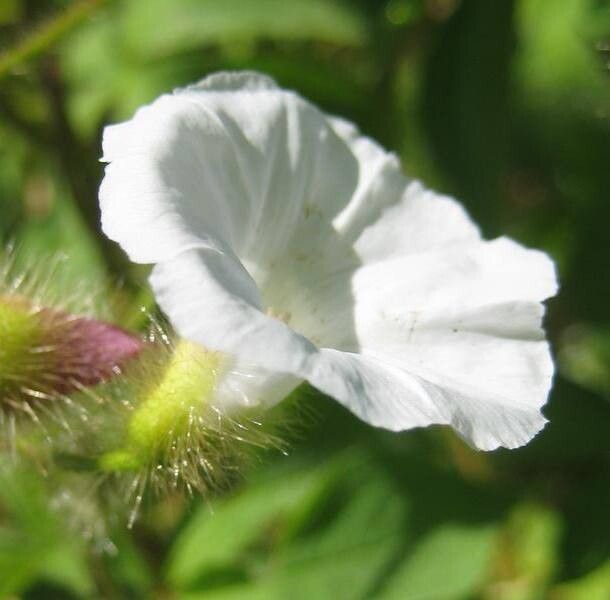
Hello fellow garden enthusiasts! I’m thrilled to chat with you today about a plant that’s really captured my heart over the years: Distimake aegyptius. If you’ve ever admired its unique foliage, perhaps its delicate, almost fuzzy leaves that seem to shimmer in the light, you’re in for a treat. Propagating this beauty is incredibly rewarding, and while it might seem a little daunting at first, I promise you, it’s a journey well worth taking. For beginners, I’d say it’s moderately easy with a little patience. Let’s dive in!
The Best Time to Start
Timing is everything in gardening, isn’t it? For Distimake aegyptius, your best bet is to start in the spring or early summer. This is when the plant is in its most active growth phase. The days are getting longer, the temperatures are warming up, and the plant has all the energy it needs to push out new roots. Trying to propagate when the plant is a bit more dormant, say in the dead of winter, can lead to lower success rates.
Supplies You’ll Need
Before we get our hands dirty, let’s gather our toolkit. Having everything ready makes the process so much smoother:
- Sharp Pruning Shears or a Clean Knife: For making clean cuts on your parent plant.
- Rooting Hormone (Optional but Recommended): A little boost can really help those cuttings take off. Look for powdered or gel forms.
- Well-Draining Potting Mix: A mix specifically formulated for cacti and succulents, or a blend of potting soil, perlite, and sand works wonderfully.
- Small Pots or Seedling Trays: Clean containers are key to preventing disease.
- Watering Can or Spray Bottle: For gentle watering.
- Clear Plastic Bags or a Propagator: To create a humid environment for your cuttings.
- Labels: To keep track of what you’ve propagated and when.
Propagation Methods
I find that stem cuttings are the most reliable and straightforward way to propagate Distimake aegyptius. Here’s how I do it:
- Select Your Cutting: Gently examine your healthy parent plant. Look for a stem that’s at least 3-4 inches long and has several sets of leaves. A newer stem that’s not too woody is ideal.
- Make the Cut: Using your sharp pruning shears or knife, make a clean cut just below a leaf node. A leaf node is where a leaf attaches to the stem. This is where the magic (rooting) happens!
- Prepare the Cutting: Carefully remove the lower leaves from the cutting, leaving only the top two or three leaves. This prevents them from rotting once planted. If you’re using rooting hormone, dip the cut end into the hormone powder or gel now, tapping off any excess.
- Let it Callus (An Important Step!): This is crucial for preventing rot, especially in succulent-like plants. Let the cutting sit in a dry, airy spot for 2-3 days, or until the cut end has formed a dry, callus-like layer.
- Potting Up: Fill your small pots with your prepared well-draining mix. Make a small hole in the center with your finger or a pencil.
- Plant the Cutting: Insert the callused end of the cutting into the hole, ensuring it’s stable. Gently firm the soil around the base.
- Watering (Gently!): Lightly water the soil. You want it to be moist, not soggy. A spray bottle can be helpful for this initial watering.
- Create Humidity: Cover the pot with a clear plastic bag or place it in a propagator. This traps moisture and humidity, mimicking the ideal conditions for root development. Make sure the leaves aren’t touching the inside of the bag; if they are, you might need to prop it up with a small stick.
The “Secret Sauce” (Pro Tips)
Here are a couple of things I’ve learned over the years that really make a difference:
- The Bottom Heat Advantage: If you have access to a seedling heat mat, place your pots on it. This gentle warmth from below encourages root growth much faster than ambient room temperature alone. It’s like a cozy little greenhouse for your cuttings.
- Don’t Rush the Roots: I know it’s tempting to tug on the cutting to see if it has roots, but resist the urge! Wait at least 3-4 weeks before gently tugging. If there’s resistance, you’ve got roots! If not, give it more time. Patience is your best friend here.
Aftercare & Troubleshooting
Once you start seeing signs of new growth, it’s a good indicator that roots have formed.
- Gradual Acclimation: If you covered your cutting, gradually remove the plastic bag over a week or so. Start by taking it off for a few hours each day, then longer. This helps the new plant adjust to normal humidity levels.
- Watering: Continue to water only when the soil feels dry to the touch. Overwatering is a common killer of young cuttings, leading to root rot.
- Signs of Trouble: The most common issue you’ll encounter is rot. If the stem turns mushy or black, or if the leaves start to yellow and drop rapidly without any signs of dryness, rot is likely the culprit. Sadly, once rot sets in, it’s very difficult to save the cutting. This is why good drainage and letting cuttings callus are so important. If you see a little bit of yellowing, try letting it dry out a bit more before watering again.
A Little Encouragement
Propagating Distimake aegyptius is a wonderful way to expand your collection and share this lovely plant with friends. Don’t be discouraged if your first few attempts aren’t perfect – gardening is a continuous learning process! Enjoy the quiet satisfaction of watching a new plant emerge from a tiny cutting. Happy propagating!
Resource: