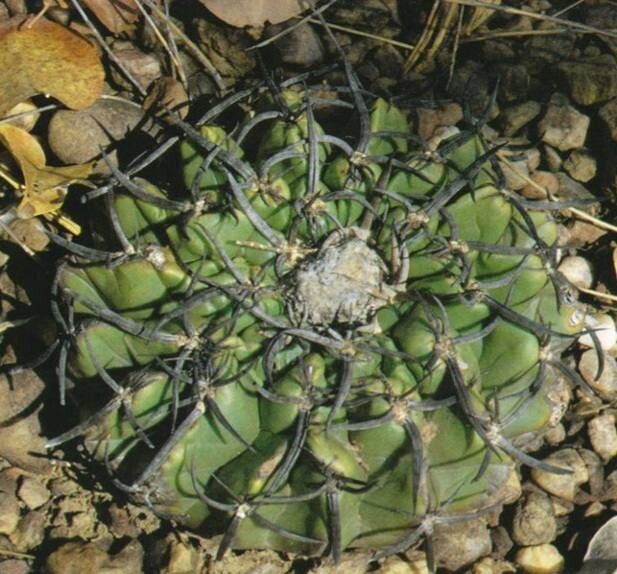
Hello, fellow plant enthusiasts! Today, we’re diving into the wonderful world of propagating Discocactus placentiformis. If you’ve ever admired this fascinating cactus with its flattened, disc-like shape and lovely fuzzy top, you’re in for a treat. Growing new plants from your existing ones is such a rewarding experience, like creating little pieces of your garden magic to share or expand. Don’t be intimidated; while Discocactus can be a bit particular, propagating it isn’t overly difficult once you understand its needs.
The Best Time to Start
For Discocactus placentiformis, springtime is your golden ticket. As the plant emerges from its winter rest and the days start to lengthen and warm up, it’s most actively growing. This vigorous growth phase means it’s primed to develop roots and establish itself quickly, giving you the best chance for success. Aim for the period after the last frost, when temperatures are consistently mild and bright.
Supplies You’ll Need
So, what should you have on hand? Let’s get our tools ready:
- Sharp, clean pruning shears or a sterile knife: For making clean cuts.
- Rooting hormone (optional, but recommended): Helps speed up root development. Look for one formulated for cacti and succulents.
- Well-draining potting mix: A cactus/succulent blend is ideal. You can also mix your own with equal parts potting soil, perlite, and coarse sand.
- A small pot or container: One with drainage holes, of course!
- Gloves: If you’re not a fan of prickly encounters.
- Watering can or spray bottle: For gentle watering.
Propagation Methods
Discocactus placentiformis is best propagated through offsets, also known as “pups.” These are small, baby plants that sprout from the base of the mature cactus.
- Assess Your Plant: Gently examine your Discocactus. You’re looking for small, formed offsets growing from the sides or base. They should have at least a few spines and a bit of a base forming.
- The “Clean Cut”: Using your sharp, sterile shears or knife, carefully gently separate the offset from the mother plant. Try to get as much of the base of the offset as possible, ideally with a small root stub if one has already formed. If the offset is still very tiny, you might need to wait a little longer.
- Allow to Callus: This is a crucial step for succulents and cacti. Place the separated offset in a dry, airy spot out of direct sunlight for several days, or even up to a week. You want the cut end to dry out and form a protective callus. This prevents rot when you plant it.
- Planting Time: Once callused, dip the cut end in rooting hormone if you’re using it. Then, plant the offset in your well-draining potting mix. Don’t bury it too deeply; just enough to support it upright.
- Initial Watering: Wait about a week after planting before the very first light watering. This gives the plant a chance to settle in its new soil.
The “Secret Sauce” (Pro Tips)
Here are a couple of things I’ve learned over the years that can make a big difference:
- Patience is Key with Callusing: Resist the urge to rush the callusing process. A fully callused cut is your best defense against rot, which is the nemesis of new succulent and cactus propagations. Sometimes, it takes a full week or more for smaller offsets to dry properly.
- Bottom Heat Can Be a Game Changer: Especially if you’re starting in early spring when things might still be a bit cool, placing your potted offsets on a gentle seedling heat mat can significantly speed up root development. Just make sure the heat isn’t too intense; think lukewarm bathwater temperature.
Aftercare & Troubleshooting
Once your offset is planted and you’ve given it its initial sip of water, treat it like a mature Discocactus, but with a bit more gentleness.
- Watering: Water sparingly, only when the soil is completely dry. Overwatering is the quickest way to kill a new propagation. You can check the soil moisture by gently poking a finger in or by the weight of the pot.
- Light: Provide bright, indirect light. Avoid intense, direct sun until the plant is well-established.
- Signs of Success: You’ll know your offset is happy when you see signs of new growth, perhaps a slight plumpness in the body, or even tiny new spines. You might also feel a gentle tug when you try to wiggle it ever so slightly (though I wouldn’t do this too often!).
- Troubleshooting – Rot: If the offset starts to turn mushy, yellow, or black, it’s a sign of rot. This usually means it’s getting too much water or didn’t callus properly. Sadly, sometimes a rotten offset can’t be saved. You can try to cut away the rotted parts and re-callus the healthy section, but it’s a long shot.
A Word of Encouragement
Propagating Discocactus placentiformis is a journey. There will be moments of excitement as you see new roots forming, and maybe a moment or two of worry if something doesn’t look quite right. Be patient with yourself and with your new plant. Each successful propagation is a little victory, and the joy of nurturing a new life from an existing one is truly special. Happy growing!
Resource: