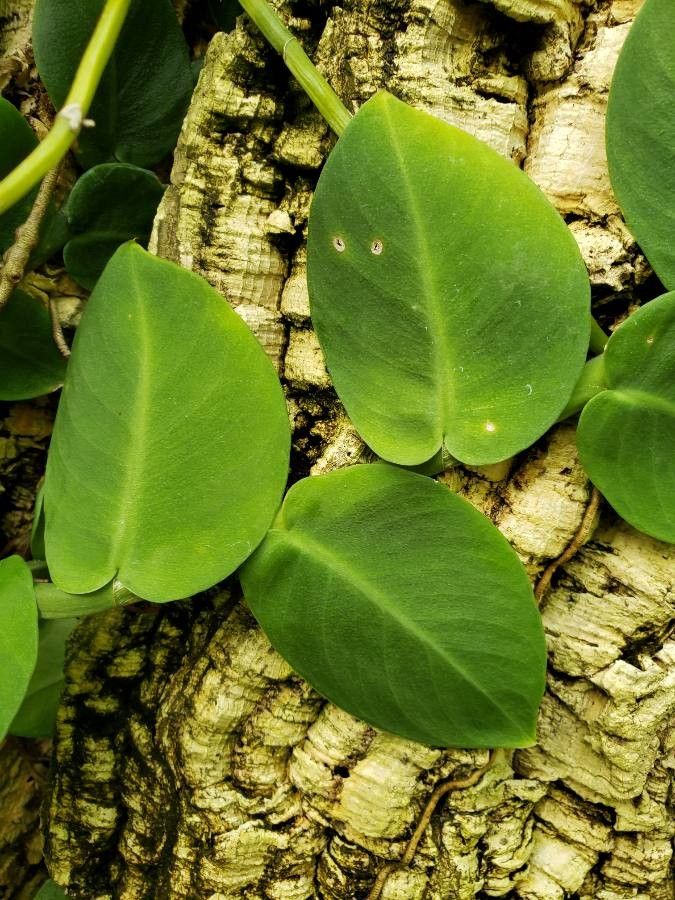
Oh, Dischidia major! I’m so glad you’re curious about this one. If you’ve ever seen a healthy, overflowing hanging basket of this fascinating plant, you’ll know why it’s such a treasure. Those delightful, somewhat puffy, and sometimes even hollow leaves are just so unique. Plus, they lend themselves to being excellent epiphytes, mimicking their natural growth habits high up in trees.
But the real joy? Being able to create more of these beauties yourself! Propagating Dischidia major is, for the most part, wonderfully rewarding and surprisingly straightforward. I’d say it’s a fantastic project for even those who are just starting to dip their toes into the world of plant propagation. You’ll feel like a magic gardener in no time!
The Best Time to Start
For the highest success rate with Dischidia major, I always lean towards propagating during the active growing season. Think late spring through summer. The warmer temperatures and longer daylight hours provide the ideal conditions for cuttings to develop roots. You’ll notice the plant is putting out new growth readily during this time, which means it has the energy reserves to invest in starting a new life.
Supplies You’ll Need
Before we dive in, let’s gather our tools. It’s always good to be prepared!
- Clean, sharp pruning shears or scissors: This is non-negotiable for clean cuts that heal well.
- Potting mix: I like a well-draining mix. A good blend for Dischidia would be about 50% perlite or pumice mixed with 50% coco coir or peat moss. If you can find a commercial “cacti and succulent” mix, that’s often a good starting point, just add a bit more perlite to loosen it up.
- Small pots or propagation trays: Whatever you have on hand that’s small and clean will do. Yogurt cups with drainage holes work in a pinch!
- A clear plastic bag or humidity dome: This is key for creating a humid environment.
- Optional: Rooting hormone: While Dischidia major is pretty happy to root on its own, a little rooting hormone can give your cuttings a significant boost, especially if you’re a bit impatient. I prefer a gel formula for ease of use.
- Water: For cleaning tools and for the propagation methods.
Propagation Methods
Dischidia major is quite forgiving, and usually, stem cuttings are the way to go. It’s reliable and you can start with just a small piece of an existing plant.
Method 1: Stem Cuttings in Potting Mix
- Take a cutting: Using your clean shears, select a healthy stem that has at least two or three sets of leaves. Make a cut just below a leaf node (where a leaf attaches to the stem). You want a piece that’s about 4-6 inches long.
- Prepare the cutting: Gently remove the bottom set of leaves. This will expose the rooting nodes and prevent the leaves from rotting when buried in the soil. If you’re using rooting hormone, dip the cut end into it now according to the package instructions.
- Plant the cutting: Fill your small pot with your prepared, slightly damp potting mix. Make a small hole in the center with your finger or a pencil. Insert the cut end of the Dischidia cutting into the hole, ensuring the nodes are below the soil surface. Gently firm the soil around the stem.
- Create humidity: Water the soil lightly, just enough to make it moist. Now, cover the pot with a clear plastic bag or a humidity dome, making sure the bag isn’t touching the leaves too much. You want to create a mini greenhouse effect.
- Placement: Place the pot in a warm spot with bright, indirect light. Avoid direct sun, as this can scorch the delicate cuttings.
Method 2: Water Propagation
This is a slightly more visual method, and I find it very encouraging to see the roots developing!
- Take a cutting: Same as above – a healthy stem with at least two or three leaf sets, cut just below a node.
- Prepare the cutting: Remove the bottom set of leaves, just like you would for soil propagation.
- Place in water: Fill a small jar or glass with water. Submerge the cut end of the Dischidia cutting, ensuring that the leaf nodes are below the water line, but try not to have any leaves touching the water themselves. Leaves submerged will often rot.
- Placement: Place the jar in a location with bright, indirect light.
- Water changes: Change the water every few days, or whenever it looks cloudy. This keeps it fresh and prevents bacterial growth.
The “Secret Sauce” (Pro Tips)
You know, after years of playing with plants, you start to notice the little things that make a big difference. Here are a couple of my favorites for Dischidia:
- The “Air Layering” Trick: If you have a particularly long, leggy stem on your Dischidia, and you don’t want to cut it off entirely, you can try air layering while it’s still attached to the parent plant. Gently wound a section of the stem near a node. Wrap that wounded area with damp sphagnum moss, and then cover it all tightly with plastic wrap. Once you see roots emerge through the plastic wrap and into the moss, you can then carefully cut the stem below the new roots and pot it up. It’s like giving your plant a head start!
- Bottom Heat is Your Friend: While not strictly necessary, placing your pots or jars on a gentle heating mat designed for seed starting can significantly speed up root development, especially if your home tends to be a bit on the cooler side. It mimics that lovely warm soil bed they’d find in their tropical home. Just a light warmth is all they need.
Aftercare & Troubleshooting
Once you see new leaf growth or a healthy root system emerging (you might see roots poking out of the drainage holes in pots, or see them clearly in the water jar), it’s time to adjust your care.
- For potted cuttings: Gradually reduce the humidity. You can start by removing the plastic bag for a few hours each day, then for longer periods. Continue to water when the top inch of soil feels dry. Continue to provide bright, indirect light.
- For water-propagated cuttings: Once your roots are about an inch or two long, it’s time to pot them up into your well-draining mix. Treat them as you would a newly potted unrooted cutting for the first week or two – keep the soil moist and maintain good humidity around them before slowly acclimating them to normal conditions.
Now, what if things go wrong? The most common issue you’ll face is rot. This usually happens for one of two reasons:
- Too much moisture: The soil is staying soggy, or leaves are sitting in water. Make sure your pot has good drainage holes and you’re not overwatering. Let that soil dry out a bit between waterings.
- Lack of air circulation: If the leaves are constantly shrouded in very still, damp air, they can start to get a bit “clammy” and prone to fungal issues. If you’re using a plastic bag, try to poke a few small holes in it to allow for some air exchange.
If a cutting starts to look mushy or black, unfortunately, it’s usually a lost cause. Don’t beat yourself up! Plant propagation is a learning process. Just clean up any affected bits and try again with a fresh cutting.
A Encouraging Closing
So there you have it! Propagating Dischidia major is really quite a charming endeavor. Be patient, observe your cuttings closely, and don’t be afraid to experiment a little. Each plant is a unique journey, and the satisfaction of nurturing a new life from a simple stem is truly one of gardening’s greatest rewards. Happy propagating!
Resource:
https://identify.plantnet.org/k-world-flora/species/Dischidia%20major%20(Vahl)%20Merr./data