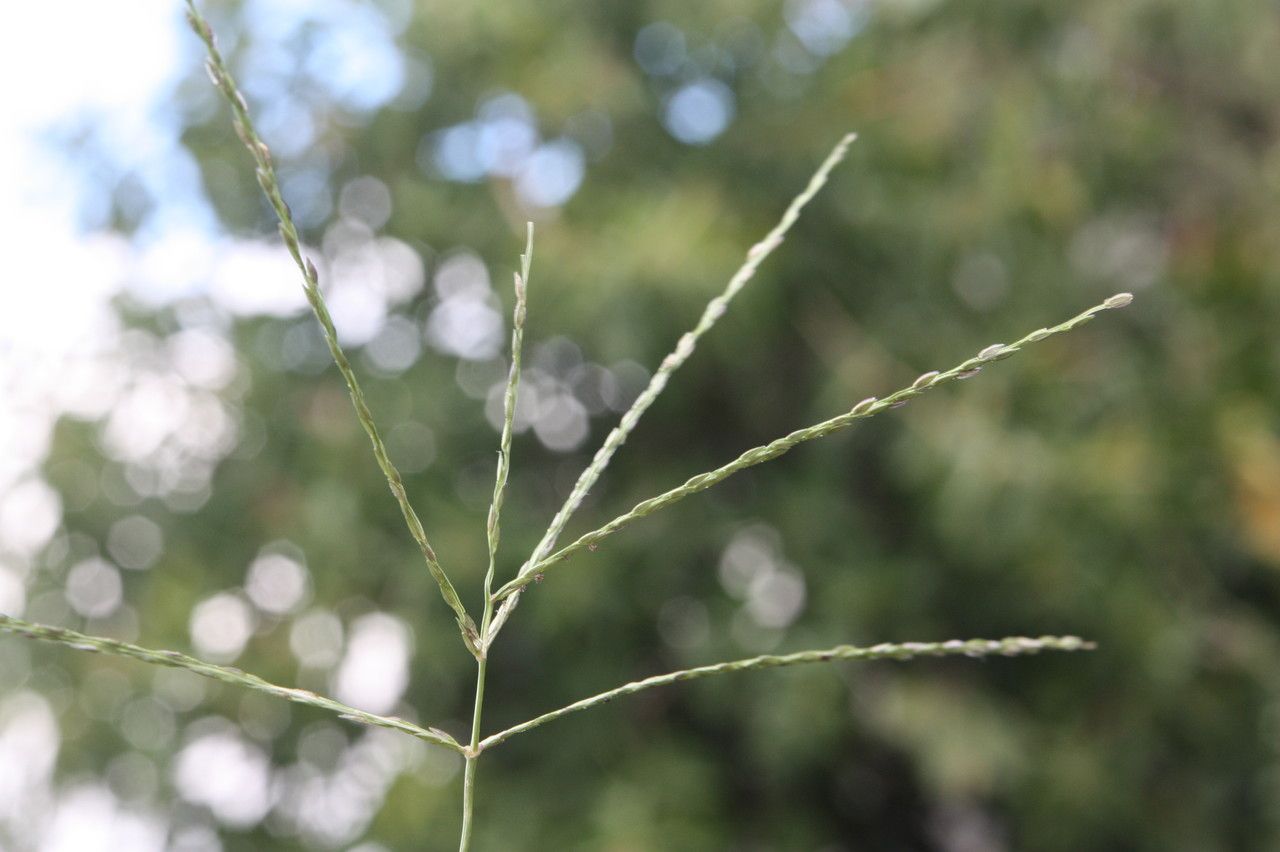
Oh, hello! Come on in, grab a mug. I’ve got some fresh coffee brewing, and I wanted to chat with you about a really delightful grass: Digitaria debilis, often called slender crabgrass. Now, I know what you might be thinking – crabgrass? But trust me, this isn’t the weed you’re picturing! Digitaria debilis is a beautiful, airy native grass that brings such a lovely texture and movement to the garden. Its delicate seed heads are just gorgeous, especially when they catch the light. Propagating it yourself is incredibly rewarding, and honestly, it’s quite forgiving, even for those of you just starting out with your green thumb.
The Best Time to Start
For the absolute best success, I find spring is your golden ticket. As the weather warms up and your existing Digitaria debilis starts putting on new growth, that’s your signal. You want to work with vigorous, healthy material. Waiting until new stems are actively growing, usually once things are consistently above freezing and days are getting longer, will give your cuttings or divisions the best chance to establish quickly.
Supplies You’ll Need
You don’t need a whole lot, which is part of the charm!
- Sharp Pruning Shears or a Knife: Cleanliness is key to preventing disease.
- Small Pots or Trays: Anything that can hold soil and allow for drainage. Yogurt cups with holes poked in the bottom work in a pinch!
- Propagation Mix: A light, well-draining blend. I like to mix about 50% peat moss or coco coir with 50% perlite or coarse sand.
- Rooting Hormone (Optional but helpful): A little powder or gel can speed things up.
- Spray Bottle: For misting.
- Water: Of course!
Propagation Methods
Digitaria debilis is a pretty agreeable plant when it comes to making more of it. My two favorite methods are stem cuttings and division.
Stem Cuttings: This is my go-to for getting lots of new plants.
- Take Your Cuttings: Find a healthy stem that’s about 4-6 inches long. Using your clean shears, cut just below a node (that’s a little bump on the stem where a leaf grows out). Remove the lower leaves, leaving just a few at the top.
- Prepare the Cuttings: If you’re using rooting hormone, dip the cut end into the powder or gel. Tap off any excess.
- Plant Them: Fill your small pots with your propagation mix. Make a little hole with your finger or a pencil and insert the cutting, ensuring a few nodes are buried in the soil. Gently firm the soil around it.
- Water and Cover: Water thoroughly, allowing excess to drain. Then, tent a clear plastic bag over the pot or place the pot in a clear plastic container. This creates a mini-greenhouse.
Division: This is fantastic for larger, established clumps.
- Dig Up the Plant: Gently dig up your Digitaria debilis plant. You can do this in spring or fall.
- Gently Separate: With your hands or a clean knife, carefully pull or cut the clump apart into smaller sections. Each section should have some roots and at least a few leafy shoots.
- Replant: Plant these divisions directly into their new homes or into pots with fresh soil, watering them in well.
The “Secret Sauce” (Pro Tips)
Here are a few things I’ve learned over the years that can make a real difference:
- No Leaves in the Water!: If you opt for water propagation (which works, but I find soil more reliable for this grass), never let the leaves touch the water. They’ll just rot and drag your cutting down with them. Only the submerged stem should be in the water.
- Bottom Heat is Your Friend: If you have a heat mat that gardeners use for seedlings, placing your pots on it can really speed up root formation. It mimics the warmth of spring soil wonderfully.
- Don’t Rush the Re-potting: When you’re doing cuttings, it can be tempting to tug on them to see if they have roots. Resist the urge! Wait until you see new leaf growth appearing at the top. That’s a sure sign roots have formed beneath the surface.
Aftercare & Troubleshooting
Once you see those lovely new shoots emerging from your cuttings, hurray! You’ve done it! Gradually acclimate them to drier air by opening the plastic bag or container a little each day over a week. Continue to keep the soil consistently moist but not soggy. If you’re propagating by division, just treat them like any other newly planted perennial – regular watering is key as they establish.
Now, for troubleshooting. The most common issue you might encounter is rot. Dark, mushy stems are a sure sign. This usually happens from too much moisture and poor air circulation. If you see rot, unfortunately, it’s usually best to discard that cutting and try again, making sure your soil drains really well and you’re not overwatering. Yellowing leaves can sometimes indicate a lack of light, so ensure your cuttings are in a bright spot.
A Encouraging Closing
Propagating Digitaria debilis is a wonderful way to expand your garden, share with friends, and truly connect with this beautiful plant. Don’t be discouraged if your first try isn’t perfect. Gardening is all about observation and learning. Be patient, enjoy the process of watching new life emerge, and before you know it, you’ll have an abundance of this lovely grass gracing your landscape. Happy growing!
Resource:
https://identify.plantnet.org/k-world-flora/species/Digitaria%20debilis%20(Desf.)%20Willd./data