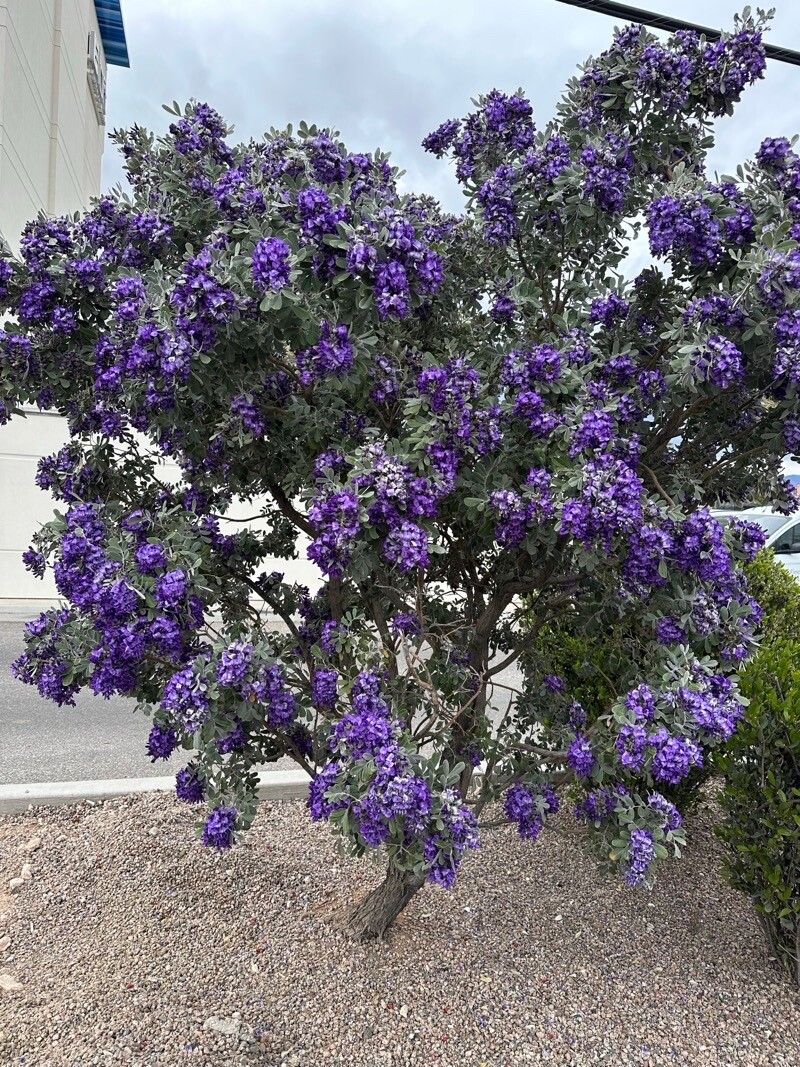
Oh, Dermatophyllum secundiflorum! If you’ve ever seen this beauty, that’s the Texas Mountain Laurel with the incredible wisteria-like purple flowers that smell like grape candy in the spring. It’s a small tree or large shrub that brings such a unique burst of color and fragrance to the garden. Want to share that magic? Propagating it is a wonderful way to get more of these stunners. For beginners, I wouldn’t call it super easy, but with a little patience and the right approach, you can absolutely succeed. It’s a really rewarding project, watching a tiny cutting transform into a new plant.
The Best Time to Start
My favorite time to think about propagating Dermatophyllum secundiflorum is in late spring or early summer, right after it finishes blooming. This is when the plant is actively growing, and those new shoots have enough energy to put towards developing roots. Waiting until the stems have started to firm up a bit, but are still somewhat flexible, is key. We’re looking for what we horticulturists call “semi-hardwood” cuttings.
Supplies You’ll Need
Gathering your tools upfront makes the whole process much smoother. Here’s what I always have on hand:
- Sharp pruning shears or a clean, sharp knife: For taking clean cuttings without crushing the stems. Sterilize them with rubbing alcohol between cuts to prevent disease.
- Rooting hormone: A powder or gel that encourages root development. I find the powder easiest to work with.
- A well-draining potting mix: A blend of equal parts peat moss or coco coir, perlite, and coarse sand works wonderfully. Avoid heavy garden soil.
- Small pots or seedling trays: With drainage holes, of course!
- Plastic bags or a propagation dome: To create a humid environment.
- Water: For misting.
Propagation Methods
While you can sometimes get Dermatophyllum to sprout from seed, which is a whole other adventure with scarification (scratching or nicking the seed coat), my go-to for reliably getting new plants is stem cuttings.
Taking Stem Cuttings:
- Select Pencil-Thick Stems: Look for healthy, new growth that is about six inches long. The tip should be pliable, but the lower part of the stem should be starting to harden.
- Make the Cut: Using your clean pruners, make a cut just below a leaf node (where a leaf attaches to the stem). This is where the rooting hormones are most concentrated.
- Prepare the Cutting: Gently remove the lower leaves, leaving just a few at the very top. If the leaves are very large, you can even cut them in half to reduce water loss through transpiration.
- Apply Rooting Hormone: Dip the cut end into your rooting hormone powder, tapping off any excess.
- Pot Them Up: Fill your small pots with your well-draining potting mix. Make a hole in the center with a pencil or your finger, and insert the cutting, pressing the soil gently around it to ensure good contact.
- Water Gently: Water the soil until it’s moist but not waterlogged.
- Create Humidity: Cover the pots with a plastic bag, propping it up with a stick or two so it doesn’t touch the leaves, or place them under a propagation dome. Place them in a bright spot, but out of direct sunlight, as this can scorch them.
The “Secret Sauce” (Pro Tips)
There are a few little tricks that have really upped my propagation success rates over the years.
- Bottom Heat is Your Friend: If you have the space, placing your potted cuttings on a gentle heat mat can make a huge difference. It encourages root cells to develop much faster. It’s like giving them a warm little blanket to snuggle under while they’re busy working on roots.
- Mist, Don’t Drench: While humidity is crucial, you don’t want soggy leaves, as this can lead to fungal issues. Mist the leaves lightly with water every day or two, or whenever the inside of your plastic bag looks dry. The goal is to keep the environment moist, not to create a swamp.
- Be Patient with the Tug Test: After a few weeks, you can gently tug on a cutting. If you feel resistance, that’s a good sign roots are forming! If it pulls out easily, it probably hasn’t rooted yet. Don’t despair if you don’t see activity for a couple of months; Dermatophyllum can be a bit slow to get going.
Aftercare & Troubleshooting
Once you feel that lovely resistance in your gentle tug test, it’s time to start acclimating your new baby plant to life outside its humid little bubble. Gradually remove the plastic bag or open the vents on your dome over a week or two. Keep the soil consistently moist but not soggy. When you see new leaf growth, that’s a fantastic sign it’s well on its way!
The most common issue you’ll face is rot. If a cutting turns black or mushy at the base, it’s usually due to too much moisture and poor air circulation. Unfortunately, if rot sets in, the cutting is usually a goner. Prevention is key here: use clean tools, well-draining soil, and that careful watering. If you’re unsure, it’s always better to err on the side of slightly too dry than too wet.
A Encouraging Closing
Growing new plants is one of the most magical parts of gardening. It’s an act of faith, really, trusting that a small piece of a plant can become something grand. So, be patient with your Dermatophyllum secundiflorum cuttings. Observe them, learn from them, and even if not every single one makes it, celebrate the successes. The reward of seeing that beautiful purple bloom in your own garden, grown from your own hands, is truly special. Happy propagating!
Resource: