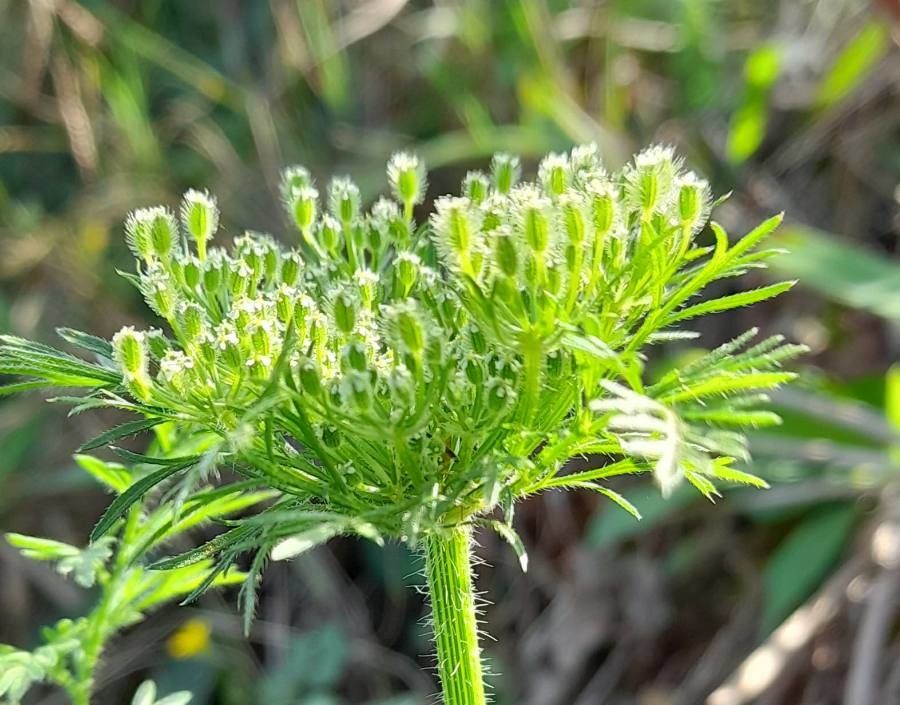
Hey there, fellow garden enthusiasts! It’s so good to be chatting with you today. We’re going to dive into something really special: propagating Daucus pusillus, also known as our humble American wild carrot. You know, those delicate, lacy white flower clusters that pop up so cheerfully in meadows and along roadsides? There’s a quiet beauty to them, and I find them incredibly rewarding to grow from scratch. If you’re just dipping your toes into propagation, I’d say Daucus pusillus is a pretty welcoming plant. It’s not overly fussy, which is always a win in my book!
The Best Time to Start
For the highest success rate with Daucus pusillus, I always aim to collect seeds in late summer or early fall. You want to wait until those seed heads have fully matured and dried on the plant. Look for them to turn a light brown or straw color, and you should be able to easily rub them off the dried flower heads. If you’re feeling adventurous and want to try propagating from cuttings, spring is your best bet. This is when the plant is actively growing and has the most vigor.
Supplies You’ll Need
Gathering your supplies beforehand makes the whole process so much smoother. Here’s what I usually have on hand:
- Fresh seeds (collected as described above) or stem cuttings
- Small pots or seed trays with drainage holes
- Sterile potting mix or a seed-starting mix (something light and airy is key)
- Fine-mesh sieve (optional, for sifting soil)
- Watering can with a fine rose or a spray bottle
- Grafting knife or clean, sharp scissors (for cuttings)
- Rooting hormone powder or gel (optional, but can give cuttings a boost)
- Plastic wrap or a clear plastic dome (to create humidity)
- Small labels to mark your pots
Propagation Methods
Daucus pusillus is wonderfully amenable to propagation from seeds, and it’s how I get most of my new plants each year.
From Seed:
- Prep Your Pots: Fill your chosen pots or trays with your sterile potting mix. Gently tap them to settle the soil, but don’t pack it down too hard. Aim for about a half-inch of soil depth.
- Sow the Seeds: Daucus pusillus seeds benefit from a period of cold stratification. This means they need a period of cold, moist conditions to break dormancy, just like they would experience over winter in the wild. To do this, lightly sprinkle your seeds over the surface of the soil. You can gently press them into the soil with your fingertips.
- Cover Lightly: Dust a very thin layer of soil over the seeds – no more than a 1/8th inch. You want them to be able to feel the light.
- Water Gently: Using your fine-rose watering can or spray bottle, mist the soil surface so it’s evenly moist but not waterlogged. You don’t want to wash those tiny seeds away!
- Stratify (The Cold Treatment): This is where the magic happens for Daucus pusillus. Place your pots in a plastic bag or cover them with a clear dome. Then, pop them into the refrigerator for 3-4 weeks. Check periodically to ensure the soil stays lightly moist.
- Bring to Warmth: After their chilly vacation, bring the pots out of the fridge and place them in a bright location with indirect sunlight. A windowsill that doesn’t get intense direct sun is perfect. Maintain consistently moist soil.
- Germination: You should start to see tiny green shoots emerge within a few weeks. Be patient – some seeds can be a bit slower to germinate!
From Stem Cuttings (More Advanced):
This method is better suited for spring when the plant is actively growing.
- Select a Healthy Stem: Choose a healthy, non-flowering stem from a mature plant. Look for one that’s about 4-6 inches long.
- Make a Clean Cut: Using your clean knife or scissors, make a clean cut just below a leaf node (where a leaf attaches to the stem).
- Prepare the Cutting: Gently remove the lower leaves, leaving only a few at the very top. This helps the cutting direct its energy towards root formation. If the remaining leaves are very large, you can even snip them in half.
- Apply Rooting Hormone (Optional): Dip the cut end of the stem into your rooting hormone powder or gel. Tap off any excess.
- Plant the Cutting: Insert the cut end into a small pot filled with your seed-starting mix. Make a small hole with a pencil or your finger first.
- Water and Cover: Water gently to settle the soil around the cutting. Then, cover the pot with a plastic bag or dome to maintain high humidity.
- Place in Bright, Indirect Light: Put the pot in a spot with bright, indirect light and keep the soil consistently moist.
The “Secret Sauce” (Pro Tips)
- Don’t Overwater Early On: This is a common pitfall, especially with seeds. Daucus pusillus seedlings are delicate. While they need consistent moisture, drowning them is a sure fire way to invite rot. Mist regularly rather than soaking.
- Bottom Heat for Cuttings: If you’re trying stem cuttings, providing gentle bottom heat can really speed up root development. A heating mat designed for seedlings works wonders. Just make sure it’s set to a low temperature.
- Air Circulation is Key: Once those little ones start to grow, good air circulation is vital to prevent fungal diseases. If you’re using a plastic dome, lift it daily for a few minutes to let fresh air in.
Aftercare & Troubleshooting
Once your seeds have germinated and you see true leaves, or your cuttings have developed roots (you can gently tug them – they’ll offer resistance if rooted), it’s time to move them to their own small pots or a slightly larger nursery tray. Continue to keep the soil consistently moist but not soggy. As they grow, gradually introduce them to more direct sunlight.
The most common issue you’ll encounter is damping off, a fungal disease that causes young seedlings to wilt and rot at the soil line. This is usually due to overwatering and poor air circulation. If you see this, immediately remove the affected seedlings and ensure better airflow. For cuttings, failure to root can happen if conditions are too dry, too cold, or if the cutting wasn’t healthy to begin with.
A Encouraging Closing
Growing plants from seed or cuttings is such a wonderfully rewarding journey. It teaches us patience, observation, and a deep appreciation for nature’s cycles. Don’t be discouraged if your first attempt isn’t perfect – every gardener has had their share of learning experiences! Enjoy the process, celebrate each tiny sprout, and soon you’ll have your own beautiful patches of Daucus pusillus gracing your garden. Happy growing!
Resource:
https://identify.plantnet.org/k-world-flora/species/Daucus%20pusillus%20Michx./data