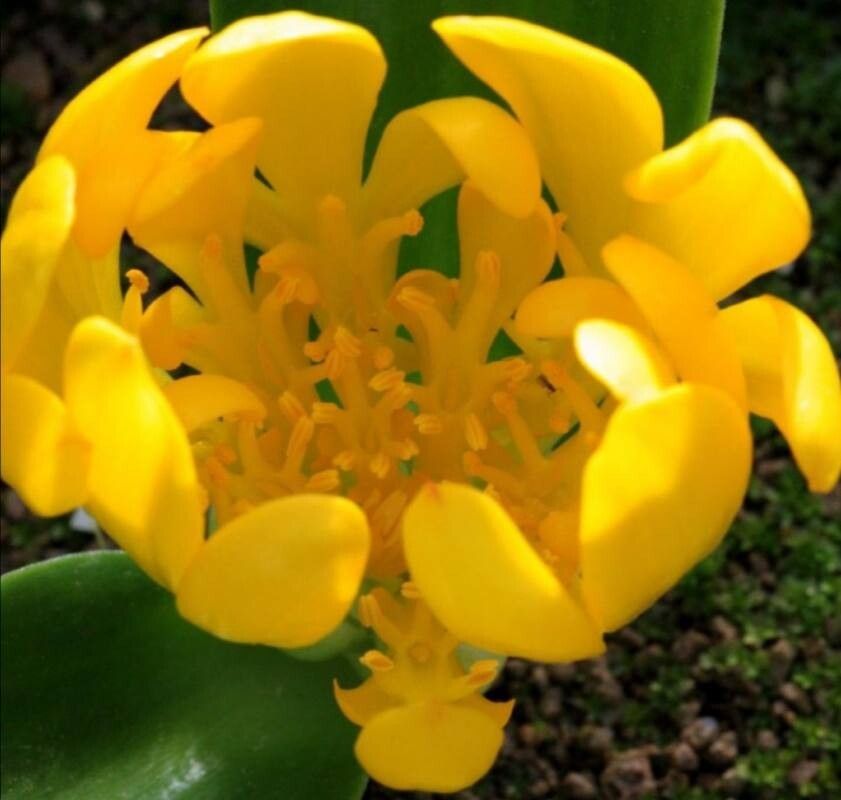
Hey there, fellow plant lovers! I’m so excited to chat with you today about a truly special bloom: the Daubenya aurea. If you’re looking for a plant that’ll bring a splash of sunshine and a unique charm to your garden or indoor space, this is it. Its vibrant, trumpet-shaped flowers are simply breathtaking, and coaxing new life from an existing plant is one of the most rewarding experiences a gardener can have.
Now, I won’t lie, Daubenya aurea can be a little fussy. It’s not the easiest plant for a complete beginner to propagate, but with a bit of patience and careful attention, it’s absolutely achievable! Think of it as a delightful challenge that will teach you so much.
The Best Time to Start
The absolute best time to tackle propagating your Daubenya aurea is during its dormant period. This usually falls in the late summer or early autumn, just as the plant is winding down its active growth after flowering. Waiting until the leaves have started to yellow and die back naturally is key. You’ll have the most success then, as the plant is conserving its energy.
Supplies You’ll Need
To give your Daubenya aurea babies the best start, gather these goodies:
- Sharp, sterile pruning shears or a clean knife: For making clean cuts.
- Well-draining potting mix: A good blend for succulents or cacti works wonderfully. You can also mix in some perlite or grit.
- Small pots or seed trays: With good drainage holes, of course!
- Rooting hormone (optional but recommended): A powder or gel helps encourage root development.
- Watering can or spray bottle: For gentle watering.
- Gloves (if you’re prone to skin irritation): Some plants can be a bit sappy.
Propagation Methods
Daubenya aurea is most commonly propagated by division. This is where you separate the bulb into smaller offsets.
- Gently Unearth: Once your Daubenya aurea is dormant and the leaves have yellowed, carefully dig it up from its pot or the ground. Be gentle! We don’t want to damage the bulb or any developing pups.
- Clean Off the Dirt: Gently brush or wash away as much soil as you can from the bulb. You want to clearly see the parent bulb and any smaller bulbs (called offsets or bulbils) attached to it.
- Separate the Offsets: Look for naturally formed divisions. These are smaller bulbs that have already started to form on the sides of the main bulb. Using your sterile knife or pruning shears, carefully make a clean cut to separate these offsets from the parent bulb. If an offset has roots already attached, that’s a bonus!
- Allow to Callus: This is a crucial step for bulb division! Place the separated offsets on a tray in a dry, well-ventilated area for 2-3 days. This allows the cut surface to dry out and form a protective callus, which helps prevent rot when you replant.
- Plant Them Up: Once callused, plant each offset in its own small pot filled with your well-draining mix. Plant them at the same depth they were growing previously, with the tip just at or slightly above the soil surface.
The “Secret Sauce” (Pro Tips)
Here are a couple of things I’ve learned over the years that can really make a difference:
- Don’t Rush Watering: After replanting your callused offsets, resist the urge to water immediately. Wait for about a week. This gives the bulb a chance to settle in and further reduces the risk of rot. When you do water, do it thoroughly but infrequently, letting the soil dry out between waterings.
- A Little Warmth Helps: If you’re propagating in a cooler environment, bottom heat can be a game-changer for bulb propagation. Placing your pots on a heat mat designed for seedlings can encourage root development and speed things up. Just be sure it’s not too hot – a gentle warmth is all you need.
Aftercare & Troubleshooting
Once your Daubenya aurea offsets have been in their pots for a few weeks, you should start to see signs of life! You might notice new leaf growth emerging.
- Watering: Water sparingly but deeply when the top inch or so of soil feels dry. Overwatering is the quickest way to invite trouble.
- Light: Place your new plants in a bright location, but avoid direct, scorching sun, especially when they are young and just establishing.
- Common Issues: The most common problem you’ll encounter is rot. This usually happens due to overwatering or insufficient drainage. If you see mushy stems or bulbs, or if the leaves start to yellow and wilt rapidly without any clear cause (and it’s not the natural dormant cycle), rot is likely the culprit. If you catch it early, you might be able to save the offset by cutting away any rotted parts with your sterile knife and letting the healthy bit callus over again before replanting in fresh, dry soil.
A Cheerful Closing
Growing plants from our existing beauties is such an empowering feeling. Be patient with your Daubenya aurea offsets. They might take their time to show you new growth, and that’s perfectly okay. Celebrate every little sprout, and remember that the joy is in the journey. Happy gardening!
Resource:
https://identify.plantnet.org/k-world-flora/species/Daubenya%20aurea%20Lindl./data