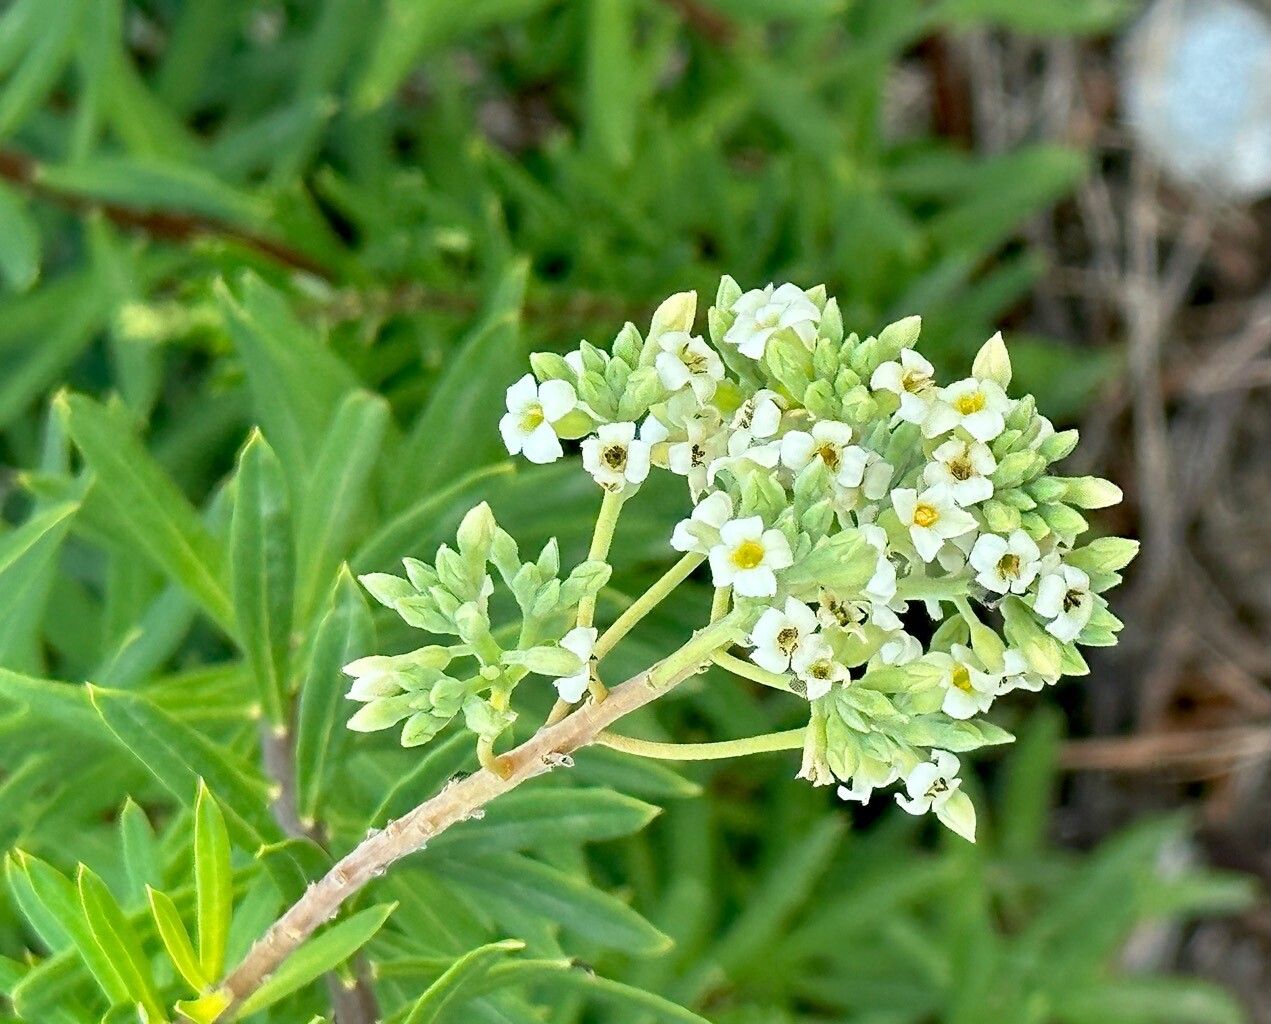
Oh, Daphne gnidium! What a beautiful shrub to want to bring more of into your garden. Its elegant, often fragrant, white flowers and attractive evergreen foliage offer such a lovely visual and aromatic appeal. And the satisfaction of growing these beauties from tiny cuttings? Absolutely immense! Now, I’ll be honest, Daphne gnidium isn’t the easiest plant to propagate. It can be a bit particular, but with a little patience and these tips, you’ll be well on your way. It’s a wonderful project for the budding gardener looking for a rewarding challenge.
The Best Time to Start
For your best chance at success with Daphne gnidium cuttings, late spring to early summer is your golden window. This is when the plant is actively growing, and you can take cuttings from semi-hardwood. Think of it as that stage where the new growth has started to firm up a bit but isn’t as woody as older stems from the previous year. This offers a good balance – enough flexibility to root but firm enough to hold its shape.
Supplies You’ll Need
Here’s what I always have on hand when I’m propagating Daphne:
- Sharp, clean pruning shears or a sharp knife: Sterilize them with rubbing alcohol to prevent disease.
- Rooting hormone: A powder or gel works well. It’s not strictly necessary for all plants, but for Daphne, it’s a real confidence booster.
- Well-draining potting mix: A good blend is usually about 50% peat moss or coco coir and 50% perlite or coarse sand. You want air to circulate around those delicate roots.
- Small pots or trays: Clean pots with drainage holes are essential.
- Plastic bags or a propagator: To create a humid environment for your cuttings.
- A watering can with a fine rose or a spray bottle: For gentle watering.
- Optional: Bottom heat source: A heat mat can significantly speed up rooting.
Propagation Methods: Stem Cuttings
This is my go-to method for Daphne gnidium.
- Select Your Cuttings: In late spring or early summer, look for healthy, non-flowering shoots. You want stems that are about 4-6 inches long.
- Make the Cut: Using your sterilized shears or knife, make a clean cut just below a leaf node (where a leaf attaches to the stem). This node is where the magic happens, encouraging root formation.
- Prepare the Cutting: Gently remove the lower leaves from the bottom half of the cutting. You want to expose a few nodes to the rooting hormone and the soil. If the remaining leaves are large, you can cut them in half horizontally to reduce water loss through transpiration. Leave just a few leaves at the top.
- Apply Rooting Hormone: Dip the cut end of the stem into the rooting hormone, tapping off any excess.
- Pot Them Up: Fill your clean pots with your prepared, moistened potting mix. Make a small hole in the center of the soil with your finger or a pencil.
- Insert the Cutting: Gently place the hormone-dipped end of the cutting into the hole, firming the soil gently around it. You want good contact between the stem and the soil.
- Create Humidity: Water the soil gently to settle it around the cutting. Then, cover the pot with a clear plastic bag, securing it around the rim with a rubber band, or place the pot inside a propagator. This keeps the humidity high, which is crucial while the cuttings are trying to root.
- Find a Spot: Place your pots in a bright location but out of direct sunlight. A greenhouse or a sunny windowsill works well.
The “Secret Sauce” (Pro Tips)
Here are a few things I’ve learned over the years that make a real difference:
- Don’t Let Leaves Touch Water (If Using Water Propagation): While I focus on soil cuttings for Daphne, if you were to try water propagation with other plants, always ensure the leaves are above the water line. Submerged leaves will rot and introduce disease.
- Bottom Heat is Your Friend: Daphne gnidium can be notoriously slow to root. Providing gentle bottom heat from a heat mat (aiming for around 70-75°F or 21-24°C) can tremendously speed up the process and increase your success rate. I find it’s worth the investment!
- Patience is Key: Don’t be tempted to pull them up too soon to check for roots. It can take 8-12 weeks, sometimes longer, for Daphne to establish a good root system. Resist the urge!
Aftercare & Troubleshooting
Once you see new leafy growth appearing from your cuttings, that’s a good sign roots are forming! You can gently test this by giving the cutting a very light tug; if there’s resistance, roots are likely there.
- Acclimatize: Once roots have formed, gradually acclimatize your new plants to normal humidity. Start by opening the plastic bag or propagator for a few hours each day, slowly increasing the time over a week or two.
- Watering: Keep the soil consistently moist but not soggy. Overwatering is the quickest way to invite rotting, which is the most common sign of failure. If your cuttings turn mushy and black at the base, that’s rot. Always ensure good drainage.
A Encouraging Closing
Growing Daphne gnidium from cuttings is a journey, not a sprint. Be patient with your little ones, and don’t be discouraged if some don’t make it. Each attempt teaches you something new. Enjoy the process, celebrate each new leaf, and soon you’ll have the satisfaction of nurturing these lovely plants from scratch. Happy gardening!
Resource:
https://identify.plantnet.org/k-world-flora/species/Daphne%20gnidium%20L./data