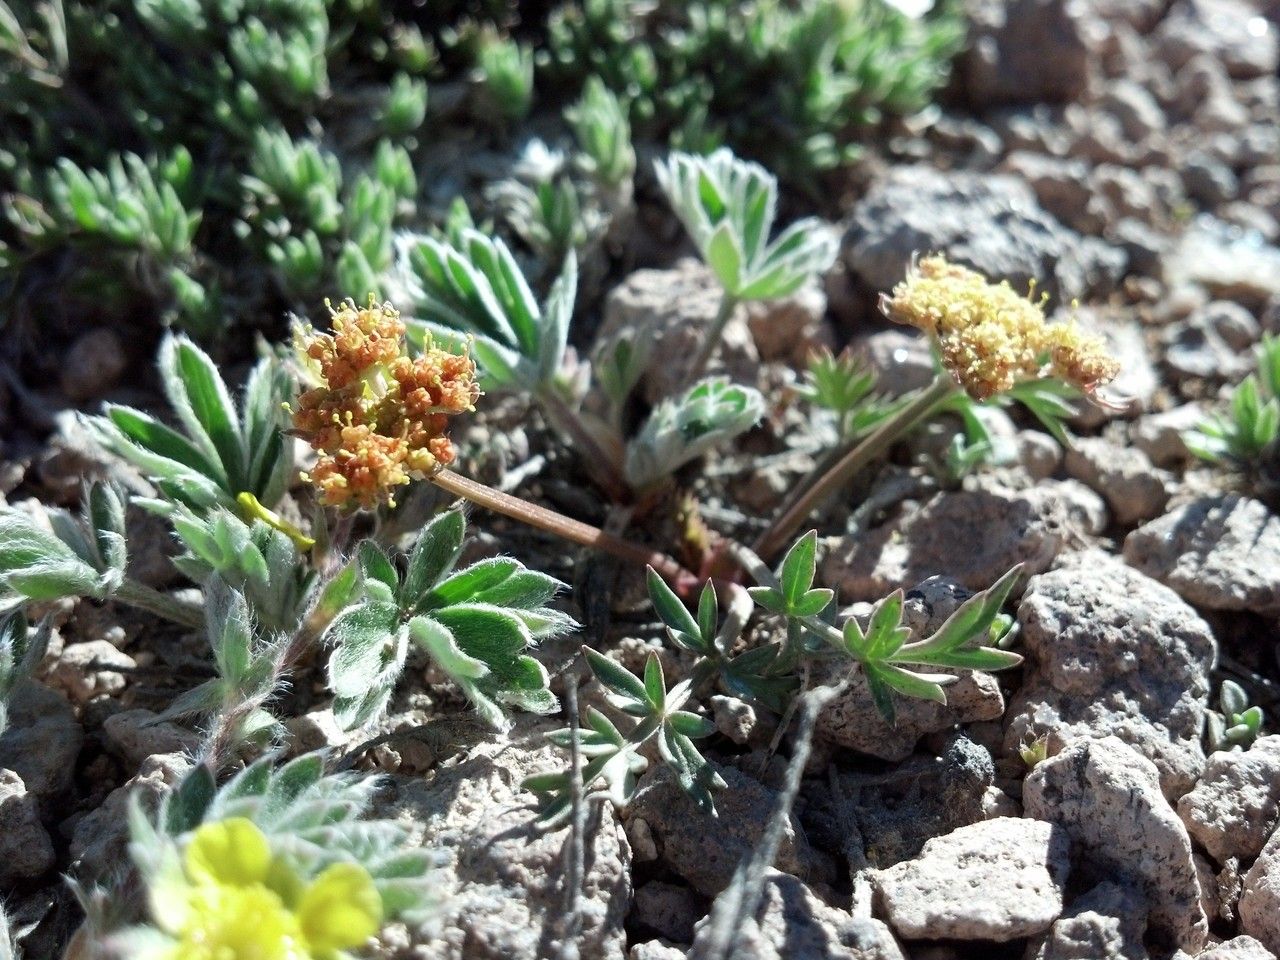
Hello fellow plant lovers! Today, we’re diving into the wonderful world of Cymopterus alpinus, often called the Alpine Rushfoil. Isn’t it a beauty? With its delicate, feathery foliage and charming, understated blooms, it brings a touch of wild elegance to any garden. And the best part? You can easily multiply this gem yourself! I’ve found that propagating Cymopterus alpinus is a truly rewarding experience, though I’ll be honest, it can be a tad finicky for absolute beginners. But don’t you worry, we’ll navigate it together, and soon you’ll have a whole patch of these lovely plants!
The Best Time to Start
My favorite time to get started with Cymopterus alpinus is in late spring to early summer. The plant is usually waking up from its dormancy and has plenty of healthy new growth to work with. This is when its energy levels are high, giving any baby plants the best chance to establish themselves before the heat of summer or the chill of autumn sets in.
Supplies You’ll Need
Gathering your supplies beforehand makes the whole process smooth sailing. Here’s what I always have on hand:
- Sharp, clean pruning shears or a sharp knife: For making clean cuts.
- Well-draining potting mix: I love a mix of equal parts peat moss or coco coir, perlite, and coarse sand. This is crucial for preventing soggy roots.
- Small pots or trays: With drainage holes, of course!
- Rooting hormone (optional but recommended for best results): A powder or liquid form works well.
- Watering can with a fine rose attachment: To water gently without disturbing young roots.
- A small trowel or dibber: For making planting holes.
- Clear plastic bags or a propagator lid: To create a humid environment.
Propagation Methods
Cymopterus alpinus is best propagated through division or seed sowing. While you can try stem cuttings, I’ve found the success rate to be much lower compared to these two methods. Let’s focus on what works beautifully!
Division
This is my go-to method for healthy, mature Cymopterus alpinus plants.
- Gently unpot your plant. Be careful with its root system.
- Inspect the root ball. You’re looking for natural divisions, where the plant has started to form separate crowns.
- Carefully tease apart the divisions. If they’re a little stubborn, use a clean knife or your fingers to gently separate them. Try to ensure each division has at least a few roots and some healthy foliage.
- Pot up the divisions individually. Use your well-draining potting mix. Make a small hole with your trowel or dibber and place the division gently, ensuring the roots are spread out.
- Water gently. Water until you see it drain from the bottom of the pot.
- Place in a semi-shady spot. Keep them out of direct, harsh sunlight for the first few weeks.
Seed Sowing
If you’re patient, starting from seed is a rewarding way to get many plants!
- Collect seeds when they are ripe. This is usually in late summer or early fall. The seed pods will turn brown and dry.
- Sow them immediately or store them in a cool, dry place. For best germination, I like to sow them in fall.
- Fill shallow trays or pots with your well-draining mix.
- Sow the seeds thinly on the surface. Don’t bury them too deeply; just a light dusting of fine grit or mix is enough.
- Water gently.
- Stratification (important!): For Cymopterus alpinus, mimicking winter conditions often helps germination. I recommend cold stratification. Place the sown trays in a cool spot (around 35-40°F or 2-4°C) for 6-8 weeks. This could be an unheated greenhouse, a cold frame, or even a protected spot outdoors.
- Bring indoors once signs of germination appear. This usually happens in spring.
The “Secret Sauce” (Pro Tips)
Here are a few tricks I’ve learned over the years that make a real difference:
- Don’t overwater the divisions! This is the absolute number one killer. They need consistent moisture, but never soggy feet. Let the top inch of soil dry out slightly before watering again.
- A light misting can help. Once your divisions or seedlings are potted, I like to cover them loosely with a clear plastic bag or lay a propagator lid over them. This creates a humid microclimate that encourages root development. Make sure to “air it out” daily for a few minutes to prevent fungal issues.
- Patience is your best friend with seeds. Alpine plants can be slow to germinate. Sometimes, they need that cold period to really get going. Don’t give up if nothing happens immediately after sowing!
Aftercare & Troubleshooting
Once your new Cymopterus alpinus plants have started to show signs of new growth and you can see they are producing roots (you might see them peeking out the drainage holes), it’s time to transition them to their individual pots if they aren’t already.
Continue to water regularly but avoid waterlogging. As they grow stronger, you can gradually introduce them to brighter light.
The most common issue you’ll encounter is rot. This is almost always due to overwatering and poor drainage. If you see yellowing leaves that turn mushy, or a general wilting that doesn’t respond to watering, it’s a sign of rot. Sadly, there’s not much you can do once it sets in, but this is why our well-draining mix and careful watering are so important!
A Big, Green Hug!
And there you have it! Propagating Cymopterus alpinus is a journey that teaches you patience and rewards you with beautiful new plants to share or enjoy. Don’t be discouraged if your first attempt isn’t perfect. Every gardener has had their share of wilting leaves or slow starters! Just keep trying, observe your plants, and you’ll soon be a pro. Happy propagating!
Resource:
https://identify.plantnet.org/k-world-flora/species/Cymopterus%20alpinus%20A.Gray/data