Oh, hello there! Grab your favorite mug, let’s chat about one of my garden joys: Cotoneaster alaunicus. I’ve been tinkering with this one for years, and I’m so excited to share how you can bring more of its beauty into your own space.
Why Grow and Propagate Cotoneaster Alaunicus?
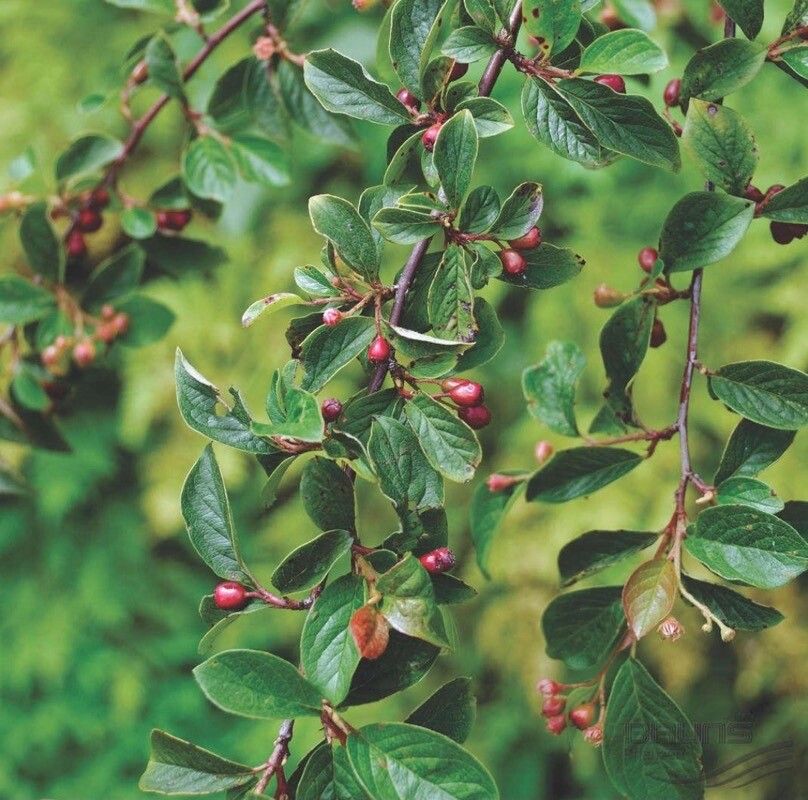
This little shrub is a true gem. I love its glossy, dark green leaves that look so lush in summer, and then, oh the berries! In fall and winter, it’s adorned with these vibrant, ruby-red berries that are not only stunning to look at but also a vital food source for our feathered friends. Propagating it means you can easily expand your collection, share with friends, or even create a beautiful living hedge. And the best part? It’s wonderfully rewarding for beginners. Don’t be intimidated; this is a plant that’s generally quite forgiving.
The Best Time to Start
For the highest success rate, I always recommend taking cuttings in late spring to early summer. This is when the plant is actively growing, and the new shoots are semi-hardwood – not too soft and floppy, and not fully ligneous and tough. This stage is perfect for rooting.
Supplies You’ll Need
Here’s a little toolkit to get you started:
- Sharp pruning shears or a clean knife: For making clean cuts.
- Rooting hormone (powder or gel): This isn’t strictly essential for Cotoneaster, but it certainly gives your cuttings a helpful boost.
- Potting mix: A good quality, well-draining seedling or cutting mix is ideal. You can also make your own by mixing equal parts peat moss (or coco coir) and perlite.
- Small pots or seed trays: Clean, with drainage holes!
- Plastic bags or a propagator: To create a humid environment.
- Watering can or spray bottle: For gentle watering.
- Labels: To remember what you’ve planted and when.
Propagation Methods: Let’s Get Our Hands Dirty!
The most straightforward way to propagate Cotoneaster alaunicus is through stem cuttings. It’s tried and true!
- Select Your Cuttings: Look for strong, healthy, current-year growth. Snip pieces that are about 4-6 inches long. With your secateurs, make a clean cut just below a leaf node (where a leaf meets the stem).
- Prepare the Cuttings: Gently remove the lower leaves from the cutting, leaving only the top couple of leaves to help the plant conserve energy. If you’re using rooting hormone, dip the cut end into the powder or gel following the product’s instructions.
- Planting Time: Fill your pots or trays with your prepared potting mix. Moisten the mix so it’s damp but not waterlogged. Make a small hole in the center of the soil with your finger or a pencil.
- Insert the Cuttings: Place the cut end of each cutting into the hole. Gently firm the soil around the stem to ensure good contact.
- Create Humidity: Water gently. Then, place the pots inside a clear plastic bag or a propagator. Seal it up to trap moisture. The leaves should ideally not touch the sides of the bag – if they do, you might need to prop it up a bit.
- Find a Good Spot: Place your cuttings in a bright location but out of direct sunlight. A greenhouse, a bright windowsill, or even a sheltered spot outdoors can work, as long as it’s protected from harsh sun and wind.
The “Secret Sauce” (Pro Tips)
Here are a few little tricks I’ve picked up over the years that often make a difference:
- Bottom Heat is Your Friend: If you have a heat mat, placing your cuttings on it can significantly speed up root development. It mimics the warmth of spring soil and encourages those roots to form faster. Just keep the surface temperature around 70-75°F (21-24°C).
- Don’t Overwater: This is crucial! While we need humidity, soggy soil is the death knell for cuttings. Check the soil moisture regularly and only water when the top inch feels dry. Good drainage is paramount.
- A Light Mist Can Help: In addition to the humidity inside the bag, you can lightly mist the leaves of your cuttings every few days. This helps keep them turgid while they are trying to establish roots.
Aftercare & Troubleshooting
Once roots have formed (this can take anywhere from 4-8 weeks, sometimes a bit longer), you’ll see new growth appearing. You’ll know for sure when you gently tug on a cutting and feel resistance.
- Acclimatize Gradually: Once rooted, slowly remove the plastic bag or open the propagator a little each day before removing it completely. This helps your new plants get used to normal humidity levels.
- Potting Up: Once your plants have a good root system, you can carefully pot them up into individual, larger pots with a good quality potting soil.
- Watch for Rot: The biggest enemy of cuttings is fungal rot. If you notice stems turning mushy and black, or leaves wilting dramatically and looking waterlogged, it’s likely rot. This usually stems from overwatering and poor air circulation. If you see it, try to remove the affected cutting immediately and give the others more air and a less soggy environment.
Keep Growing!
Propagating plants is such a rewarding endeavor. It’s a chance to connect with nature, multiply the beauty in your garden, and even share the joy with others. Be patient with your Cotoneaster alaunicus cuttings – they’ll get there! Enjoy the process, and soon you’ll have a whole new bush filled with those delightful red berries. Happy gardening!
Resource:
https://identify.plantnet.org/k-world-flora/species/Cotoneaster%20alaunicus%20Golitsin/data