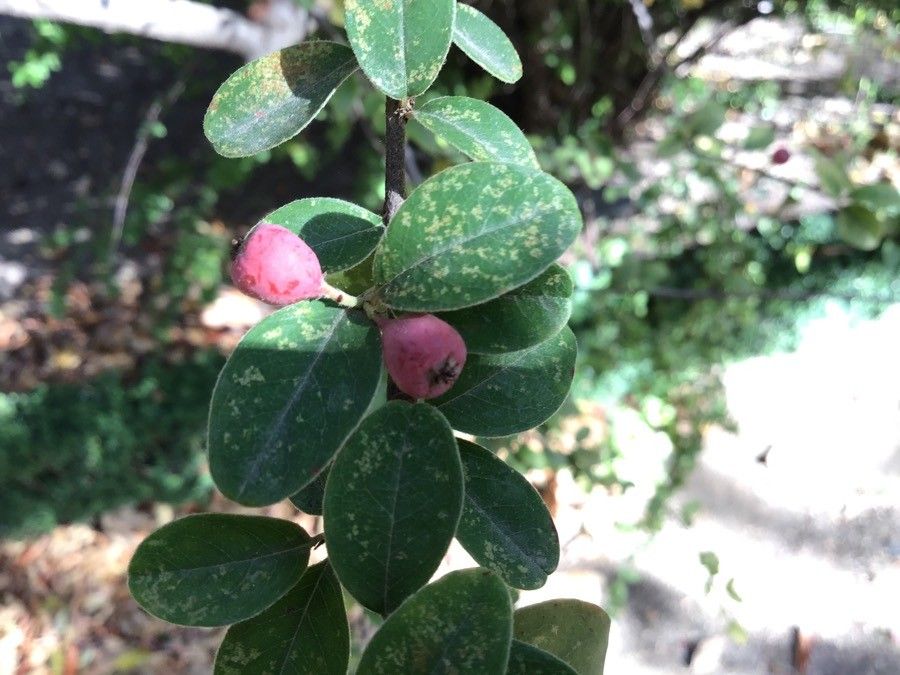
Hello, fellow plant lovers! I’m so glad you’ve stumbled upon this little corner of the garden today. We’re going to chat about a plant that has brought me so much joy over the years: Cotoneaster affinis. You know, those gorgeous shrubs with their lovely sprays of white flowers in spring, followed by those absolutely stunning, jewel-like berries in the fall. They’re like nature’s little treasures, adding color and structure to the garden when so many other things are starting to fade.
Now, if you’re like me, you probably look at them and think, “Wow, I’d love more of those!” And the good news is, propagating them is a really rewarding endeavor. It’s not the easiest plant for a complete beginner, but with a little patience and the right approach, you’ll find yourself with a whole new family of cotoneasters in no time.
The Best Time to Start
When it comes to getting the most success for your buck, late spring to early summer is your sweet spot. This is when the plant is actively growing, and you can take cuttings from what we call “semi-hardwood.” Think of it as wood that’s no longer brand new and floppy, but not yet tough and woody. It has a bit of flexibility but is firm enough to hold its shape. This stage offers the perfect balance for rooting.
Supplies You’ll Need
Gathering your supplies beforehand makes the whole process so much smoother. Here’s what I always have on hand:
- Sharp, clean pruning shears or secateurs: For making clean cuts. Dirty tools can introduce diseases.
- Rooting hormone: This isn’t strictly mandatory, but it really gives your cuttings a boost. I prefer a powder or gel.
- A good potting mix: A blend of equal parts peat-free compost, perlite, and coarse sand works wonders. It needs to be well-draining to prevent rot.
- Small pots or seed trays: Clean ones, of course! Those little 3- or 4-inch pots are perfect.
- A clear plastic bag or propagator: To create a humid environment around your cuttings.
- A sharp knife or razor blade: For preparing the cuttings.
- Labels and a marker: You’ll thank yourself later for knowing what’s what!
Propagation Methods
For Cotoneaster affinis, my go-to method is stem cuttings, and here’s how I do it:
- Take Your Cuttings: On a pleasant morning, head out to your Cotoneaster affinis. Look for healthy, vigorous stems that are about pencil thickness. Using your clean secateurs, take cuttings that are 4-6 inches long. Try to get them from just below a leaf node (where a leaf grows from the stem).
- Prepare the Cuttings: Once you have your cuttings, it’s time to prep them. Remove any lower leaves, as these will likely rot if they’re buried in the soil or touch the water (if you were to do water propagation, which I find less successful for cotoneaster). If the leaves at the top are very large, you can even snip them in half, as this reduces water loss through transpiration.
- Apply Rooting Hormone: Dip the cut end of each
stem into your rooting hormone, tapping off any excess. This is your signal to the plant that it’s time to get growing roots! - Plant Your Cuttings: Fill your pots with your prepared, well-draining potting mix. Make a hole in the center with a pencil or your finger. Gently insert the bottom 1-2 inches of your cutting into the hole. You want enough of the stem in the soil to encourage rooting. Firm the soil gently around the base of the cutting.
- Water and Cover: Water the pot thoroughly but gently, allowing excess water to drain away. Now, cover the pot with a clear plastic bag or place it inside a propagator. You can use a couple of bamboo canes to keep the bag from touching the leaves. This creates a mini greenhouse effect, keeping humidity high.
The “Secret Sauce” (Pro Tips)
Here are a few tricks I’ve learned over the years that make a big difference:
- Bottom Heat is Your Friend: If you have the space and inclination, placing your pots on a heated propagator mat can absolutely speed up the rooting process. The gentle warmth stimulates root development from below.
- Don’t Overcrowd: Give your cuttings a little breathing room in their pots. Cramming too many into one small space can lead to increased competition for resources and can make them more susceptible to rot.
- Consider a Dip in Willow Water (Optional): Before using rooting hormone, some gardeners swear by soaking their cuttings in a homemade willow water solution (made by steeping young willow twigs in water). Willow contains natural rooting hormones, and while I use commercial hormones, it’s a lovely natural method to consider.
Aftercare & Troubleshooting
Once your cuttings are potted, place them in a bright spot, but out of direct, harsh sunlight. Too much sun will scorch those delicate young leaves and the stem. Keep the soil consistently moist but not waterlogged. This is crucial.
You’ll know your cuttings are taking root when you see new leaf growth. This can take anywhere from 4 to 8 weeks, sometimes longer, so patience is key! Once you see good signs of growth, you can start to gradually acclimate them to more open air by opening the plastic bag a little more each day.
The most common issue you’ll encounter is rot. If a cutting turns black and mushy, it’s usually a sign of too much moisture and not enough airflow. Unfortunately, there’s usually no coming back from that. Make sure your soil mix is spot-on for drainage, and don’t let those leaves sit in standing water.
A Encouraging Closing
And there you have it! Propagating Cotoneaster affinis is a wonderful way to extend the beauty of these plants in your garden. Don’t be discouraged if not every cutting takes – it’s all part of the learning process. Just enjoy the journey of nurturing these tiny new lives. Happy gardening!
Resource:
https://identify.plantnet.org/k-world-flora/species/Cotoneaster%20affinis%20Lindl./data