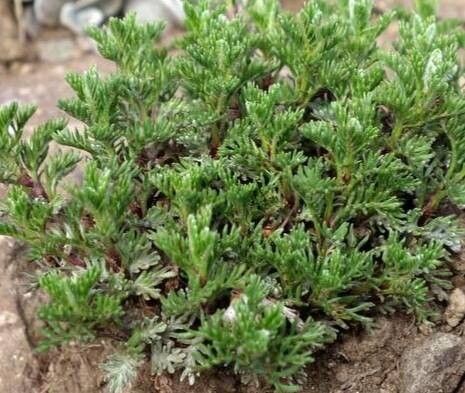
Hello fellow plant lovers! I’m so excited to chat with you today about a delightful plant that’s been a joy to grow and propagate: Cota altissima. You might know it by its common name, like “Tall Chamomile” or “Giant Chamomile,” and it’s absolutely beautiful in the garden with its frothy, daisy-like blooms that dance in the breeze. Plus, it smells divine! If you’ve admired these cheerful flowers and thought about spreading the love, you’re in luck. Propagating Cota altissima is a wonderfully rewarding experience, and I’m happy to report that it’s quite beginner-friendly. You’ll be surprised at how easy it is to create new plants to fill your garden beds or share with friends.
The Best Time to Start
For the happiest results, I always aim to propagate Cota altissima in late spring or early summer. This is when the plant is actively growing and has plenty of energy to put into producing new roots. You’re looking for stems that are sturdy but not yet woody. Think of it as taking cuttings from a plant that’s just hitting its stride, full of life and ready to branch out.
Supplies You’ll Need
Gathering your supplies beforehand makes the whole process much smoother. Here’s what I like to have on hand:
- Sharp Pruning Shears or a Craft Knife: For making clean cuts.
- Rooting Hormone (Optional but Recommended): Especially a powder formulation. It gives young cuttings that extra boost.
- A Well-Draining Potting Mix: A good blend of potting soil, perlite, and a bit of coarse sand works wonders. You want it to be light and airy.
- Small Pots or Seedling Trays: Clean ones, of course!
- Clear Plastic Bags or a Small Greenhouse: To create a humid environment.
- Watering Can or Spray Bottle: For gentle watering.
- Labels and a Marker: To keep track of what you’ve planted.
Propagation Methods
Cota altissima is quite obliging and can be propagated reliably through stem cuttings. Here’s how I do it:
- Select Your Cuttings: Find healthy, non-flowering stems on your established plant. Aim for pieces that are about 4-6 inches long. Make a clean cut just below a leaf node (where a leaf attaches to the stem). This is where roots are most likely to form.
- Prepare the Cuttings: Gently remove the lower leaves from each cutting, leaving just a few at the top. This prevents rotting when they’re in the soil. If you’re using rooting hormone, dip the cut end into it, tapping off any excess.
- Plant Your Cuttings: Fill your small pots with your prepared potting mix. Make a small hole with your finger or a pencil, then gently insert the cutting into the hole, firming the soil around it. I usually put 3-4 cuttings per pot, giving them a little space.
- Water Gently: Water the soil thoroughly but gently. A spray bottle is great for this initial watering to avoid dislodging the cuttings.
- Create a Humid Environment: This is crucial! Cover the pots with a clear plastic bag (supported by stakes so it doesn’t touch the leaves) or place them in a small greenhouse. This traps moisture and creates the humid microclimate that encourages rooting.
The “Secret Sauce” (Pro Tips)
You know, after years of gardening, you pick up a few little tricks that seem to make all the difference. Here are a couple that work like a charm for Cota altissima:
- Don’t let the leaves touch the soil: Once you’ve removed the lower leaves, ensure that any remaining leaves are well above the soil line. If they sit in damp soil, they’re far more likely to rot and take your cutting down with them.
- Bottom heat can be your best friend: If you have a seedling heat mat, placing your pots on top of it can speed up root development significantly. It’s like giving your cuttings a cozy, warm little foot bath that encourages them to send down roots faster.
Aftercare & Troubleshooting
Once your cuttings are planted, keep them in a bright location, but out of direct, scorching sunlight. The goal is consistent moisture – the soil should feel damp, not waterlogged. Mist them occasionally if they look a bit dry, especially if you have the plastic cover on.
You’ll know your cuttings are rooting when you see new growth appearing at the top. This usually takes about 4-6 weeks. Gently tugging on a cutting will also offer resistance if roots have formed.
If you notice your cuttings looking limp, yellowing, or developing black spots that spread, it’s often a sign of too much moisture and not enough air circulation, leading to rot. Don’t despair! Remove the affected cuttings, check your watering habits, and ensure there’s adequate drainage. Sometimes, a cutting just doesn’t make it, and that’s okay. It’s all part of the learning curve!
A Encouraging Closing
And there you have it! Propagating Cota altissima is a simple yet incredibly rewarding way to multiply your garden’s beauty. Be patient with your little cuttings; they’re doing their best to grow into magnificent new plants. Enjoy the process, celebrate each bit of new growth, and get ready to fill your garden with those cheerful, fragrant blooms! Happy planting!
Resource:
https://identify.plantnet.org/k-world-flora/species/Cota%20altissima%20(L.)%20J.Gay/data