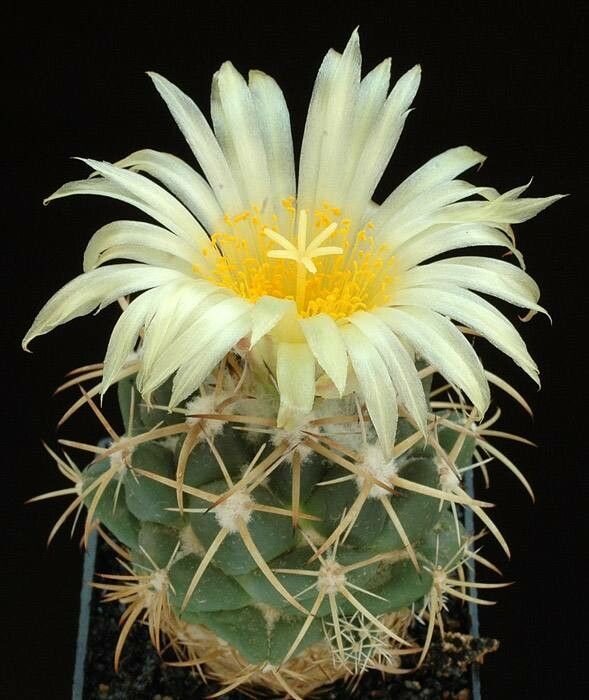
Hey there, fellow plant enthusiasts! I’m so excited to chat with you today about a truly special cactus: Coryphantha retusa. If you haven’t met this beauty yet, imagine a cactus that’s not just prickly, but utterly charming. Its tuberculate body, with those neat, tufted areoles, has a wonderfully appealing texture. And when it blooms? Oh, the most delightful flowers! Propagating your own Coryphantha retusa is a truly rewarding experience. It’s a little like sharing a piece of your garden’s magic with yourself all over again. Now, for beginners, I’d say this one is moderately easy. It’s not as fussy as some delicate succulents, but it does appreciate a bit of attentive care.
The Best Time to Start
When it comes to getting the best bang for your propagation buck, spring and early summer are your golden ticket. This is when your Coryphantha retusa is actively growing and has plenty of energy to put into developing new roots. Starting during its active growth phase means you’re working with the plant, not against it.
Supplies You’ll Need
Before we get our hands dirty, let’s gather our toolkit. You won’t need too much, but having the right bits and pieces makes all the difference.
- Well-draining potting mix: I like a blend of regular cactus soil with some added perlite or pumice for extra airiness. Think grit!
- Sharp, clean pruning shears or a knife: Sterilize them with rubbing alcohol before you start. This is crucial to prevent disease.
- Rooting hormone (optional but helpful): A little dash of this can really give your cuttings a boost.
- Small pots or trays: Terracotta pots are my personal favorite as they allow the soil to breathe.
- Gravel or small stones: For drainage at the bottom of your pots.
- Spray bottle: For gentle misting.
- Gloves: To protect your hands from those spines.
Propagation Methods
Coryphantha retusa is a gem when it comes to propagation, and I find division to be the most reliable method for this particular cactus.
Division: The Star Player
This cactus often produces offsets, or “pups,” around its base. This is where the magic happens!
- Gently remove your main plant from its pot. Be patient; sometimes a little wiggling helps.
- Examine the base of the plant. You’ll likely see smaller plantlets attached.
- Using your sterilized knife or pruning shears, carefully cut away an offset. Make sure the offset has at least a small root system attached. If it doesn’t, don’t worry too much; it can still root with a bit of time and care.
- Allow the cut end to calluse. This is a super important step! Place the offset in a dry, shaded spot for a few days to a week until the cut surface forms a dry skin. This prevents rot.
- Plant the callused offset. Fill a small pot with your well-draining soil mix, potentially adding a sprinkle of rooting hormone to the callused end. Gently firm the offset into the soil. Ensure it stands upright on its own.
- Water sparingly. Wait a few days after planting before giving it its first light watering. You want the soil to be barely moist.
The “Secret Sauce” (Pro Tips)
Here are a few little tricks I’ve picked up over the years that can really make a difference:
- Give it a warm welcome: After planting your divisions, place them in a warm spot but out of direct, harsh sunlight. A little bottom heat, like a heat mat designed for seedlings, can really encourage root development.
- Patience is a virtue, especially with cacti: Don’t be tempted to tug on your new plants to see if they have roots. Leave them be! It can take weeks, sometimes even a couple of months, for them to establish themselves. Trust the process.
- The air is your friend: When you’re propagating cacti, good air circulation is key. Make sure the area where you have your new plants is well-ventilated. This helps to dry out any excess moisture and discourages fungal issues.
Aftercare & Troubleshooting
Once your Coryphantha retusa divisions have settled in, continue to care for them like you would a mature plant, with a bit more gentleness.
- Watering: Let the soil dry out completely between waterings. In general, less is more with cacti.
- Light: Bright, indirect light is best for new propagations. As they get established, you can gradually introduce them to more direct sun, especially if that’s where your mature plants thrive.
- Signs of trouble: The biggest culprit here is rot. If you see your cactus becoming mushy, discolored (often turning brown or black and soft), or smelling off, it’s likely rot. This usually happens from overwatering or failure to callus properly. Unfortunately, once rot sets in, it’s very difficult to save the plant. If you catch it very early, you might be able to cut away the affected parts and let the healthy section callus again, but it’s often a losing battle.
A Little Encouragement
Growing plants is such a joy, and there’s a special satisfaction in nurturing a new life from a piece of your existing plant. Remember, every gardener has had their share of propagations that didn’t quite make it. Don’t get discouraged by a few setbacks. Keep trying, observe your plants, and enjoy the journey of watching them grow. You’ve got this!
Resource: