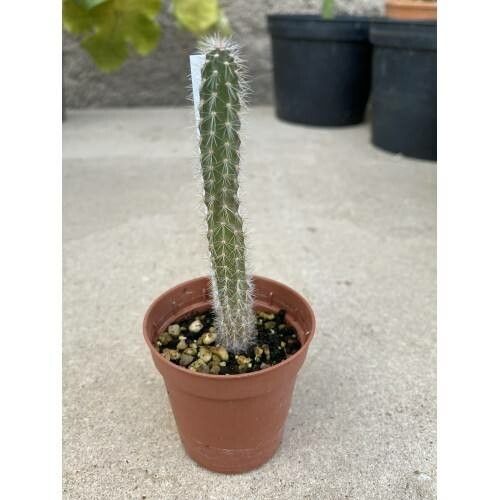
Hello, fellow plant lovers! I’m so excited to chat with you today about a particularly charming cactus: Corryocactus squarrosus. It’s a real stunner, with its distinctive, almost architectural form and those delightful spiky arms. There’s something incredibly satisfying about watching a tiny piece of a plant transform into a whole new specimen. And the good news? Propagating Corryocactus squarrosus is a genuinely rewarding experience, and while it might sound a bit daunting, I think even beginners can achieve great success with a little guidance.
The Best Time to Start
For most cacti, including our friend Corryocactus squarrosus, the perfect time to get propagating is during their active growing season. This typically runs from late spring through summer. You want to catch them when they’re full of energy and ready to put on some growth. Starting a cutting or division when the plant is dormant is like asking someone to run a marathon on an empty stomach – it’s just not going to go as well! Look for a healthy, established plant to take your cuttings from.
Supplies You’ll Need
Gathering your tools beforehand makes the whole process smoother. Here’s what I recommend:
- Sharp Pruning Shears or a Clean Knife: For making clean cuts. Sterilize them with rubbing alcohol before and after use.
- Propagating Medium: A well-draining cactus or succulent mix is non-negotiable. You can also create your own by mixing equal parts perlite and coarse sand with potting soil.
- Rooting Hormone (Optional but Recommended): This little helper can significantly boost your success rate, especially for trickier cuttings. Look for one specifically for succulents or cacti.
- Small Pots or Trays: Clean, with drainage holes. Terra cotta pots are fantastic for cacti as they allow the soil to dry out effectively.
- Gloves: Cacti can be prickly!
- Watering Can or Spray Bottle: For gentle watering.
Propagation Methods
Corryocactus squarrosus is usually propagated from stem cuttings. It’s straightforward and gives you a great chance of success.
Stem Cuttings
- Select a Healthy Stem: Choose a vigorous, mature stem that looks plump and healthy. Avoid any that appear wilted, discolored, or show signs of pests.
- Make the Cut: Using your sterilized shears or knife, make a clean cut at a point where the stem meets the main body or a healthy branch. Aim for a cutting that is at least 3-4 inches long.
- Let it Callus: This is arguably the most crucial step for cacti. Place your cutting in a dry, well-ventilated spot away from direct sunlight for at least a week, or even two. You’ll see the cut end dry and form a firm, leathery callus. This prevents rot when you plant it. Don’t rush this part!
- Apply Rooting Hormone (Optional): Once the callus has formed, you can dip the cut end into your rooting hormone. Tap off any excess.
- Plant Your Cutting: Fill your small pot with your prepared cactus mix. Make a small hole in the center and insert the callused end of your cutting, pushing it down about an inch or so. Gently firm the soil around it.
- Wait for Roots: Resist the urge to water immediately! Wait another few days to a week before giving it its first light watering. You’re looking for signs of new growth, a subtle firmness to the cutting, or even a gentle tug from the roots. This can take several weeks, so patience is key.
The “Secret Sauce” (Pro Tips)
Here are a few things I’ve learned over the years that really make a difference:
- Don’t Overwater Early On: I can’t stress this enough. New cuttings are very susceptible to rot. It’s much easier to revive a thirsty cactus than a waterlogged one. Mist the surface lightly every week or so until you see signs of rooting.
- Bottom Heat is Your Friend: If you have a seedling mat or a safe, warm spot (around 70-80°F or 21-27°C), using bottom heat can significantly speed up the rooting process for your cuttings. It mimics the warmth of the soil when plants are naturally propagating.
- Observe, Don’t Prod: While it’s tempting to dig around and check for roots, it’s best to leave your cutting undisturbed. Look for visual cues like slight swelling at the base or new growth from the tip.
Aftercare & Troubleshooting
Once you see evidence of roots (your cutting might feel a little more stable, or you might even see a tiny root peeking out the drainage hole!), you can start watering a bit more regularly, but still, let the soil dry out completely between waterings. Place your new Corryocactus squarrosus in bright, indirect light initially, and gradually introduce it to more sunlight as it establishes.
The most common enemy here is rot. If your cutting turns mushy or black at the base, it’s likely succumbed to rot. Unfortunately, once rot sets in, it’s very difficult to save. If you suspect rot, remove the cutting from the soil immediately, cut away any affected parts with your sterile knife, let the healthy part callus again, and try planting it in fresh, dry soil. It’s also possible that your cutting just didn’t take. Don’t be discouraged! Sometimes, it’s just a matter of trying again.
A Gentle Encouragement
Growing new plants from cuttings is a beautiful journey. It connects you to the plant’s life cycle in a profound way. Be patient with your Corryocactus squarrosus babies. Some days will feel slow, but the reward of seeing your own little cactus thrive is truly immense. Enjoy the process, learn from each attempt, and happy growing!
Resource: